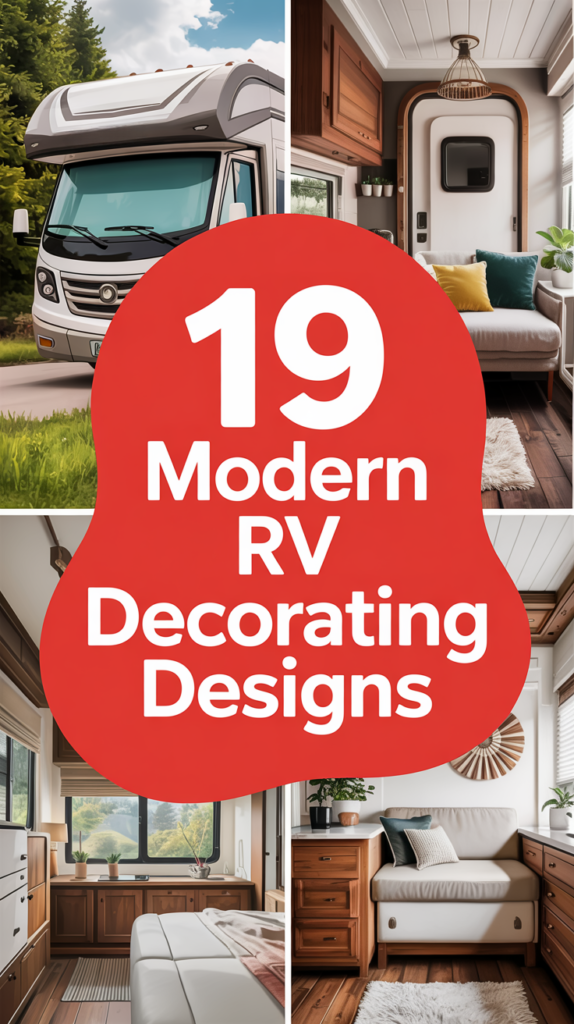
If your RV came with dated tan cabinets, hunter green upholstery, and that blue-grey laminate flooring someone in 2003 thought was a good idea, you’re not alone — and you don’t need a contractor’s license or a five-figure budget to fix it. The transformation from factory-issue to cozy farmhouse charm is more achievable than most people think.
The secret isn’t expensive materials or complicated techniques. It’s making smart choices that look incredible while standing up to life on the road, where everything shakes, shifts, and needs to earn its place in limited square footage. The 19 ideas ahead are exactly that kind of smart.
Start With a Neutral Base Palette of Warm Whites and Beiges
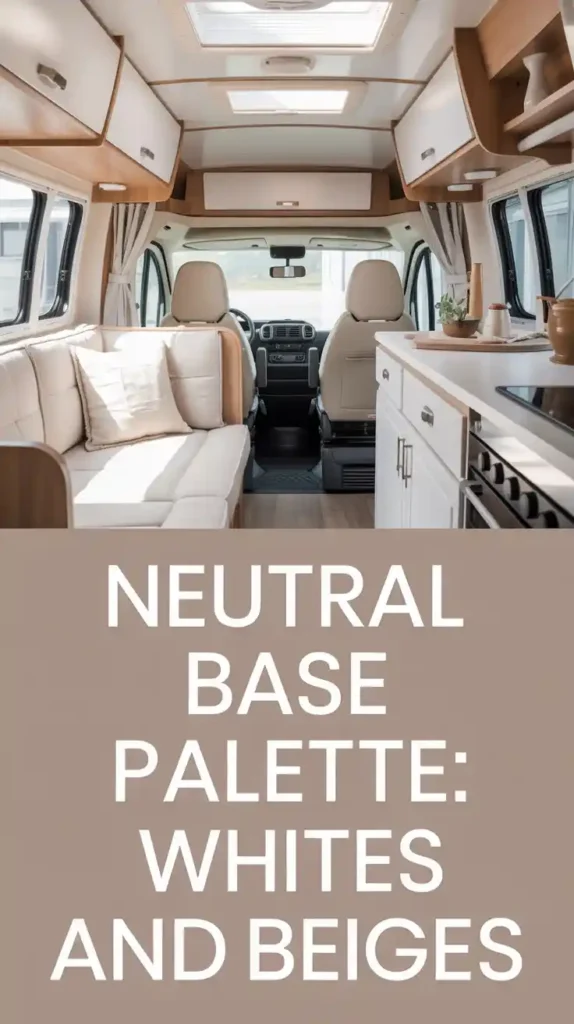
Your paint choice sets the tone for everything else, so get this part right, and the rest falls into place naturally. I always steer people toward warm whites like Benjamin Moore’s White Dove or Sherwin-Williams Alabaster because they bounce light around in ways that make your RV feel twice its actual size.
Cool whites and grays can make small spaces feel sterile and cold, but these warmer tones create that inviting atmosphere you’re after while giving you a clean canvas for layering in textures later. Just make sure you clean your surfaces with TSP or a good degreaser first, because RV walls collect road grime and cooking residue that’ll cause even the best paint to peel.
Install Shiplap Paneling on Walls or Ceilings
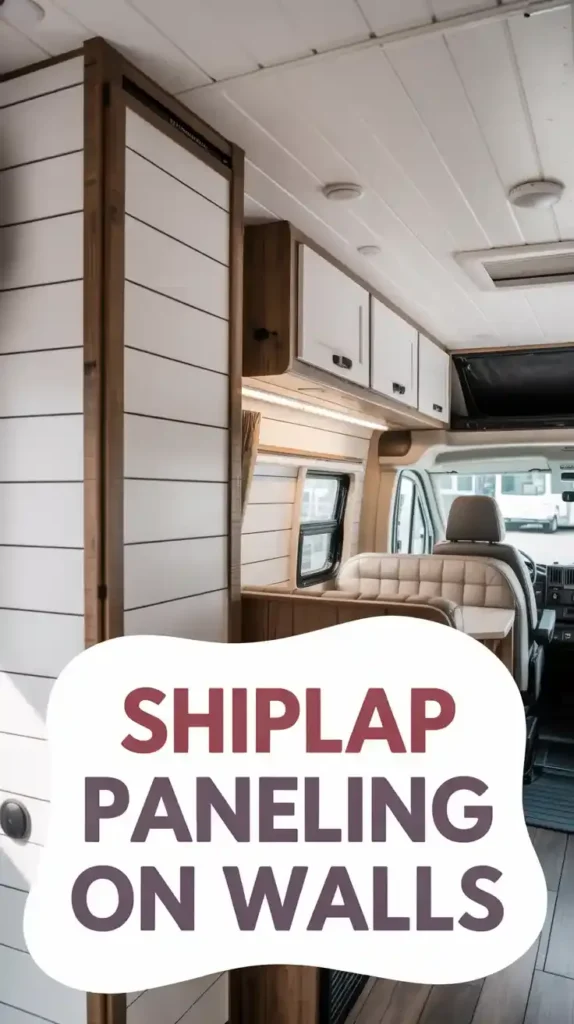
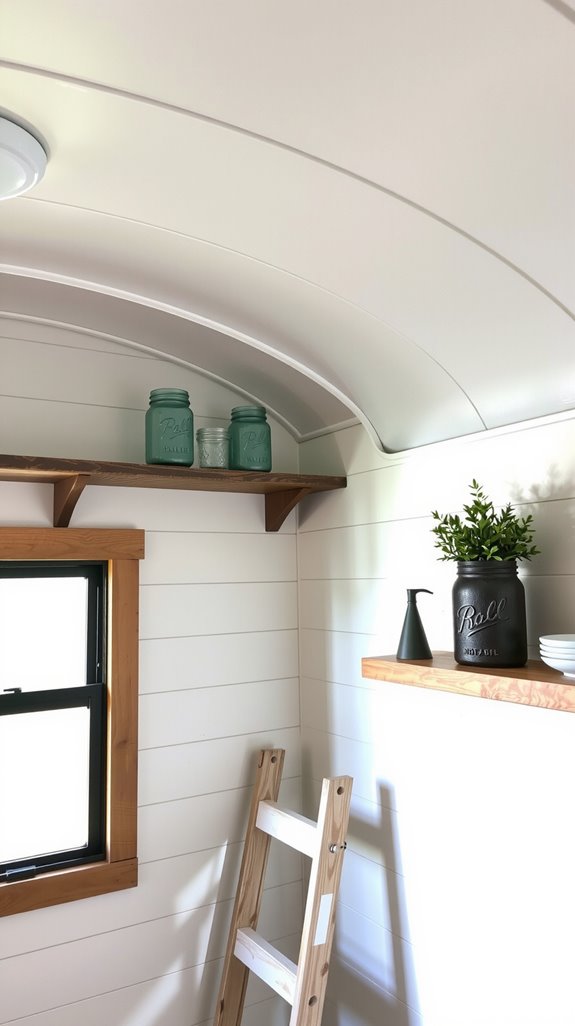
Nothing says modern farmhouse quite like shiplap, and it’s way easier to install in an RV than most people think. I typically use 1/4-inch Baltic birch plywood cut into consistent widths because it’s lightweight enough that you won’t stress your walls while still looking substantial and real.
Run your panels perpendicular to the wall studs, using construction adhesive as your primary hold and brad nails every 16 inches to keep everything tight while the glue sets. Leave tiny 1/32-inch gaps between boards so the wood has room to expand and contract as temperatures change, which they absolutely will when you’re parked in Arizona one week and Montana the next.
Add Faux Wood Beams for Rustic Architectural Interest
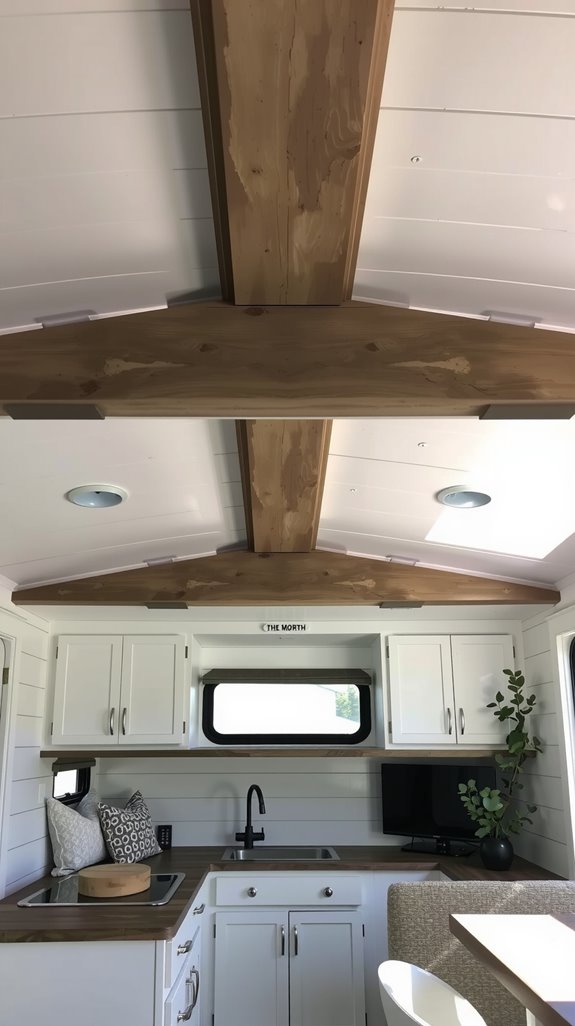
Real wood beams look amazing, but they’re heavy enough to affect your payload capacity and they’ll warp the first time humidity levels spike. Faux polyurethane beams solve both problems by giving you that reclaimed wood look without adding serious weight or maintenance headaches.
You’ll install them using mounting blocks screwed directly into your ceiling studs, typically spacing them about three feet apart along your RV’s length for the most natural appearance. They won’t crack, split, or attract insects like real wood, which matters when you’re sitting in a campground for weeks at a time in the humid South.
Choose Wood-Look Vinyl Plank Flooring for Durability
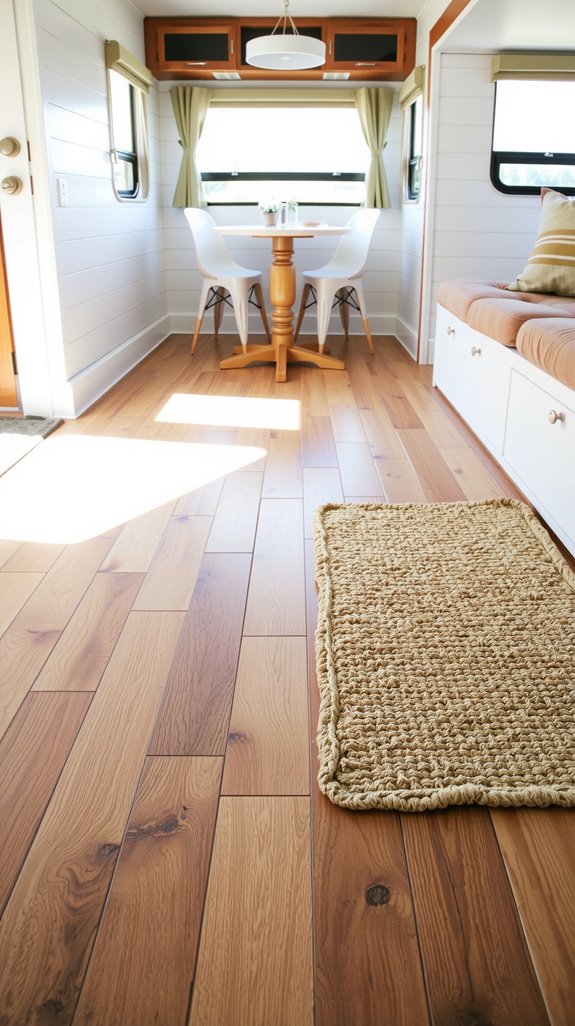
I love real hardwood as much as the next person, but it’s a terrible choice for RVs where weight matters and water happens. Luxury vinyl plank flooring has come so far that I’ve had people swear they’re standing on real oak until I tell them otherwise.
The embossed texture mimics natural grain patterns beautifully while the waterproof core protects you from the inevitable spills, tracked-in rain, and humidity that’s part of RV life. Installation is straightforward since most quality LVP uses a click-lock system that floats over your existing floor, and it weighs a fraction of what real hardwood would.
Incorporate Butcher Block Countertops and Surfaces
Butcher block brings warmth and character to RV kitchens in ways that laminate just can’t match, and it’s surprisingly affordable if you know where to look. Stick with edge-glued boards in the 1 to 1.25-inch thickness range so you get that substantial look without the weight penalty of thicker slabs.
Seal everything properly with polyurethane or a good water-based finish because moisture is the enemy of wood in RVs. Keep up with mineral oil treatments following what’s called the Rule of 7 (once a day for a week, once a week for a month, once a month for a year, then once a year) and your counters will develop a rich patina that only gets better with time.
Use Peel-and-Stick Wallpaper for Easy Accent Walls

Here’s where you can get bold without any real commitment or skill requirements. Peel-and-stick wallpaper has evolved beyond those flimsy contact paper rolls your grandmother used, and brands like NuWallpaper and Tempaper make stuff that actually looks legitimate.
I love using shiplap patterns or rustic wood grain designs on accent walls because they add texture and interest in minutes instead of the hours traditional paneling would take. The vinyl-based materials resist humidity better than regular wallpaper; they clean up easily when road dust settles on everything, and they peel off cleanly when you’re ready for a change or need to sell your RV.
Install Mason Jar Pendant Lights and Vintage Fixtures
Custom lighting separates amateur RV makeovers from ones that look professionally designed, and mason jar pendants hit that sweet spot of character and simplicity. You’re basically working with keyless light sockets, some corded wire, and LED bulbs that won’t drain your battery bank every time you turn them on.
Make sure you drill small vent holes in the jar lids because LED bulbs still generate some heat that needs somewhere to go. Secure everything with additional anchoring beyond just the electrical mounting because your fixtures need to handle road vibration without swinging around or coming loose at 65 mph down the interstate.
Built-in Storage Seating With Bench Seats
Dead space under seating is a wasted opportunity in an RV, so custom bench seats with storage compartments make practical sense while adding to your farmhouse aesthetic. Frame everything out with 2×2 pine and 3/4-inch plywood to keep the weight reasonable while maintaining strength.
Design your benches around 18 inches tall because that height works for both comfortable dining and converting to sleeping surfaces if you need the extra bed space. The hinged tops give you access to storage that can swallow camping gear, off-season clothes, or all those random items that never seem to have a proper home.
Add Reclaimed Wood Furniture and Custom Pieces
Actual reclaimed wood brings character that you simply can’t fake with new materials, and custom furniture lets you maximize odd spaces that standard RV furniture never quite fits. I’ve built everything from dinette tables to ceiling beams using barn wood, and the weathered texture and natural variations make each piece genuinely unique.
Just make sure whatever you use is properly sealed against moisture because RVs can get humid, especially if you’re boondocking without running your AC. Secure all furniture pieces with L-brackets or other anchoring systems so nothing becomes a projectile if you have to brake hard or take a turn faster than you intended.
Layer Natural Fiber Rugs for Texture and Comfort
Flooring choices are practical, but rugs are where comfort happens. Start with a durable base layer of jute or sisal that can handle foot traffic and the occasional muddy boot, then layer a softer wool or cotton rug on top for actual comfort underfoot.
This combination gives you visual depth while improving insulation (which helps with heating and cooling costs) and absorbing road noise that would otherwise echo off hard surfaces. Natural earth tones work perfectly with farmhouse design, and you can swap the top layer seasonally without spending much money or effort.
Use Woven Baskets for Decorative Storage Solutions
Baskets are the secret weapon for making clutter look intentional and organized. Seagrass, jute, and handwoven options in natural tones or whitewashed finishes hide everything from dirty laundry to pantry overflow while actually adding to your design instead of detracting from it.
Stack them under beds, mount them on walls with simple hooks, or tuck them into cabinet spaces where rigid containers would waste valuable inches. Their breathable construction keeps stored items from getting musty, and they’re light enough that you can rearrange your storage setup whenever your needs change.
Incorporate Barn Door-Inspired Furniture and Hardware
Barn door hardware solves space problems while adding instant farmhouse credibility to your RV interior. Traditional swing doors eat up floor space that’s already at a premium, but sliding barn doors need only the wall space they cover.
Use lightweight mini hardware kits rated for doors under 75 pounds, so you’re not overloading your RV walls. Wall-mounted floor guides keep doors tracking properly without requiring you to drill into your flooring, and matte black hardware stands out beautifully against light-colored doors or walls.
Maximize Natural Light With Layered Window Treatments
Light makes cramped spaces feel livable, but you still need privacy and temperature control without turning your windows into dark caves. I typically layer honeycomb cellular shades with simple linen curtains because the combination gives you flexibility for different situations and camping spots.
Top-down, bottom-up cellular shades let you pull light from above while keeping privacy at eye level, which works perfectly when you’re parked close to neighbors. Cordless options keep the look clean and modern while making them safer if you have kids, and inside-mounted treatments don’t stick out into your already-limited living space.
Create a Slide-Out or Fold-Down Kitchen Island
Counter space disappears fast when you’re actually cooking instead of just reheating, so adding temporary workspace changes how you use your kitchen. A slide-out island built from 15mm plywood with quality drawer runners can extend up to 1000mm when you need it and tuck away completely when you don’t.
Add fold-down extensions using simple hinges and support brackets for even more prep surface. This setup gives you the workspace of a larger RV without permanently expanding your footprint or making your kitchen feel cramped when you’re just walking through.
Display Galvanized Metal and Copper Accents
Metal accents bring in texture and reflect light in ways that soften an all-wood look. Galvanized pieces like corrugated shower surrounds or wall panels add authentic rustic texture while being practically indestructible and naturally rust-resistant.
Layer in copper elements through curtain rods, light fixtures, or even cabinet pulls to warm things up with those rich, reddish tones. The contrast between cool gray galvanized metal and warm copper creates visual interest that makes your space feel collected and intentional rather than matchy-matchy.
Add Overhead Storage Cubbies With Rustic Bins
Vertical space is your friend when you’re living in a rolling box, and overhead storage puts dead space to work. Build simple cubbies from lightweight plywood using 2×2 timber frames that attach to your wall studs or furring strips for solid support.
Fill them with woven wicker or distressed wood bins that you can pull down easily when you need access. Add whitewashed finishes or vintage-style pulls to match your farmhouse theme, and line everything with shelf liner or non-slip material so contents don’t shift around when you’re driving.
Use Warm-Toned LED Lighting With Dimmers
Lighting makes or breaks the atmosphere in small spaces, and nobody wants their RV feeling like a hospital waiting room. Warm-toned LEDs mimic the cozy glow of old incandescent bulbs while using a fraction of the power, which matters when you’re running off batteries.
Install PWM dimmers inline with your 12-volt system so you can dial brightness up for cooking and down for evening relaxation. Wireless switches let you control lights from anywhere without tearing into walls to run new switch wiring.
Layer Throw Blankets and Pillows in Natural Fabrics
This is where you make your RV feel like home instead of just a place you sleep. Natural fabrics like cotton, linen, and wool breathe better than synthetics, and they age beautifully instead of looking tired after a season.
Mix textures by pairing chunky knit throws with smooth woven blankets, and vary your pillow sizes from large euro shams down to small accent pillows. Drape blankets casually over seating areas so they look inviting instead of staged, and stick with neutral tones that you can refresh seasonally with different accent colors.
Incorporate Simple Greenery and Dried Florals
Plants and florals soften hard edges and bring life to your space, but real plants can be challenging when you’re moving around and dealing with varying light conditions. Faux eucalyptus stems, lavender bundles, and small succulents require zero maintenance while adding organic texture that balances all the wood and metal.
Display them in mason jars or small galvanized containers on open shelves where they add visual interest without taking up counter space. Dried wreaths mounted on cabinet doors maximize vertical surfaces and bring in seasonal touches without permanent commitment.