Twenty-five square feet sounds like a design death sentence, and honestly, most RV bathrooms look like one. The builder-grade finishes, the awkward corners, the plastic everything, it all compounds fast.
But I’ve spent enough nights in rigs of every size to know the problem isn’t the space itself.
Trying to decorate an RV bathroom the same way you’d decorate a house bathroom never lands. Every single thing in a small space carries more visual weight than you’d expect, so the goal isn’t to add more; it’s to swap smarter. Here’s how to do exactly that.
Why RV Bathroom Decorating Requires a Smart Strategy
An RV bathroom isn’t a shrunken house bathroom, it’s a different problem entirely, and it needs a different approach. The fixtures are non-standard, the walls may be slanted, and anything you place in there has to justify its existence twice over.
You’re also working against road vibration, humidity, and storage needs that residential design never has to account for. Treating it like a regular renovation will leave you frustrated and overstuffed.
Why small RV bathrooms feel cluttered quickly
Most RV bathrooms run between 25 and 35 square feet, roughly a third the size of a standard home bathroom, which means one misplaced basket can throw off the whole room. There’s almost no buffer space to absorb clutter the way a larger bathroom would.
A few stray toiletries on the counter and suddenly the place looks chaotic, even if it’s technically clean. The visual math is unforgiving, so organization has to be baked into the design, not bolted on afterward.
The balance between function and decor
Every item you bring into an RV bathroom needs to pull double duty, looking decent while also solving a problem. A decorative basket that holds nothing is just clutter with better lighting.
This dual-function requirement forces you to be more selective than you’d ever be in a home bathroom, and that discipline is actually what makes small spaces look intentional. When everything earns its place, the room stops feeling cramped and starts feeling curated.
| READ THIS GUIDE: The Ultimate Guide to RV Decorating Ideas (Inside, Outside & Every Style in Between) |
Common layout challenges in camper bathrooms
Odd corners, slanted walls, and non-standard fixture placements mean standard towel bars often won’t fit and conventional storage units won’t sit flush. You’re also dealing with a space that shifts function throughout the day, wet room in the morning, storage closet by afternoon.
Conventional decorating advice assumes square walls and predictable dimensions, neither of which you’re likely to have. The solutions that work in here are almost always the ones designed specifically for RVs, not adapted from a home improvement store.
Start With a Clean, Light Color Foundation
Best neutral palettes for small RV bathrooms
White, warm cream, and soft gray are the workhorses of small bathroom design, and they earn that reputation. These tones reflect both natural and artificial light, which matters enormously in a space with one small window and a single overhead fixture.
Beige and greige lean warmer and feel less clinical, which is worth considering if you’re spending multiple weeks in the same rig. Any of these on walls and ceiling will immediately make the room feel taller and less box-like.
Using one accent color for cohesion
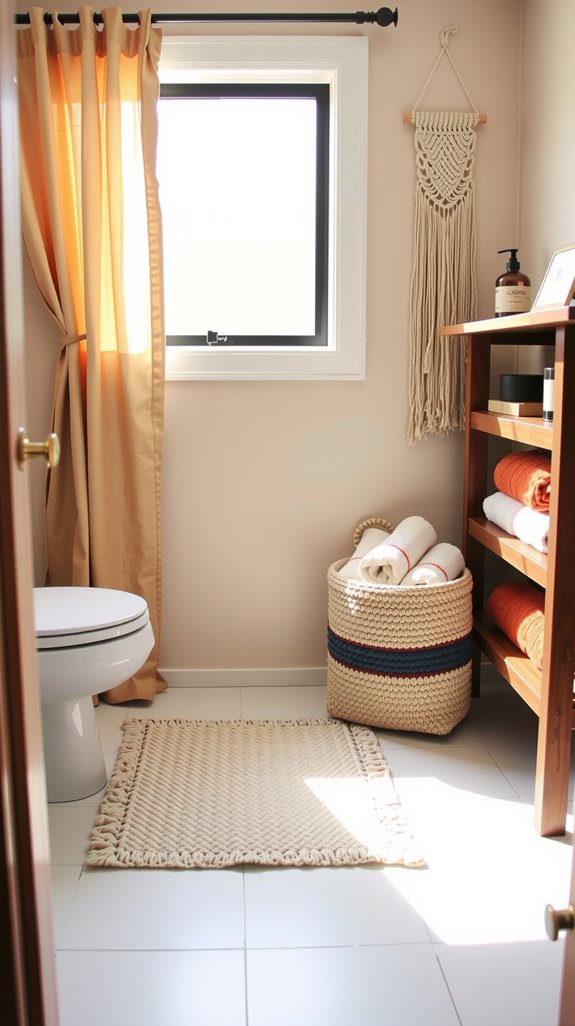
Once the neutral base is down, one accent color is all you need to make the space feel designed rather than default. Pick something with some personality, navy, sage, terracotta, burnt orange, and repeat it across your shower curtain, hand towels, and one small accessory.
That repetition is what signals intention to anyone who walks in, and it keeps the eye moving rather than landing on clutter. More than one accent color in a room this size tips over into busy fast.
SEE THIS: RV Bedroom Decorating Ideas That Feel Cozy, Intentional & Spacious.
Upgrade Hardware for Instant Impact

Swapping cabinet pulls and towel hooks
Old cabinet pulls and builder-grade towel hooks date a bathroom faster than almost anything else in it. Replacing them is usually a matter of unscrewing four to six pieces of hardware and swapping in something better.
Modern pulls and hooks are inexpensive, widely available, and require nothing beyond a basic screwdriver. The whole job takes under an hour and the difference is immediately visible. View these HOOKS on AMAZON store!
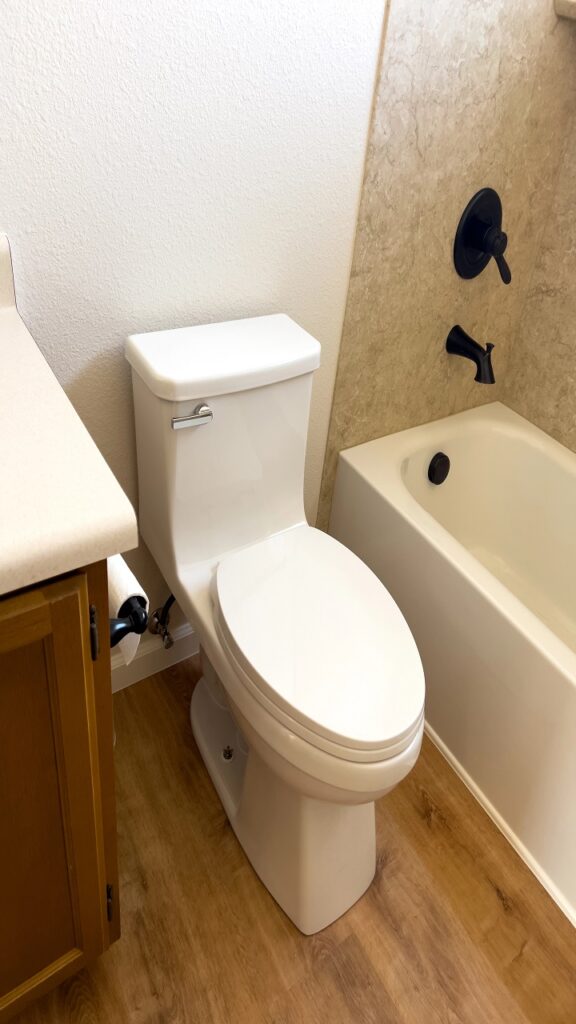
Choosing finishes that elevate the space
Brushed nickel reads contemporary and clean, matte black leans modern and bold, oil-rubbed bronze adds warmth and a bit of age. Whichever direction you go, commit to it fully across every metal surface in the room, faucet, pulls, towel bar, hooks, all of it.
Mixing finishes in a space this size looks accidental rather than eclectic, and it fragments the visual cohesion you’re working toward. One finish, done consistently, makes the whole bathroom look like someone actually thought it through.
SEE THIS: RV Outside Decorating Ideas for Stylish & Functional Campsites.
Use Vertical Storage Without Adding Bulk
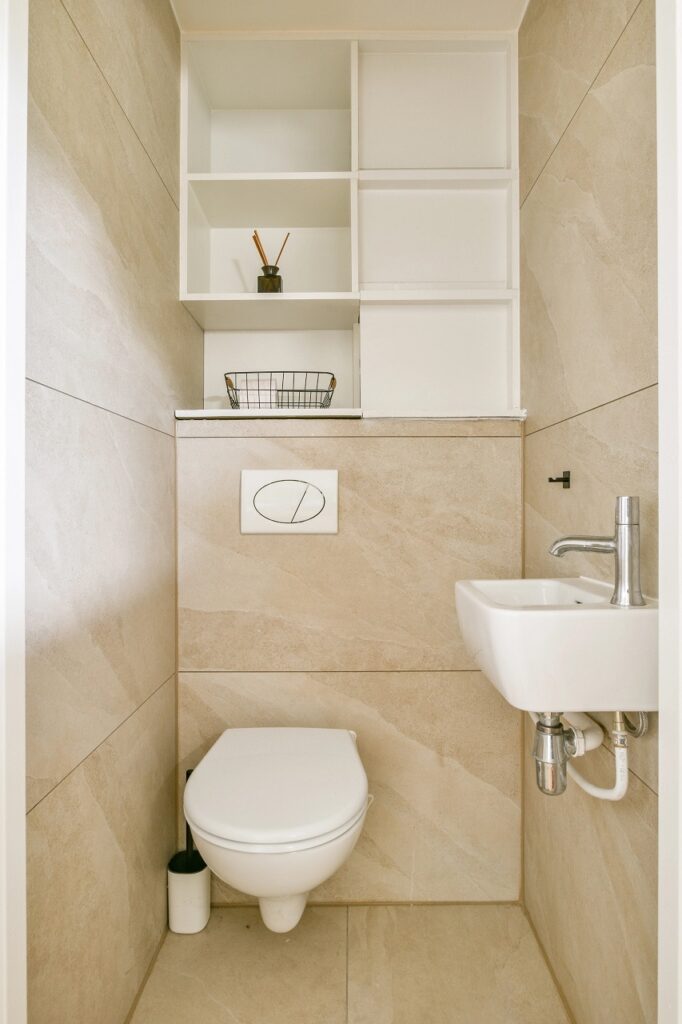
Over-the-toilet shelving ideas
The wall above the toilet is almost always dead space in an RV, and it’s the easiest place to reclaim real storage. A two or three-tier shelf unit, bamboo or powder-coated metal, fits neatly into that zone and holds everything from spare toiletries to folded washcloths.
Look for units designed specifically for RV use since they tend to be lighter and sized to fit tighter clearances. Secure it well because anything stored here will shift during travel if the mounting isn’t solid.
Slim wall-mounted organizers
Beyond the toilet zone, the remaining wall space responds well to narrow mounted organizers, magnetic strips for metal grooming tools, adhesive-backed racks for daily essentials, and small pegboards that hold more than you’d expect.
The rule I follow is nothing deeper than two inches, because anything that projects further starts eating into the narrow lanes of movement you rely on in a tight bathroom.
These fixtures keep toiletries off the counter and off the floor, which immediately makes the room feel bigger. Label what goes where and you’ll actually maintain the system instead of abandoning it after a week.
SEE THIS: Boho, Rustic, Modern & Western RV Decorating Styles.
Keep Countertops Minimal and Functional
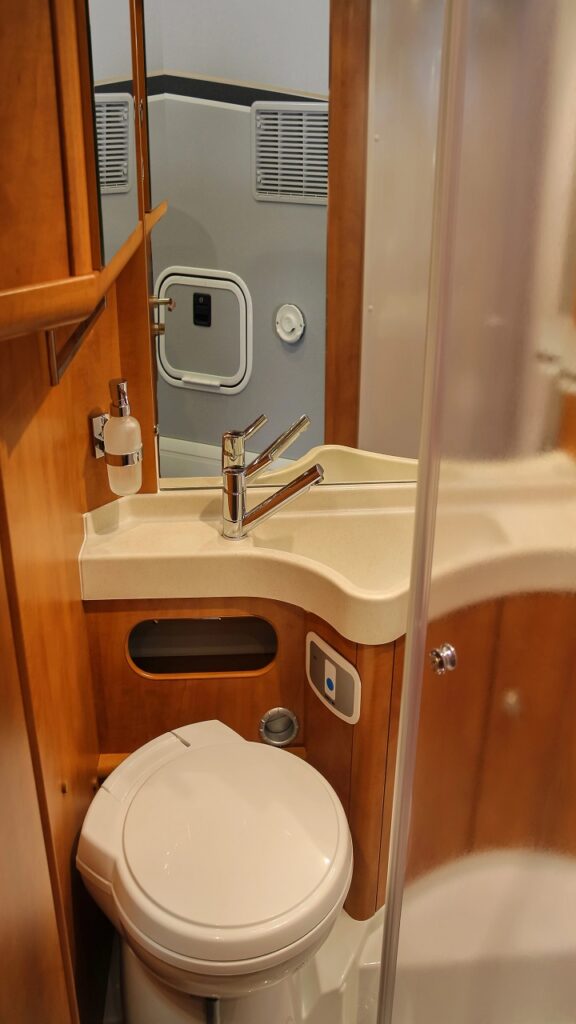
Wall-mounted toothbrush and soap holders
Moving your toothbrush and soap off the counter and onto the wall sounds minor until you actually do it and see how much visual breathing room it creates.
Wall-mounted holders in stainless steel or rustproof plastic are designed to handle road vibration and humidity, so they won’t fail on you after a few weeks.
Install them with heavy-duty adhesive strips if you want to avoid drilling, and position them at a height that actually makes sense to use. That counter space you reclaim changes how the whole room feels every single morning.
Storing daily items in coordinated containers
Whatever does live on the counter deserves to live in something that looks like it belongs there. Matching jars or small bins in your bathroom’s color palette keep cotton rounds, hair ties, and daily toiletries accessible without looking like a junk pile.
Clear acrylic works well because you can see when you’re running low without pulling lids off everything. Labeled containers take thirty seconds to set up and prevent the slow accumulation of random items that eventually overtakes every flat surface in a small rig.
SEE THIS: RV Decorating Ideas by RV Type (Class A, C & Fifth Wheel).
Add Soft Textiles for Warmth and Comfort
Choosing slim, washable rugs
Hard surfaces dominate RV bathrooms, plastic, metal, fiberglass, laminate, and without some softness in the mix the space feels utilitarian at best. Textiles are where you bring in warmth, and they’re also one of the easiest things to swap out seasonally if you want to refresh the room cheaply.
The trick is choosing materials that can handle the humidity and the washing frequency that RV living demands. Get that right and the bathroom actually starts to feel like somewhere you want to spend a few minutes.
Coordinated hand towels for visual polish
Hand towels are doing decorative work whether you think of them that way or not, so they might as well be doing it intentionally. Select colors or patterns that pull from your accent palette and hang them consistently rather than tossing them over whatever bar is closest.
Quick-drying microfiber or cotton is the practical choice in a humid, compact space where mildew finds its way in fast. Swap them out seasonally along with the shower curtain and the room feels refreshed without spending anything significant.
SEE THIS: Seasonal & Holiday RV Decorating Ideas.
Replace Builder-Grade Details That Date the Space
Peel-and-stick backsplash or wallpaper accents
Peel-and-stick tile panels and wallpaper strips go up in an afternoon, require no adhesives beyond what’s already on the backing, and pull off cleanly if you sell the rig or change your mind.
The range of patterns available now is genuinely impressive, subway tile, hex, geometric, linen texture, so there’s no reason to settle for something generic. These products hold up well in humid environments as long as the surface is clean and dry before application. It’s a sixty-dollar transformation that reads like a renovation.
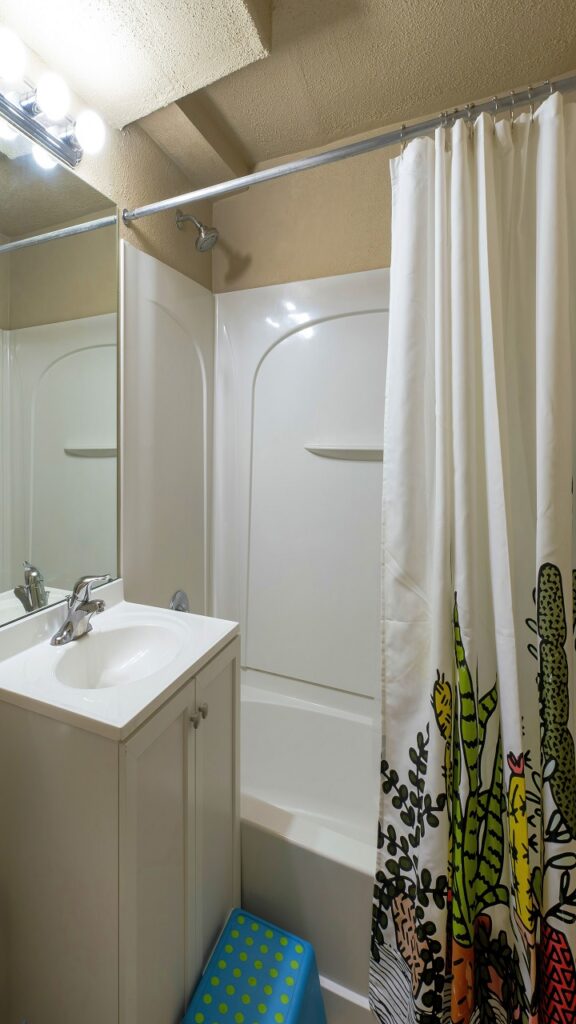
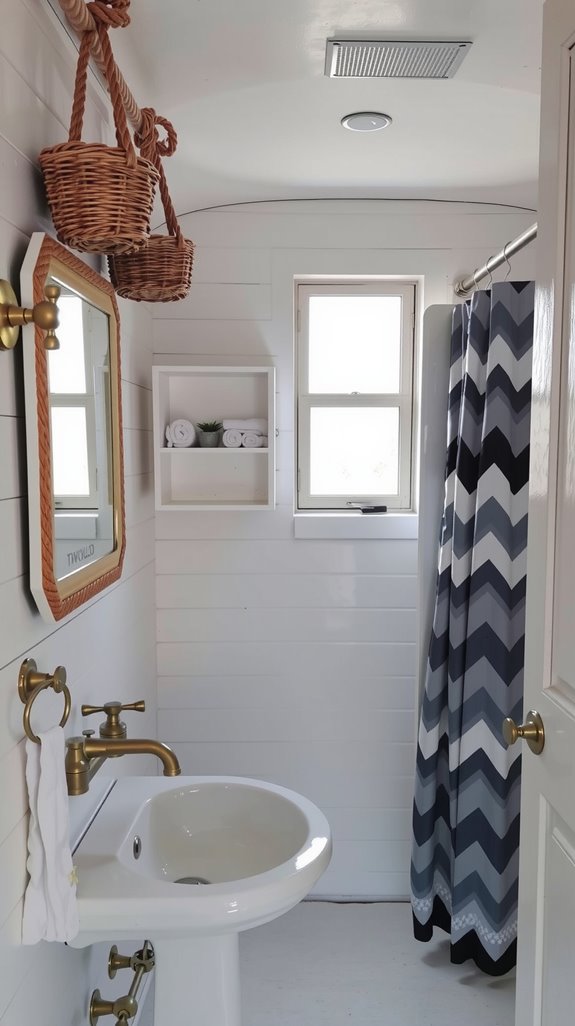
Upgrading the shower curtain for texture
A flimsy plastic shower curtain does nothing for a bathroom except keep water off the floor. Swapping it for a fabric option in waffle weave, linen, or a subtle pattern adds the kind of texture that makes a room feel layered and finished.
Look for a weighted hem so the curtain hangs properly and doesn’t billow into the shower every time air moves through the rig. Match it to your accent color and it ties the whole room together in a way that costs maybe thirty dollars.
SEE THIS: RV Interior Color Schemes That Transform Small Spaces.
Maximize Light in Small RV Bathrooms
Using mirrors strategically
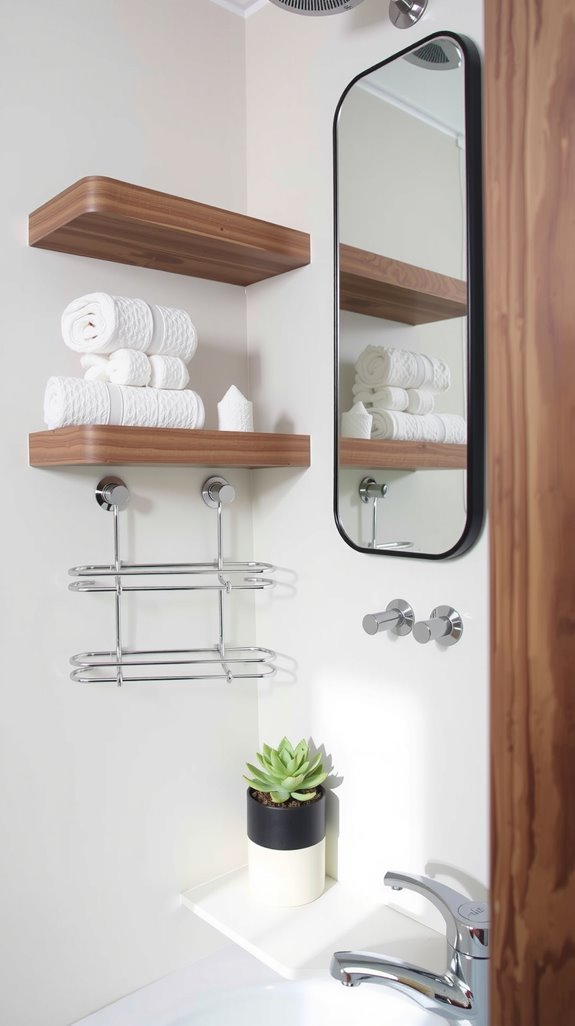
A well-placed mirror is the closest thing to free square footage you’ll find in a small bathroom. Mount a large one opposite whatever natural light source you have, even a small porthole window, and the room immediately reads as bigger and brighter.
Mirrored cabinet doors serve double duty by covering storage while adding reflective surface, which in a space this size is as efficient as design gets. Corner mirrors and frameless styles keep the look clean and avoid adding visual bulk.
Swapping harsh bulbs for warm LED lighting
Cool white bulbs make a small bathroom feel like a department store fitting room, and not in a flattering way. Warm LED replacements shift the whole atmosphere, softer, easier on the eyes, and more comfortable to spend time in.
They also draw less power than incandescent or fluorescent options, which matters when you’re managing battery consumption off-grid. This is a five-minute swap with a noticeable result from the first morning you flip the switch.
SEE THIS: RV Organization That Looks Like Decor.
Small Travel Trailer Bathroom Decorating Ideas
Decorating around corner sinks
A corner sink sounds like a liability but it actually opens up wall space on both sides that a straight-mounted sink wouldn’t. Install floating shelves on those adjacent walls to capture vertical storage without the room feeling top-heavy or crowded.
Keep accessories narrow and wall-mounted, slim towel bars, a single soap dispenser, nothing that projects far into the room. The angular geometry of a corner layout rewards restraint more than any other configuration.
Working with tight shower layouts
A 24 to 32-inch shower stall is a phone booth with a drain, and the only design approach that works is radical simplicity. A tension-rod corner shelf handles toiletry storage without a single hole in the wall, which also means it comes out easily if you’re renting or reselling.
One light-colored curtain keeps the visual noise down and makes the stall feel less enclosed than it actually is. Add a single textured bath mat outside the threshold for personality and leave everything else out.
Common RV Bathroom Decorating Mistakes to Avoid
Overloading shelves with decor
Shelves in a small bathroom have one job: organized storage. Piling them with decorative objects that don’t serve a function is just moving clutter off the counter and onto the wall.
A few intentional pieces that complement the color scheme are fine, but anything beyond that starts eating into the visual calm you’ve worked to create. If it doesn’t get used daily and it doesn’t add meaningful visual value, it belongs in an overhead bin somewhere else in the rig.
Choosing dark colors without contrast
Dark colors can absolutely work in an RV bathroom and look sophisticated when handled correctly. The problem is dark walls with dark fixtures and dark towels, because that combination turns a small space into a dim box with no depth.
Balance any deep hue with white fixtures, warm lighting, and at least one mirror large enough to push light back into the room. Without that contrast, the paint color is working against you regardless of how intentional the shade selection was.
Ignoring storage when adding design elements
Decorating a bathroom without solving its storage problem first is like painting over a leak. Every item you add without a home eventually ends up on the counter or the floor, and all your design work disappears under a pile of toiletries.
Choose decor that solves a problem, decorative baskets that hold things, attractive shelves that store things, hooks that are both good-looking and functional. If something occupies space without earning it, it’s not decor, it’s just more clutter with better aesthetics.
A Simple 4-Step RV Bathroom Decorating Plan
Step 1: Define your color scheme
Your color scheme is the filter every other decision runs through, and setting it early saves you from buying things that don’t belong in the room. Choose two to three tones, a dominant neutral, a supporting neutral, and one accent that has some personality.
Light tones make the space feel larger and give you more flexibility as you add textiles and accessories later. Get this locked in before you touch a single piece of hardware or open a shopping cart.
Step 2: Upgrade hardware and lighting
With your palette established, hardware and lighting are the next moves because they affect how every other element reads in the space. Replace dated faucets, drawer pulls, and towel bars with a single cohesive finish and watch the room sharpen immediately.
Pair that with warm LED bulbs and the bathroom starts feeling like somewhere you’d actually want to spend time rather than a utility closet with plumbing. This step requires minimal skill and delivers disproportionate results.
Step 3: Add vertical storage solutions
Once the bones of the room look right, tackle storage before you add a single decorative element. Float shelves above the toilet, mount magnetic strips for metal tools, add an over-door organizer to the cabinet interior if there’s one available.
Getting storage right is what determines whether the decorating that follows actually holds up over time or gets buried under daily accumulation. Plan for where everything lives before you start hanging anything that’s purely aesthetic.
Step 4: Edit down to essentials
Storage solved, now subtract. Keep only what you use daily in the bathroom and move everything else to secondary storage elsewhere in the rig.
Replace oversized bottles with wall-mounted dispensers or travel-sized containers that take up a fraction of the space. The final version of the bathroom should feel edited, not sparse, and if you’re second-guessing whether something belongs, that’s your answer.