Camper kitchens are small, dated, and usually the first thing people want to tear out. But that cramped galley with the peeling laminate and dark-stained doors has real potential hiding underneath.
The right remodel changes how you feel about living in your rig every single day, not just how it looks in photos.
Materials need to handle road vibration, humidity, and constant use that would destroy a residential kitchen inside a season. Here are the ideas that deliver, pulled from rigs that went through real, working transformations.
Contents
- 1 Earthy Green Cabinets With a Farmhouse Sink and Wood Countertops
- 2 Transformation of Dark Cabinets to Bright White
- 3 Rustic Modern Style With Butcher Block Countertops
- 4 Two-Toned Cabinetry for Visual Impact
- 5 Open Shelving for Accessibility and Aesthetic Appeal
- 6 Farmhouse Backsplash for a Cozy Feel
- 7 Painting Techniques for Durable Finishes
- 8 Functional Upgrades With Pull-Down Faucets
- 9 Maximizing Storage With Smart Organization
- 10 Floating Shelves for Visual Space Expansion
- 11 Custom Cabinetry Trims for Personalization
- 12 Hardware Reinstallation for Seamless Completion
- 13 Strategic Shelf Placement for Accessibility
- 14 Color Changes With Blue and White Cabinetry
- 15 Bold Fridge Prints for Added Personality
- 16 Restoration of Existing Elements
- 17 Decluttering for Enhanced Living Quality
- 18 Overcoming Stain Challenges
- 19 Patience in Small Space Painting
- 20 Ongoing Remodel Projects for Continuous Improvement
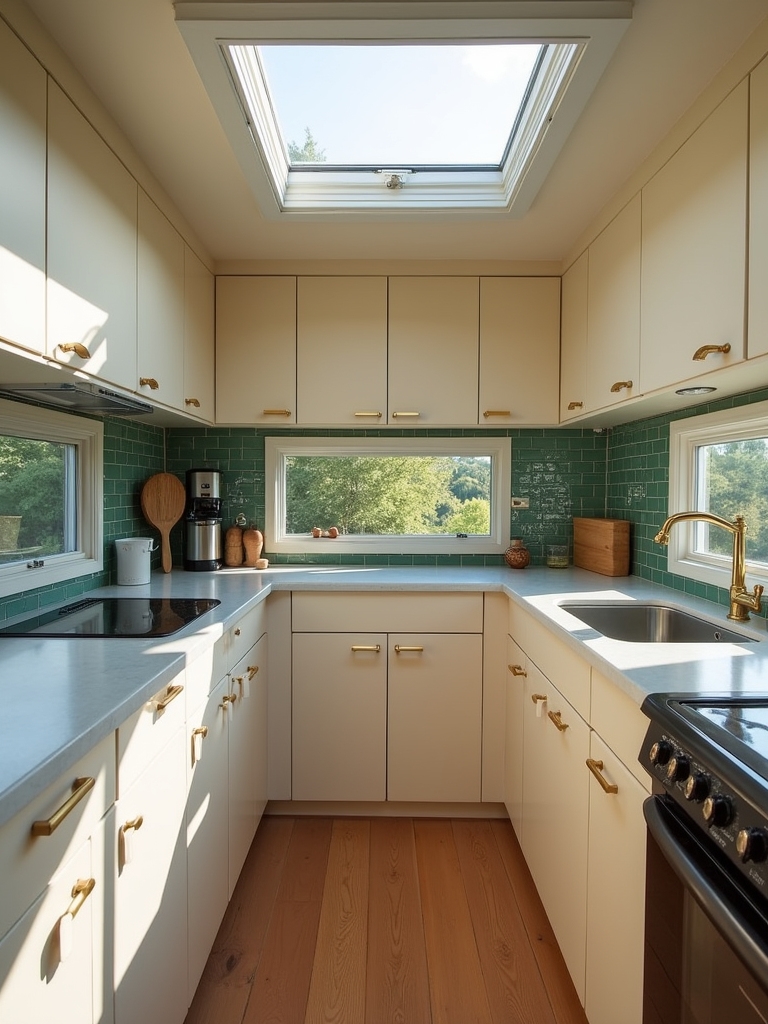
Earthy Green Cabinets With a Farmhouse Sink and Wood Countertops

Sage green is one of the most underrated cabinet colors in the RV world, warm without going yellow, and it ages well. Pair it with butcher block counters and a deep farmhouse sink and the whole kitchen starts to feel like it belongs somewhere intentional.
Mesh-door uppers add a vintage character while keeping everyday gear visible without looking like a cluttered shelf. Finish with matte black hardware and a subway tile backsplash and you end up with a kitchen that feels grounded rather than styled.
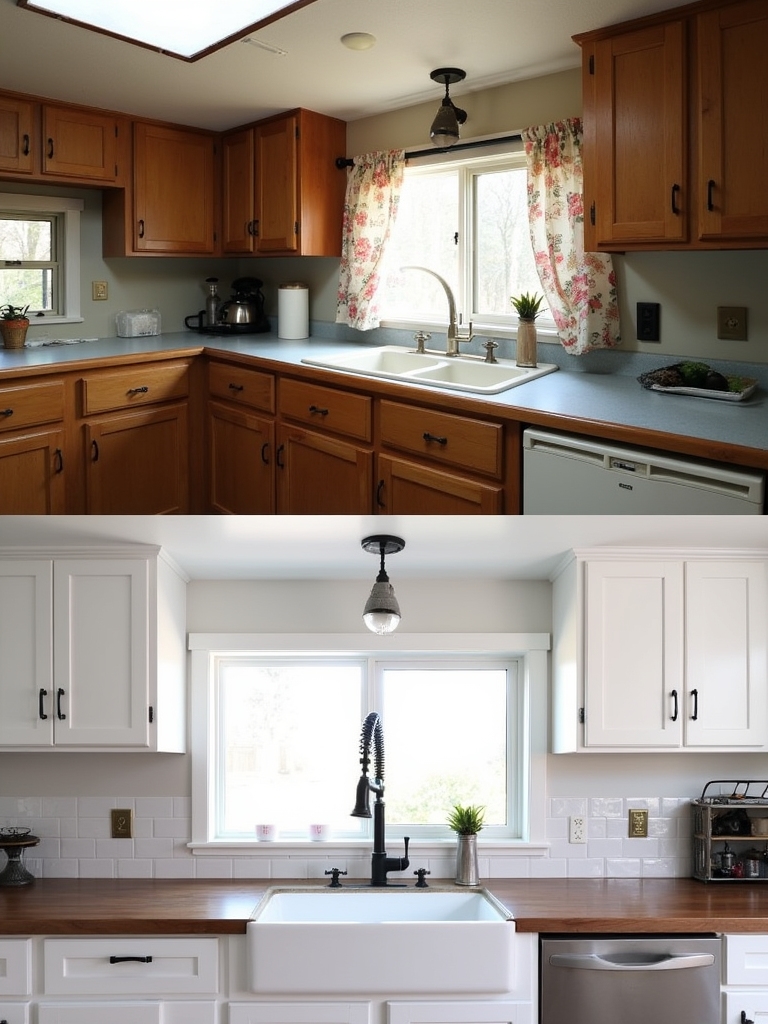
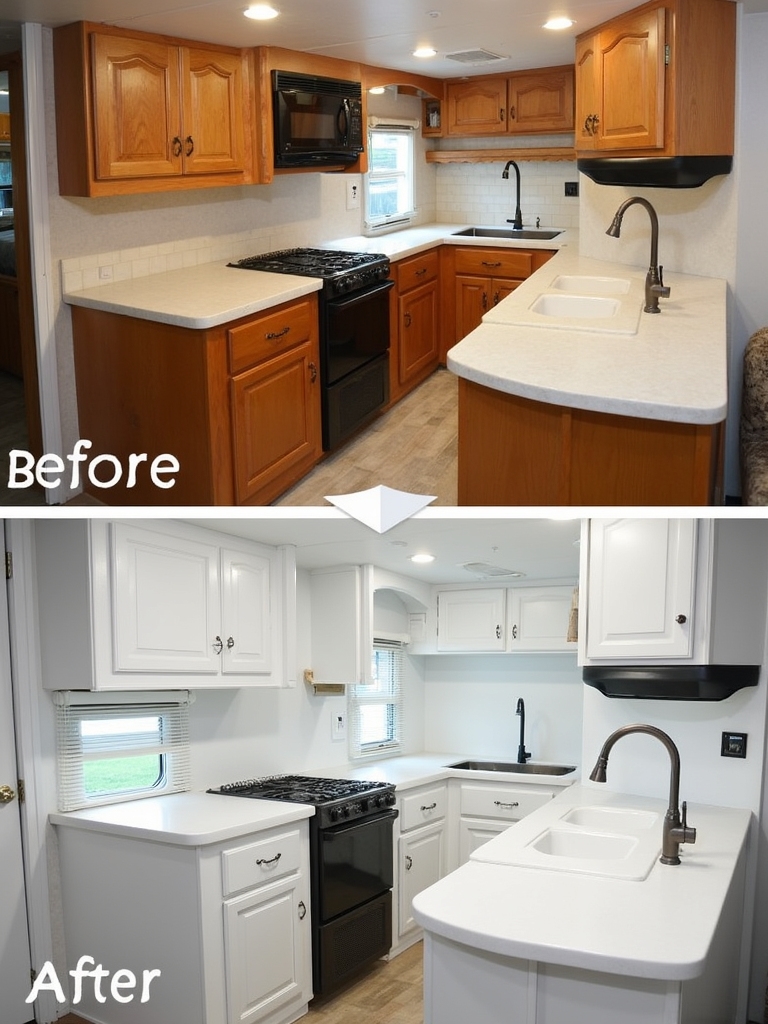
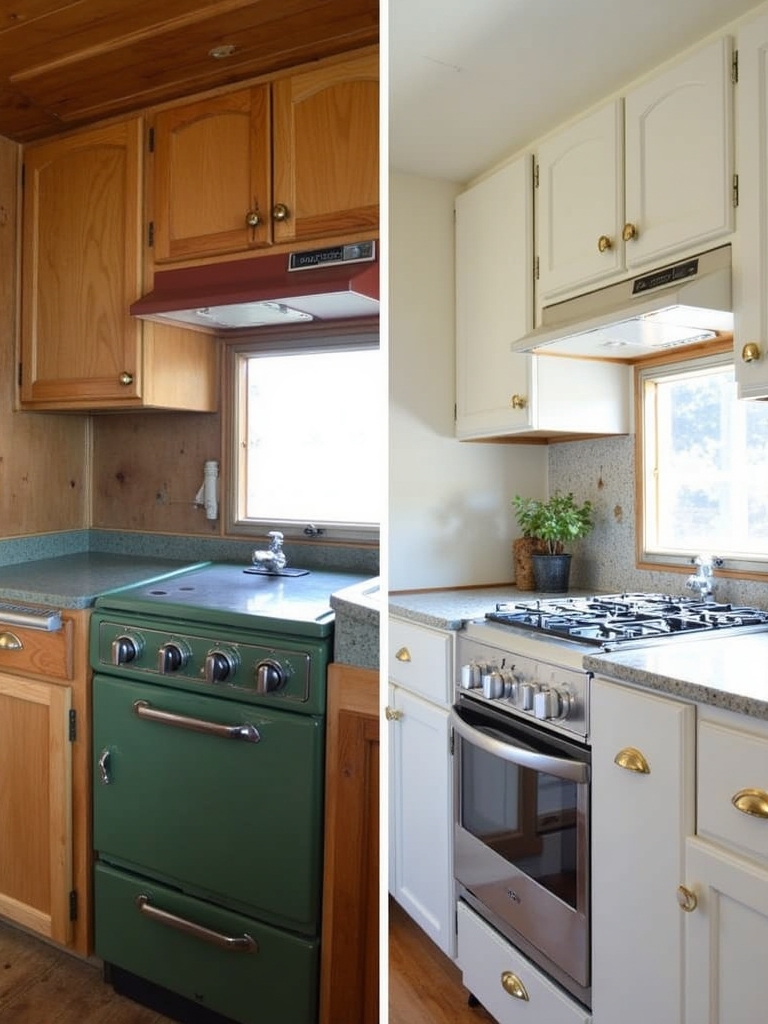
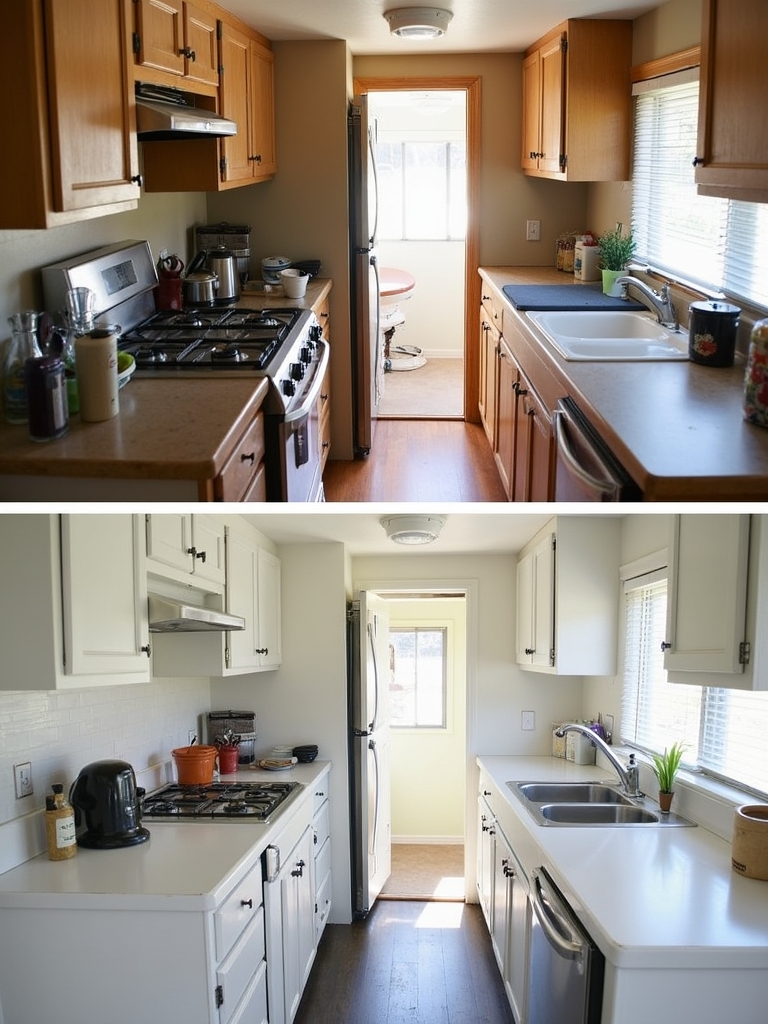
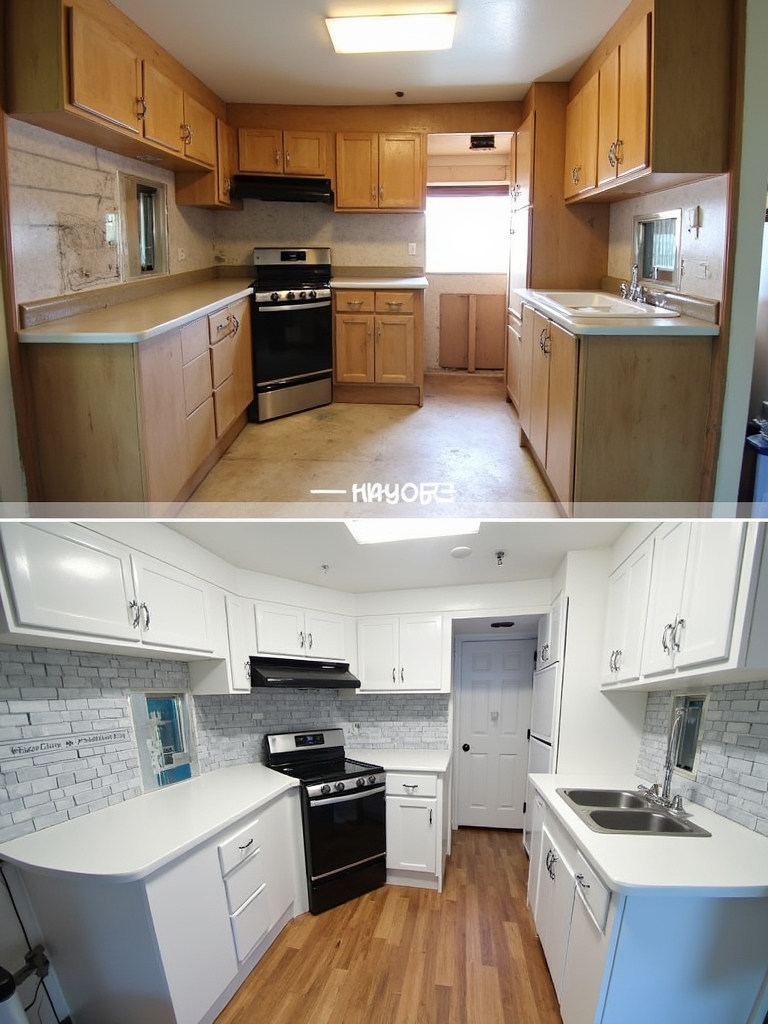
Transformation of Dark Cabinets to Bright White
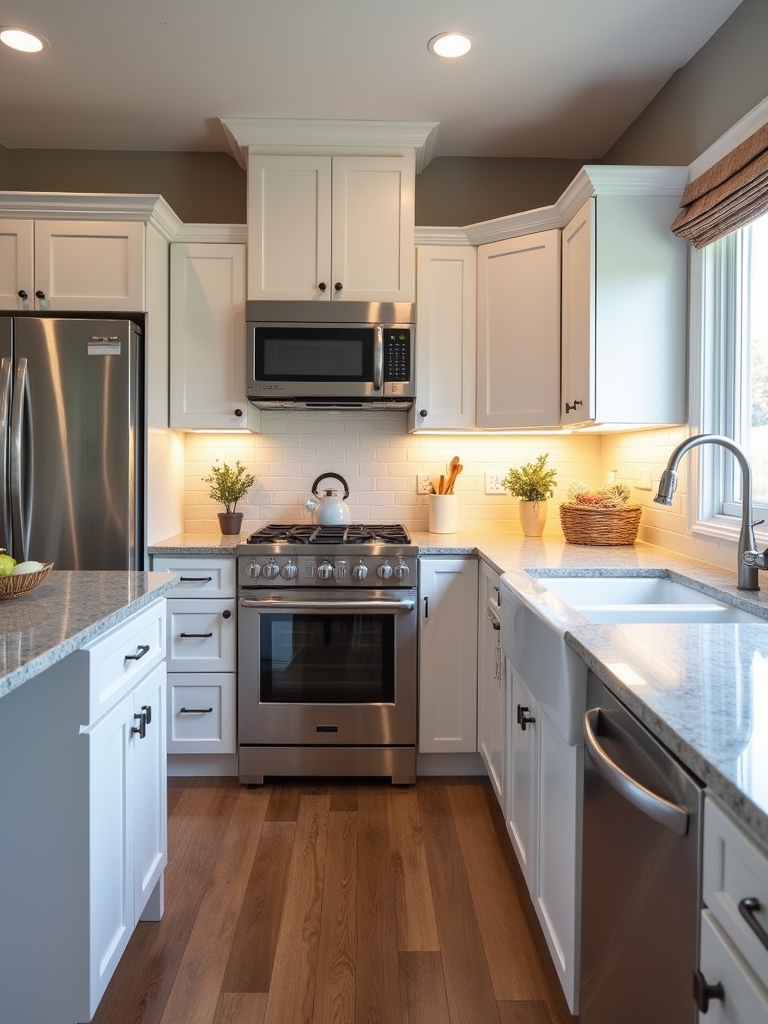
Dark cabinet finishes do real damage to a small camper kitchen, shrinking the space visually until it feels like a closet with a stove. Painting them white is the highest-impact change you can make without swapping out a single cabinet box.
The prep work carries the whole job: degrease every surface, sand with 220-grit, and apply a stain-blocking primer before you even open the topcoat. Use an airless sprayer for thin, even coats that won’t show roller texture after the first few months of road use.
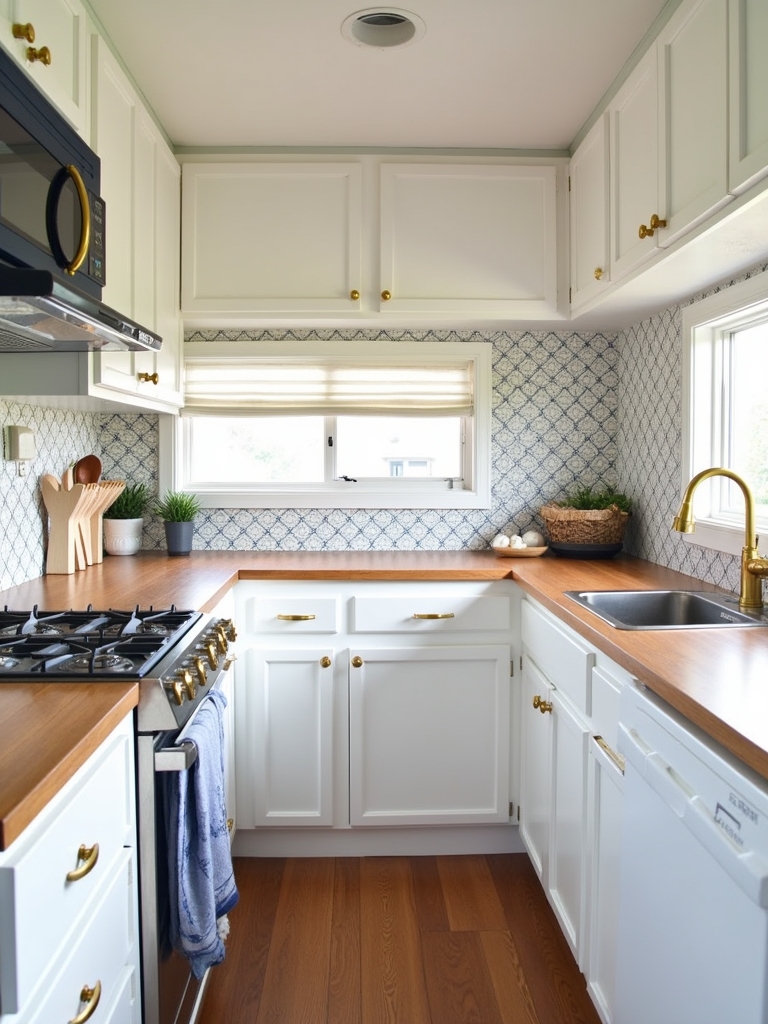
Rustic Modern Style With Butcher Block Countertops
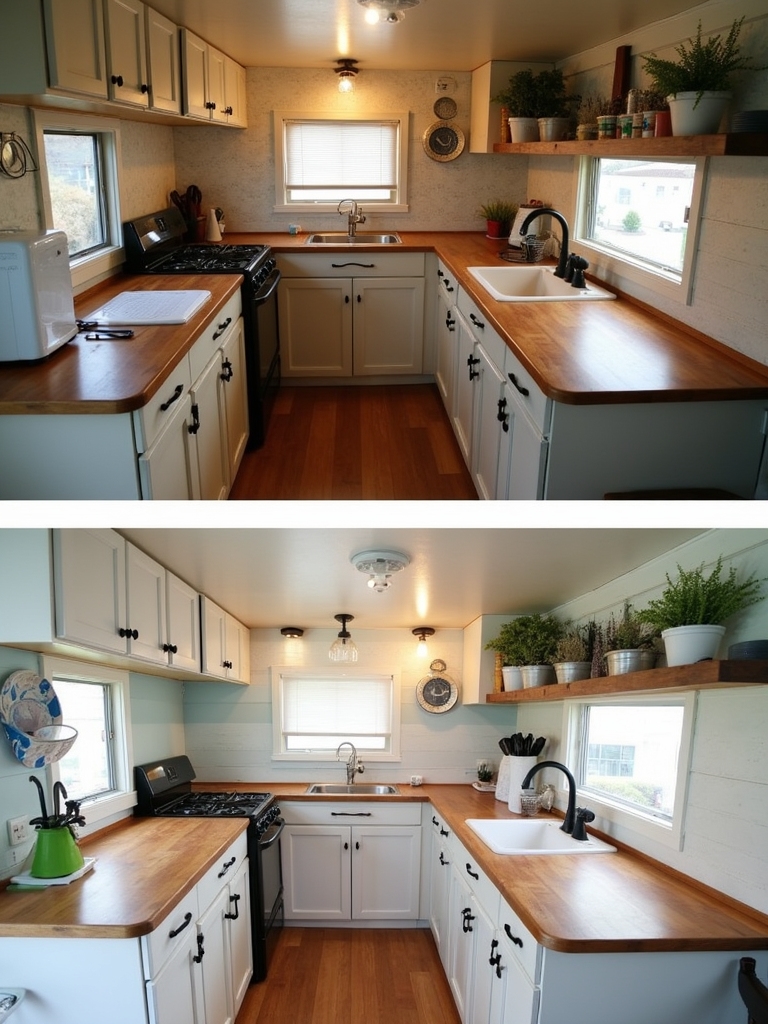
Butcher block is a surface that earns character the more you actually cook on it. Maple and oak are the reliable choices, both dense enough to handle daily chopping and the constant vibration that comes with highway miles.
The warm grain softens what can otherwise feel like a hard, utilitarian kitchen, and it pairs naturally with painted cabinetry in almost any color. Sand out deep scratches and finish with food-grade mineral oil a couple of times a year, and these counters will outlast everything else in the rig.
Two-Toned Cabinetry for Visual Impact
Single-color cabinetry in a small kitchen reads flat, and flat makes a tight space feel even tighter. Pairing darker base cabinets with lighter uppers breaks up that monotony and creates a natural visual separation between storage zones.
The lower cabinets take the hardest daily abuse, and darker finishes hide scuffs, spills, and edge wear far better than white lowers ever will. It’s a straightforward approach that adds depth without requiring a full cabinet replacement.
Open Shelving for Accessibility and Aesthetic Appeal
Open shelving changes how you actually move through a camper kitchen, not just how it looks. When you can see every item at a glance, meal prep speeds up and the constant shuffling through packed cabinets stops.
The key is being selective about what stays out, because a shelf loaded with mismatched gear looks worse than a closed door. Keep the display intentional and the shelves become both functional and part of the kitchen’s overall character.
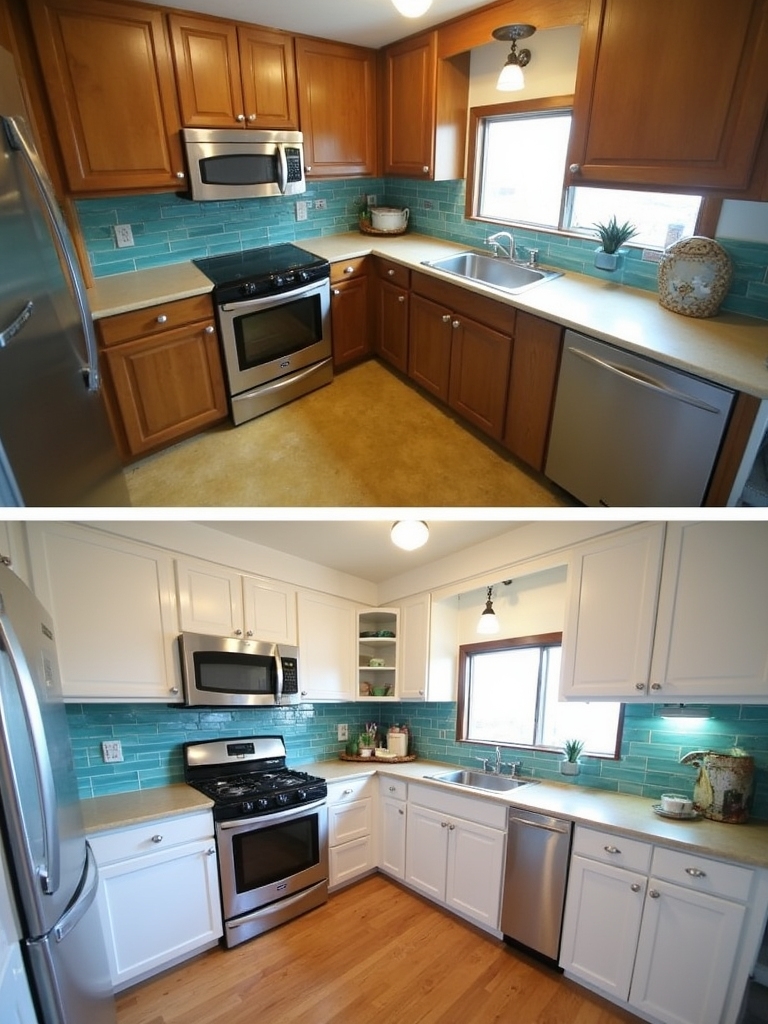
Farmhouse Backsplash for a Cozy Feel
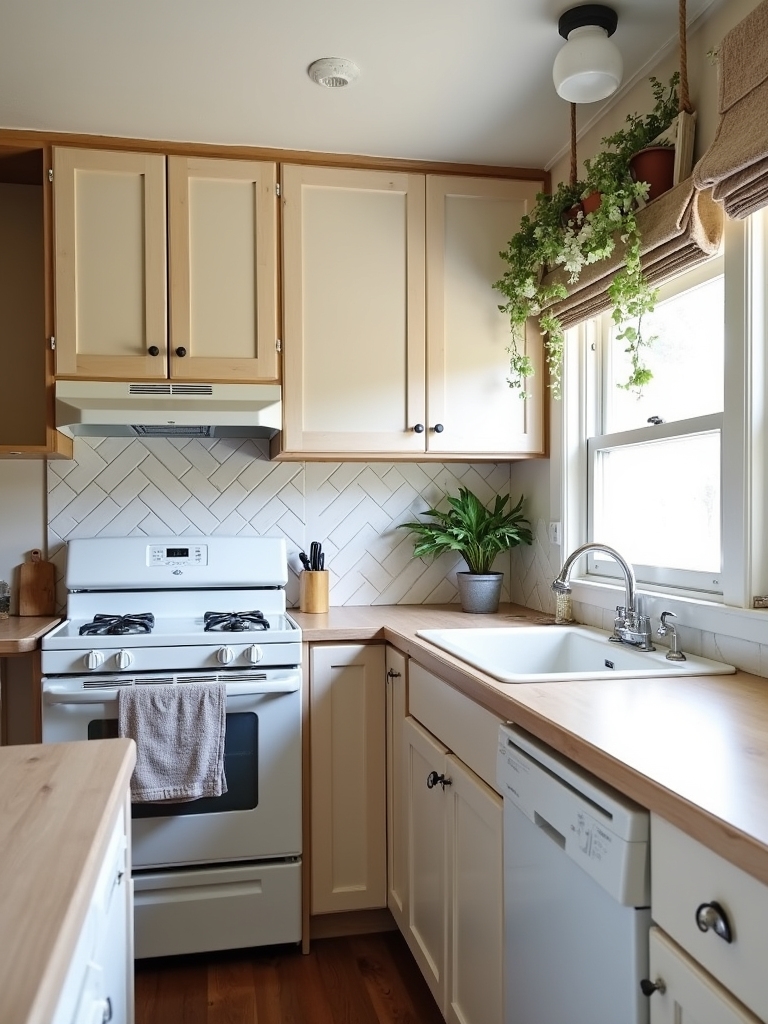
A backsplash does more work than people usually credit it for in a compact kitchen. It protects the wall from grease and moisture while pulling together all the other finishes in the space.
Subway tile is reliable and forgiving, natural stone adds warmth and texture, and herringbone patterns can seriously change the feel of a plain galley. Peel-and-stick options have improved enough to be worth a serious look, especially when you’d rather not deal with thinset and grout inside a four-foot space.
Painting Techniques for Durable Finishes
Paint in a camper kitchen faces conditions that interior house paint was never designed for: humidity, vibration, and daily contact. Oil-based or alkyd enamel finishes hold up far better than standard latex on cabinet surfaces.
Sand between every coat, apply a quality stain-blocking primer like Zinsser 1-2-3, and let each layer cure fully before adding the next. An airless sprayer gives you the smoothest result, and protecting hardware before you start saves you the frustration of peeling tape off freshly dried pulls.
Functional Upgrades With Pull-Down Faucets
A pull-down faucet is one of those upgrades that changes how you use the kitchen every single day. The flexible spray head lets you rinse large pots, aim water exactly where you need it, and clean the sink basin without soaking the surrounding counter.
Look for a model with magnetic docking so the head stays put instead of drooping after a few months of travel. A pause button is worth having at dry campsites where every gallon counts.
Maximizing Storage With Smart Organization
Storage in a camper kitchen demands a different approach than a house kitchen. Every cabinet door, wall section, and drawer needs to be doing real work, not just holding empty space.
Mount baskets inside doors for cutting boards and foil rolls, run slim racks on the wall for spices, and put hooks under upper cabinets to handle mugs and utensils. Clear containers and labeled bins let you see what you have at a glance so you’re not unloading half the cabinet to find one ingredient.
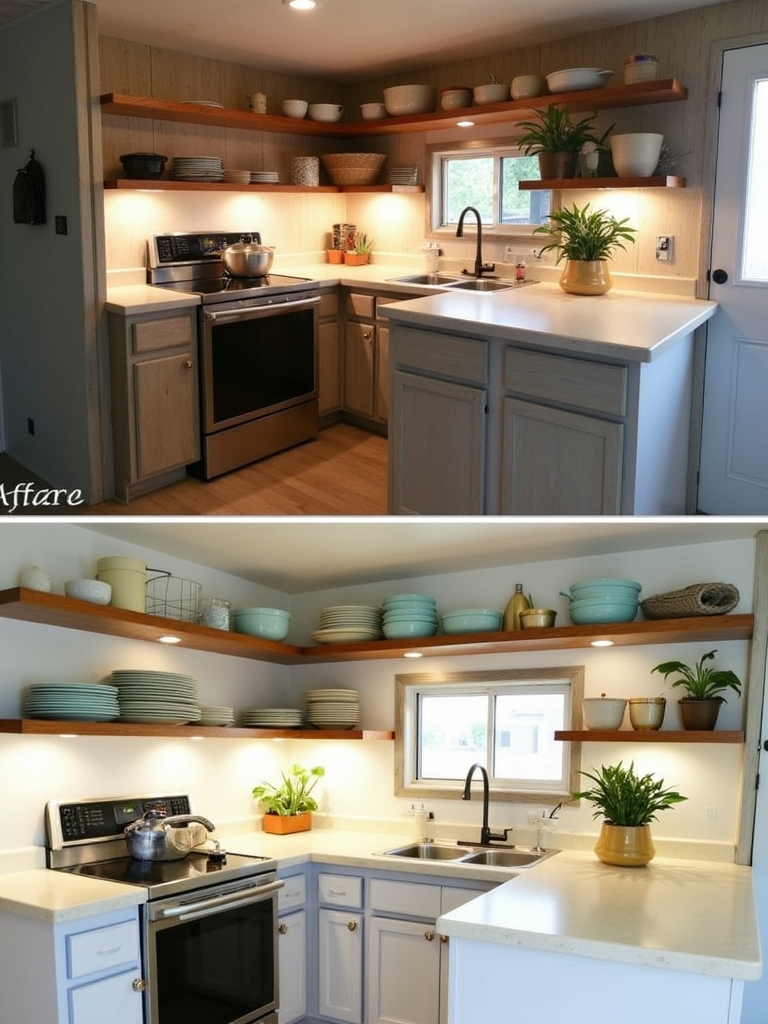
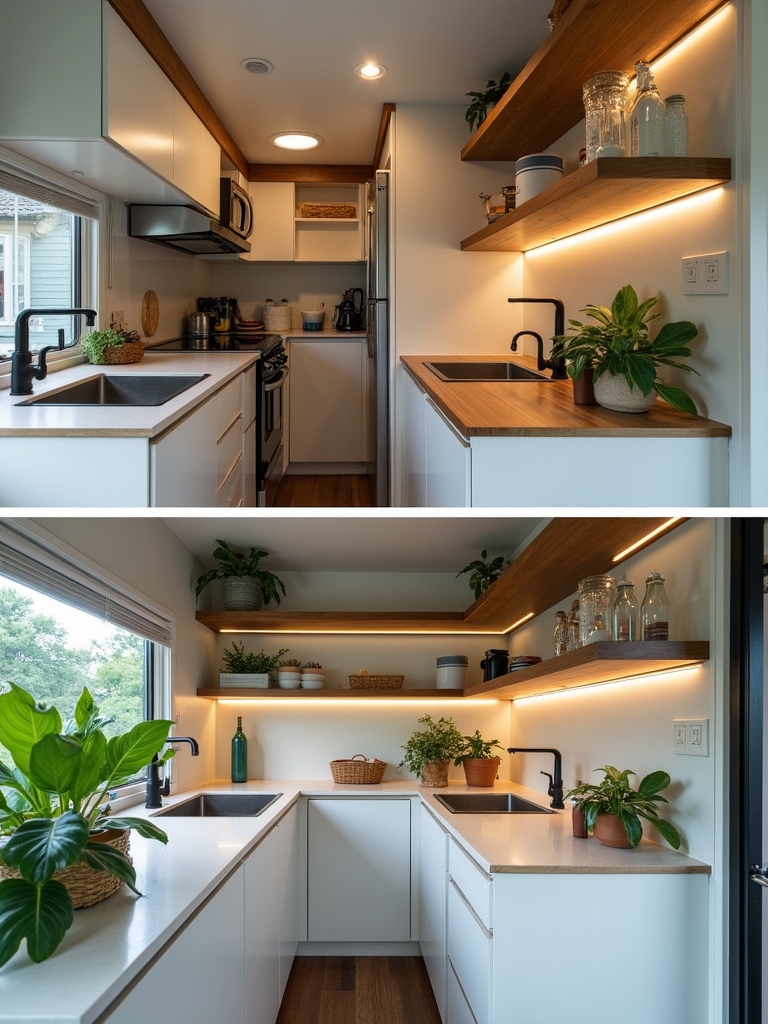
Floating Shelves for Visual Space Expansion

Floating shelves work especially well above sinks and countertops where traditional cabinets would feel heavy and obstructive. Without cabinet boxes and frames taking up visual space, the wall reads as open even when the shelves are holding a full load of gear.
Lighter materials like birch or poplar keep the shelves from looking chunky, and a clean, bracket-free mount adds to the sense of airiness. In a kitchen where every square foot matters, that visual lightness has a real effect on how the space feels to work in.
Custom Cabinetry Trims for Personalization

Trim work is what separates a remodel that looks finished from one that looks patched together. Shaker-style trim applied around mismatched cabinet fronts can unify a collection of doors that were never meant to go together.
It also gives you a clean line to paint against, which makes the whole cabinet run look more deliberate and custom. Getting the trim right doesn’t require a finish carpenter; it requires patience, a miter box, and decent caulk.
Hardware Reinstallation for Seamless Completion
Hardware is the last thing people think about and one of the first things you actually notice in a well-done remodel. If existing hole placement doesn’t work for new pulls or knobs, fill the old holes with dowel rods or wood filler, sand them flush, and pre-drill clean new ones before you install anything.
Always pre-drill to avoid splitting the cabinet face, especially on older rig cabinets that may be thinner than they look. Matte black and brushed nickel both read as intentional choices rather than defaults, and either one signals that the whole job was done with care.
Strategic Shelf Placement for Accessibility
Where you put a shelf matters as much as whether you have one at all. Adjustable shelf heights let you accommodate tall appliances on one level and short canned goods on another without wasting vertical space.
Pull-out shelves and lazy susans in deep lower cabinets are worth the extra cost, because they eliminate the dead zone in the back corner that otherwise just collects forgotten gear. A front lip or tension rod on any fixed shelf keeps items from sliding during travel, which is something you learn the hard way the first time you hit a sharp turn.
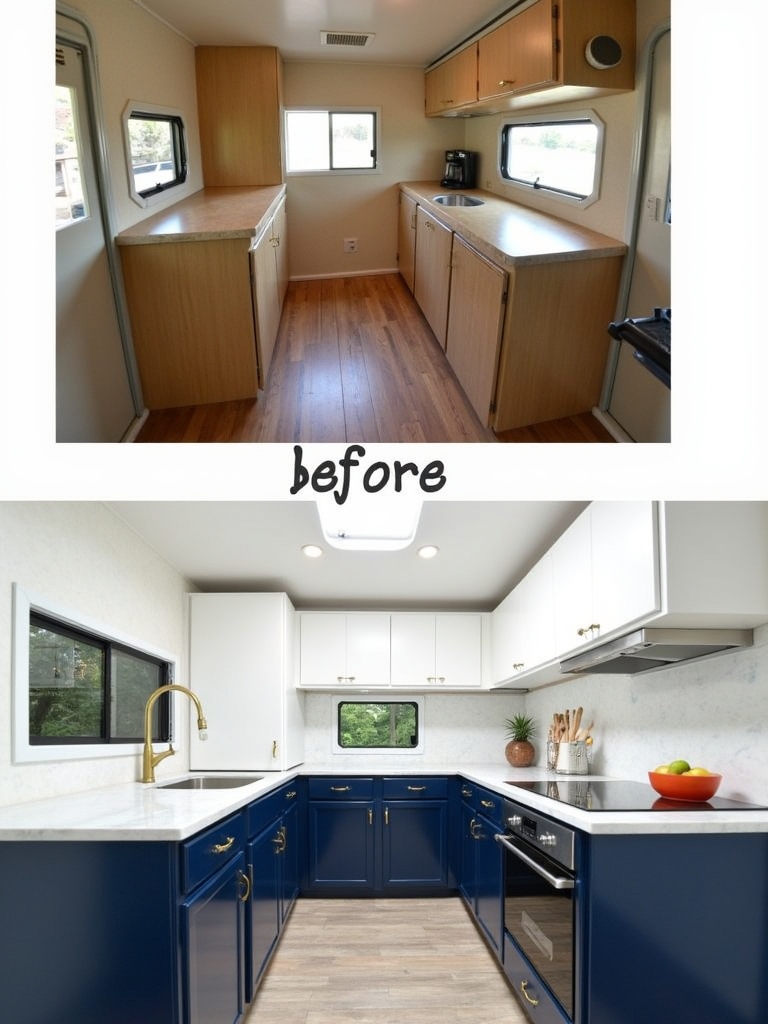
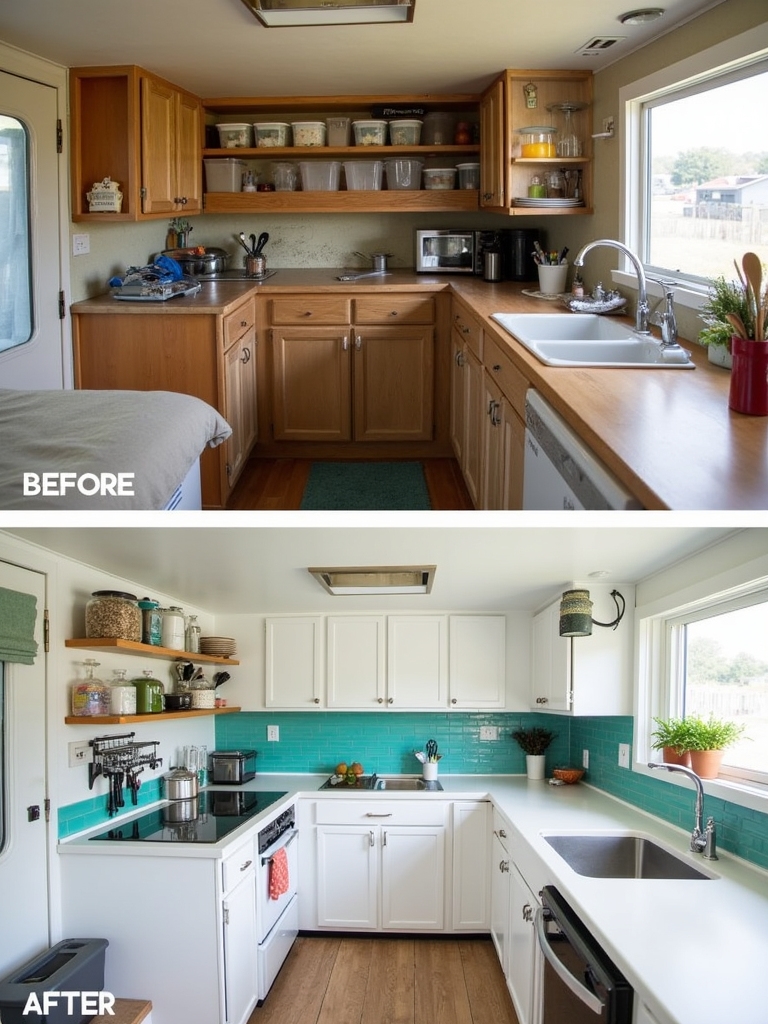
Color Changes With Blue and White Cabinetry
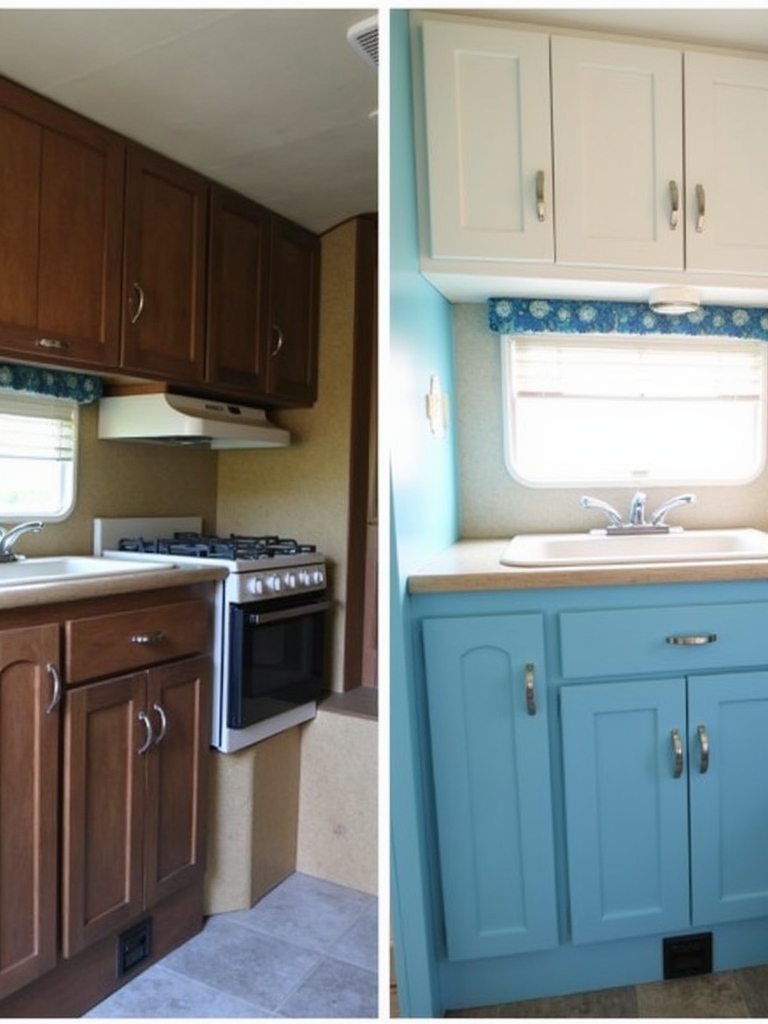
Blue and white cabinet combinations are having a moment in camper kitchens, and for good reason. White uppers bounce light around a small space, which matters a lot when your kitchen gets natural light from one small window.
Blue lowers the ground of the room and hides better than any light color would, which makes practical sense in a working kitchen. The combination shows up especially well in farmhouse-style rigs, where it pairs naturally with wood accents and simple hardware.
Bold Fridge Prints for Added Personality
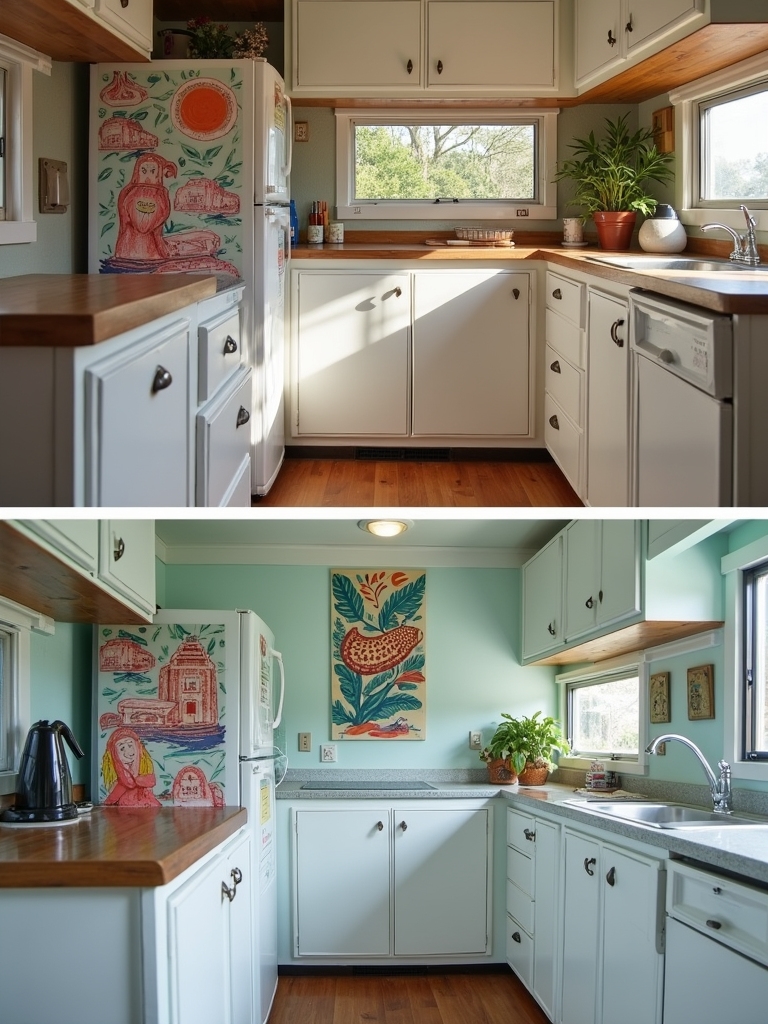
The refrigerator is a large, flat surface that takes up serious visual real estate in a small kitchen. A vinyl wrap or custom decal can turn that beige appliance into something that actually contributes to the look of the space.
Botanical prints, geometric films, and wood-grain wraps all hold up well to moisture and regular cleaning. It’s a low-cost change with an outsized effect on how finished and intentional the whole kitchen looks.
Restoration of Existing Elements
Not everything in an older camper kitchen needs to go. Original cabinet doors are often solid enough to keep if you clean them thoroughly, sand them down, and repaint with a quality enamel.
Hardware that has good bones can be cleaned and refinished rather than replaced, which preserves the character of an older rig while modernizing the overall look. Countertops that are structurally sound can be cut, re-fit, and refinished rather than replaced entirely, saving money without sacrificing the result.
Decluttering for Enhanced Living Quality
A remodel only goes so far if the space is still packed with stuff you don’t need. Clearing out anything that doesn’t earn its place in the kitchen changes the feel of the room almost immediately, and it costs nothing at all.
A calmer, more open kitchen makes cooking in a small space feel manageable rather than frustrating. That shift in how the space functions day to day is just as important as any material or color choice you make during the remodel.
Overcoming Stain Challenges
Camper kitchen surfaces take hard daily use, and stains are part of the deal. Cold water handles blood and protein-based messes before they set, and white vinegar is reliable on fruit and mineral buildup.
Baking soda paste tackles grease when you catch it early, but mud needs to dry completely before you clean it or you’ll push it deeper into the surface. Matching the treatment to the stain type is the whole game, and having a small kit of these basics on hand saves you from reaching for harsh chemicals that can damage finished surfaces.
Patience in Small Space Painting
Painting a camper kitchen tests your patience in ways that painting a room never does. The tight quarters mean you’re working in awkward positions, and there’s no room to step back and see what you’re doing until you’re almost done.
Allow full drying time between coats, sand lightly in between, and don’t rush the masking tape and surface prep no matter how tempting it is to just get started. The extra time you spend in prep is the difference between a finish that holds up and one that starts peeling at the edges by spring.
Ongoing Remodel Projects for Continuous Improvement
A camper kitchen remodel is rarely a single event; it’s more like an ongoing conversation with the space. Upgrading to an under-mount sink, swapping in a deeper basin, or adding magnetic spice containers to a bare wall can each make a meaningful difference without requiring a full redo.
Painting cabinets a fresh color and changing the hardware costs almost nothing and can completely reset how a tired kitchen looks and feels. The best rigs are the ones that keep getting better season after season, because the owner pays attention and keeps making small, smart improvements.