Terracotta pumpkins have been sitting on my craft table every October for years, and they are still the most-asked-about pieces in any fall display. There’s something about that warm, dusty clay tone that reads as genuinely handmade in a way glossy painted pumpkins never do.
The technique looks complicated but it isn’t, once you understand what you’re actually trying to mimic.
Real terracotta isn’t one color, it’s a whole family of tones that shift depending on how the clay was fired, how old it is, and how much sun it’s seen.
Get that layering right, and people will pick up your pumpkin and check the bottom for a pottery stamp. The steps ahead show you exactly how to get there.
Contents
- 1 Achieving Authentic Terracotta Tones
- 2 Crafting Rustic Farmhouse Textures
- 3 Economical Faux Terracotta Techniques
- 4 Exploring Variations in Paint Shading
- 5 Creating a Whitewashed Finish
- 6 Incorporating Natural Elements
- 7 Enhancing With Cement-Like Spray Paint
- 8 DIY Terracotta on a Budget
- 9 Layering for Depth and Dimension
- 10 Integrating With Seasonal Decor
- 11 Utilizing Foam and Plastic Bases
- 12 Mixing Sizes for Visual Interest
- 13 Combining With Whitewashed Pumpkins
- 14 Display Ideas for Front Porches
- 15 Arranging on Mantelpieces
- 16 Styling Farmhouse Tables
- 17 Using Air Dry Clay for Stems
- 18 Matte Sealing for Durability
- 19 Blending With Rustic Accents
Achieving Authentic Terracotta Tones

Terracotta isn’t orange, and that’s the mistake most people make on the first try. You’re mixing equal parts warm orange, raw umber, yellow ochre, and a touch of red, then pulling it back toward neutral with a small dab of warm gray.
Titanium white comes in last, just enough to lift the mix away from looking muddy or burnt. Brands like Cermacoat and FolkArt Dusty Trail are solid starting points, but no single tube will carry the whole look on its own.
SEE THIS: 19 Stargazer Pumpkin Carving Ideas That Shine Bright at Night.
Crafting Rustic Farmhouse Textures
The farmhouse look lives and dies by texture, and pumpkins are no different. Rough, matte, slightly uneven surfaces read as handmade in a way smooth paint never does.
Layer your paint with a chip brush using short, directional strokes rather than long sweeps, and let the bristle marks stay. That slight unevenness is exactly what gives the piece its character.
SEE THIS: 20 Ombre Painted Pumpkin Ideas for a Modern Fall Aesthetic.
Economical Faux Terracotta Techniques
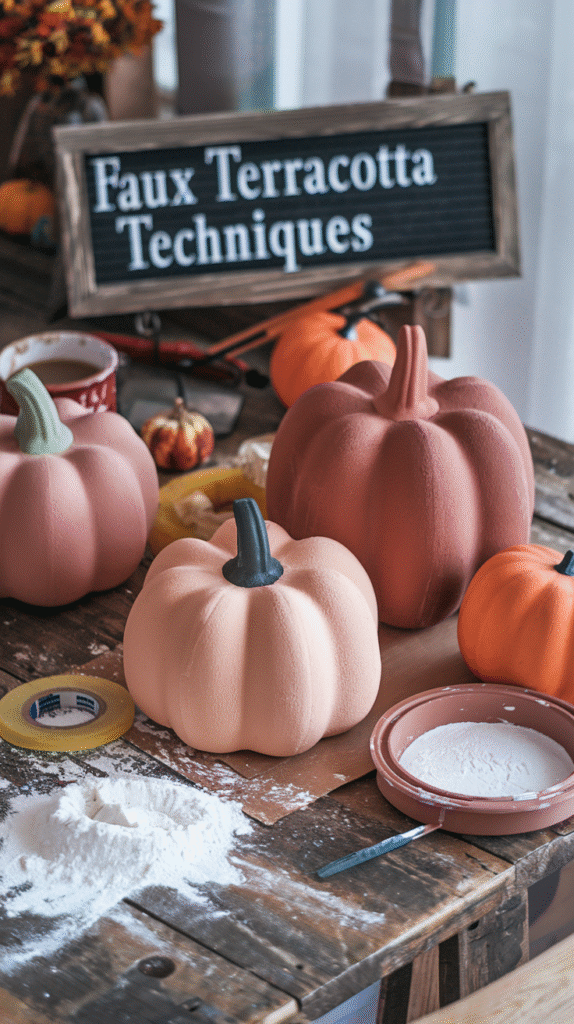
You don’t need expensive supplies to pull this off convincingly. Foam and plastic pumpkins from discount stores are perfectly good bases, and a bag of baking soda mixed into cheap craft paint does more for texture than any specialty product I’ve tried.
Sprinkle a little flour over the surface while the paint is still tacky, and you get another layer of depth that looks genuinely clay-like once it dries. The whole project can cost a few dollars if you already have basic acrylic paints on hand.
SEE THIS: 17 Fall-Inspired Terrarium Ideas That Double as Whimsical Centerpieces.
Exploring Variations in Paint Shading

Two pumpkins painted in the exact same shade, side by side, will always look like craft projects. Vary your mix deliberately, pushing one batch warmer and another cooler, so the finished pieces feel like they came from different batches of clay.
A darker base with unevenly applied lighter layers creates the kind of tonal variation you see in real, fired pottery. Apply with a chip brush in vertical strokes, and don’t try to make it even.
SEE THIS: 19 Amber Glass Fall Decor Ideas That Glow in Golden Light.
Creating a Whitewashed Finish
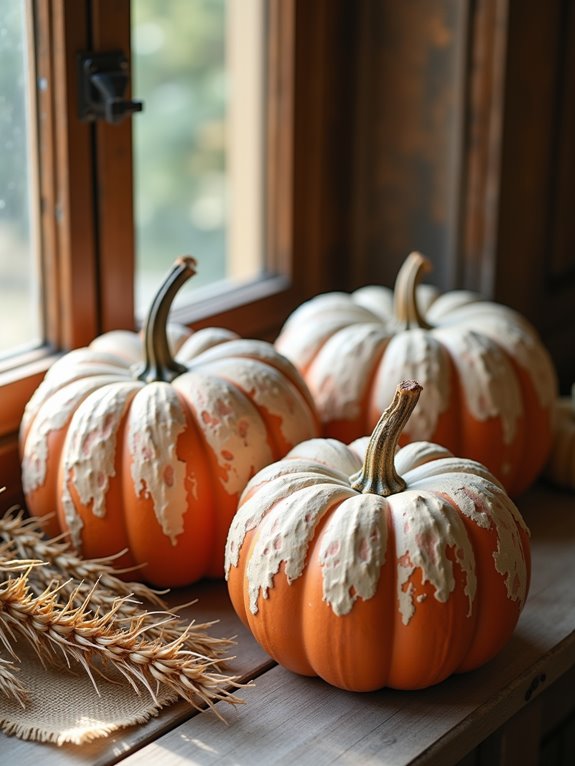

A whitewash finish suggests age and wear in a way that complements farmhouse styling. Dilute white paint with about 3 parts water to 1 part paint, dry-brush it lightly over a fully dried terracotta base, and immediately wipe most of it back with a paper towel.
The goal is a chalky film that softens the orange tones without covering them. It takes practice to stop yourself from going too heavy, but the restraint is what makes it work.
SEE THIS: 21 Glitter & Glam Painted Pumpkins That Double as Party Centerpieces.
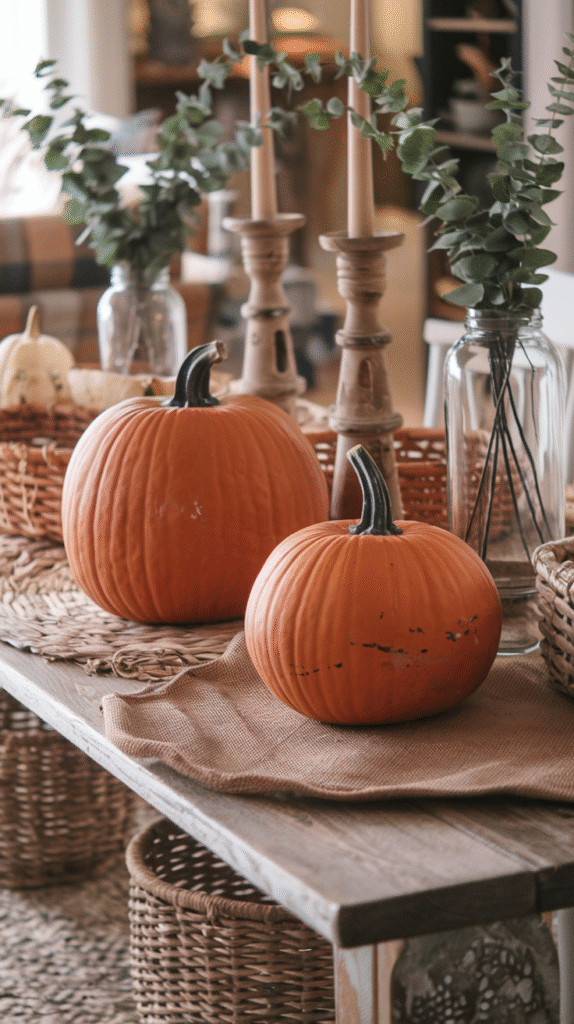
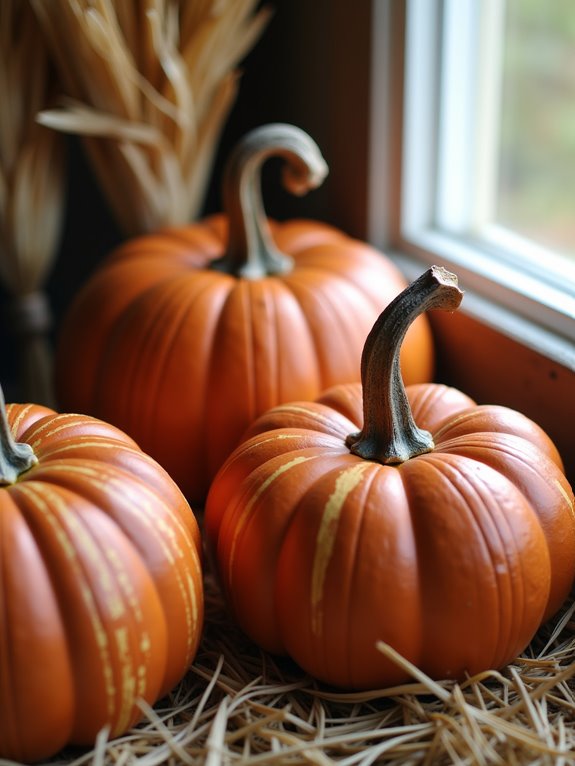
Incorporating Natural Elements

Terracotta pumpkins look their best when they’re surrounded by things that were actually outside recently.
Grapevine wreaths, dried okra pods in vintage vases, acorns in a hurricane glass, and bundles of dried wheat tied with jute all reinforce the earthy quality of the painted surface.
Mixing real dried materials with faux ones adds depth that a purely artificial display can’t replicate. Twigs, pinecones, and small gourds tucked in around the pumpkins make the whole arrangement feel gathered rather than purchased.
Enhancing With Cement-Like Spray Paint

Cement-style spray paint is worth keeping in your arsenal for a faster, slightly different finish. Earthy shades like Caribbean Sand go on with a natural stone texture that requires almost no additional work.
Apply several light coats over a primed surface rather than one heavy coat, which tends to drip and pool in the crevices. A follow-up pass with a chip brush and baking soda paint over the spray finish adds warmth and keeps it from reading as purely industrial.
DIY Terracotta on a Budget

Chalk paint is the budget crafter’s best friend here because it covers in fewer coats and skips the priming step on most surfaces. Leftover latex wall paint mixed with baking soda works nearly as well and costs nothing if you have half-empty cans in the garage.
Painter’s tape and fine-grit sandpaper are the only tools you really need beyond the brush. Seal the finished pumpkin with outdoor Mod Podge and it will hold up through the whole season without flaking.
Layering for Depth and Dimension

Sand the pumpkin surface lightly before you start, then put down a white base coat to give the colors somewhere to pop from. Mix baking soda into your terracotta paint for the first layer, then build progressively lighter tones on top in thin coats.
Work darker shades into the recessed areas and lighter ones onto the raised ridges, which is exactly how light hits real clay. Varied brush strokes in different directions at this stage produce a surface that genuinely looks three-dimensional.
Integrating With Seasonal Decor
Terracotta tones sit naturally alongside caramel, deep rust, and warm cream, so building a display around a neutral base lets the pumpkins anchor without competing. A few pops of muted burgundy or sage green stop the palette from feeling one-note.
Group the pumpkins with vintage wooden pieces, natural fiber textiles, and candlelight to reinforce the warmth the painted surface already suggests. The key is keeping everything in the same tonal family so nothing looks like it wandered in from a different decorating scheme.
Utilizing Foam and Plastic Bases
Plastic pumpkins get a bad reputation, but they’re genuinely practical for a project like this. They’re lightweight, they don’t rot, and they’ll hold up outdoors in a way real pumpkins simply won’t past mid-October.
Sand the surface lightly before painting to give the paint something to grip, then apply a primer coat before your terracotta layers. That extra prep step takes ten minutes and is the difference between paint that stays put all season and paint that peels the first week.
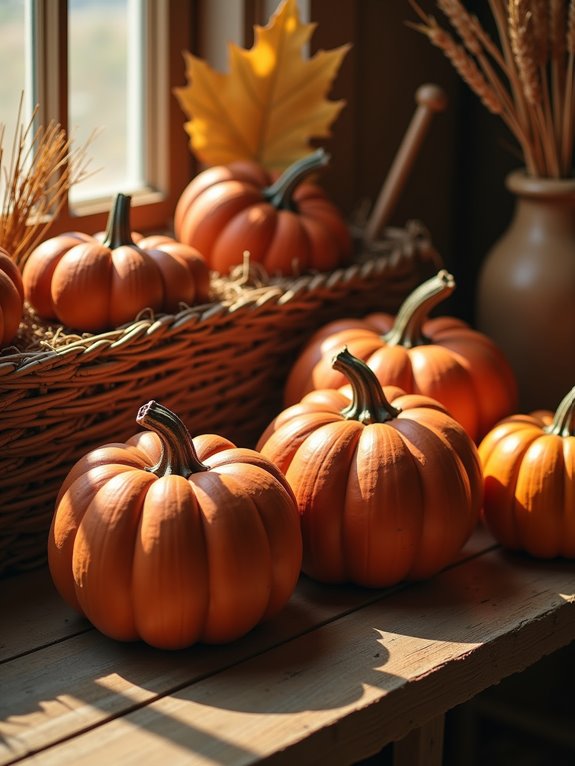
Mixing Sizes for Visual Interest
A grouping of same-sized pumpkins looks like inventory, not decor. Start with one large pumpkin as the anchor, then build outward with medium and small ones at varying heights.
Upturned crates, stacked books, or folded burlap under the smaller pumpkins keep everything from sitting flat on the same plane. That variation in height is what gives the display a natural, organic quality that draws the eye through the whole arrangement.
Combining With Whitewashed Pumpkins
Terracotta and whitewashed pumpkins together do something that either finish alone can’t. The warm clay tones and the cool chalky white create a contrast that gives the arrangement visual movement without requiring any additional color.
Keep the sizes varied within both groups so the two finishes feel distributed rather than separated into camps. The difference in texture between the two surfaces, slightly gritty terracotta against the smooth matte white, adds a tactile quality that makes people want to pick them up.
Display Ideas for Front Porches
Odd numbers are the rule outdoors just as much as inside. Groups of three, five, or seven pumpkins read as intentional without looking rigid.
Stack or layer varying sizes, mix in real gourds for texture contrast, and flank the arrangement with corn stalks or potted mums to frame the entry. A dried wheat wreath on the door above ties the whole porch display together and pulls the eye upward.
Arranging on Mantelpieces
Mantle arrangements give you more control over height variation than porch displays, so use them. Stack smaller pumpkins on books or wooden stands to create levels, and tuck twigs or small branches into the gaps to fill space without crowding.
Mix warm terracotta tones with a charcoal or dark brown piece nearby to give the arrangement some shadow and contrast. A pair of candles or a lantern at one end keeps the display from looking symmetrical, which always reads as more natural.
Styling Farmhouse Tables
The pumpkins need to share the table with other things, and those things matter. A linen runner in warm cream or oatmeal tones gives the display a foundation without competing with the earthy palette.
Scatter a few small gourds, a wooden bowl of acorns, or a bundle of dried botanicals around the pumpkins rather than centering everything in a tight cluster. Pendant lighting or a low candle arrangement above or near the table pulls the warmth of the terracotta tones into the whole room.
Using Air Dry Clay for Stems
Plastic stems are the detail that gives away a store-bought pumpkin, and swapping them out makes a bigger difference than most people expect. Roll air dry clay into a rough cylinder, taper one end, and press in vertical grooves with your fingertip to mimic real stem texture.
Let it dry completely on a non-stick surface before painting, because any flex in a partially dry stem will cause it to crack later. Paint with raw umber and a touch of dark green, let that dry fully, then attach it before sealing the whole piece.
Matte Sealing for Durability
Skip the brush-on sealer here. It streaks, it can pull the baking soda texture, and it sometimes leaves a slightly tacky finish that attracts dust. A spray-on ultra-flat sealant goes on evenly and dries to a true matte that preserves the clay-like quality of the surface.
Apply two light coats minimum, letting each dry completely, and pay particular attention to the base and the stem junction where moisture tends to get in first.
Blending With Rustic Accents
Terracotta pumpkins want to live alongside materials that share their handmade quality. Reclaimed wood, woven baskets, jute, aged metal, rough linen these all speak the same visual language as unglazed clay.
Avoid anything shiny or overly polished nearby, because high-gloss surfaces make the matte terracotta finish look dull by comparison rather than intentional. Keep the surrounding palette in muted greens, warm browns, and earthy neutrals, and the pumpkins will anchor the whole arrangement without needing to fight for attention.