Recent surveys show that 68% of pop-up camper owners plan to renovate their vehicles within the first year of purchase.
That’s wild, right? If you’re like me and you’re dreaming of a DIY glow-up for your own home-on-wheels, you should know that even a few small changes can make your space feel totally new and gorgeous.
I get it, renovation talk can feel totally overwhelming at first. But trust me, as long as you break the project down into super-manageable steps, it stops feeling like a monster task and starts feeling like a fun, rewarding puzzle.
We’re going to walk you through this together so you can tackle these updates with total confidence, whether you’ve renovated a house or never held a power tool!
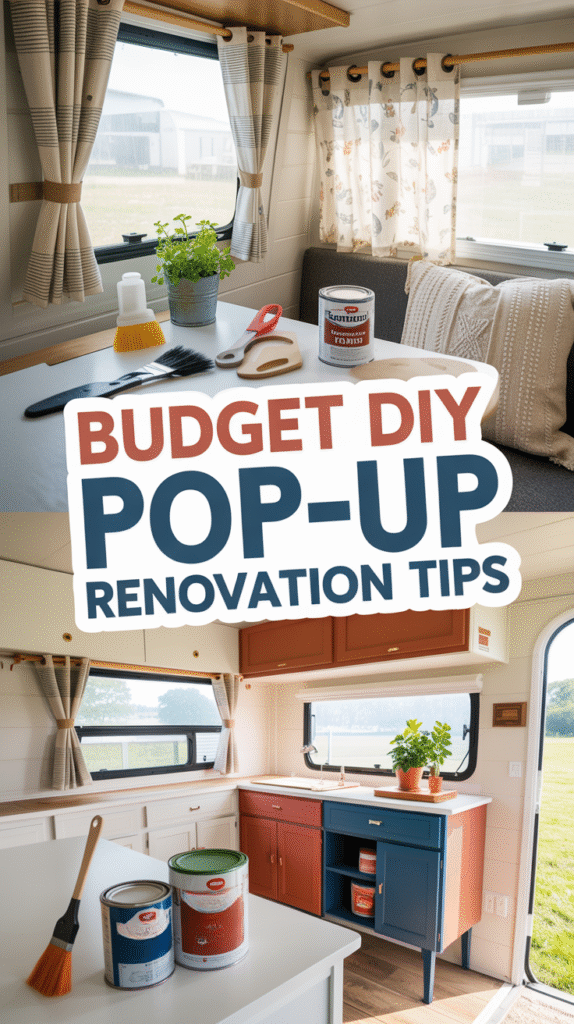
Essential Planning and Budgeting Tips for Your Camper Makeover
First things first, before you go all Chip and Joanna on your pop-up, we absolutely need to talk about proper planning and budgeting. This step is the foundation for a makeover that goes smoothly (and doesn’t bankrupt you!).
Start by evaluating your camper’s current condition and determining your available funds. Create a detailed budget that prioritizes essential repairs and updates while setting aside money for unexpected expenses.
And hey, if you haven’t even bought your camper yet, be a hawk! Scope out Facebook Marketplace and Craigslist for a few months. Patience pays off, because you can snag an incredible deal on a used camper in your price range.
Quick and Easy Flooring Transformations
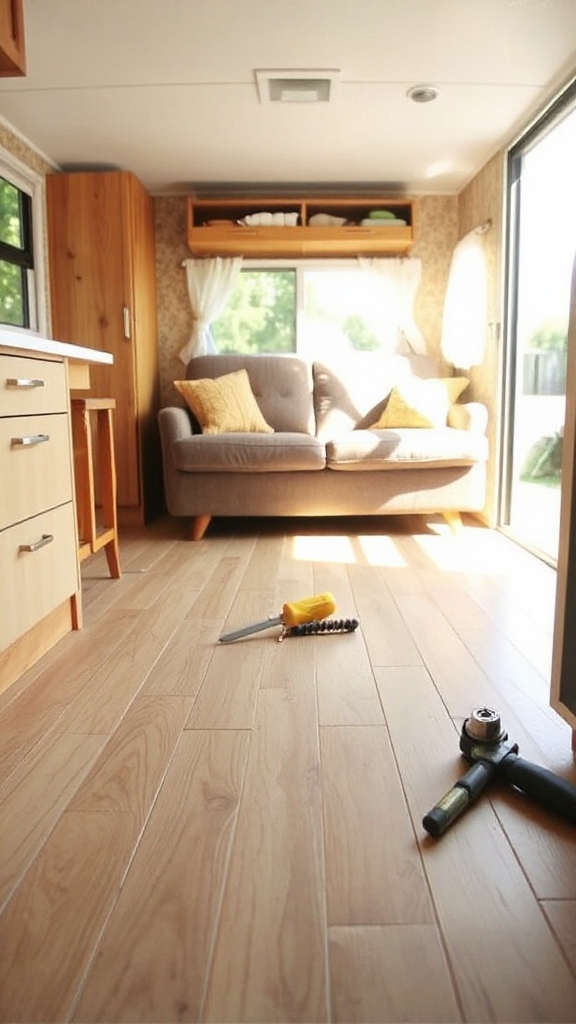
If you want the most bang for your buck and the most dramatic change with the least effort, start with the floor!
Click-lock vinyl planks are honestly your best bet. They’re basically indestructible, super durable, and the best part is you can usually lay them right over your existing floor.
All you really need are basic tools (a good utility knife and a tape measure). For most small pop-ups, two boxes of a simple product like TrafficMaster “Winding Brook” is probably enough, and you get a finish that can handle water and wild temperature swings.
Perfect for camping life!
Simple Window Treatment Ideas That Save Money
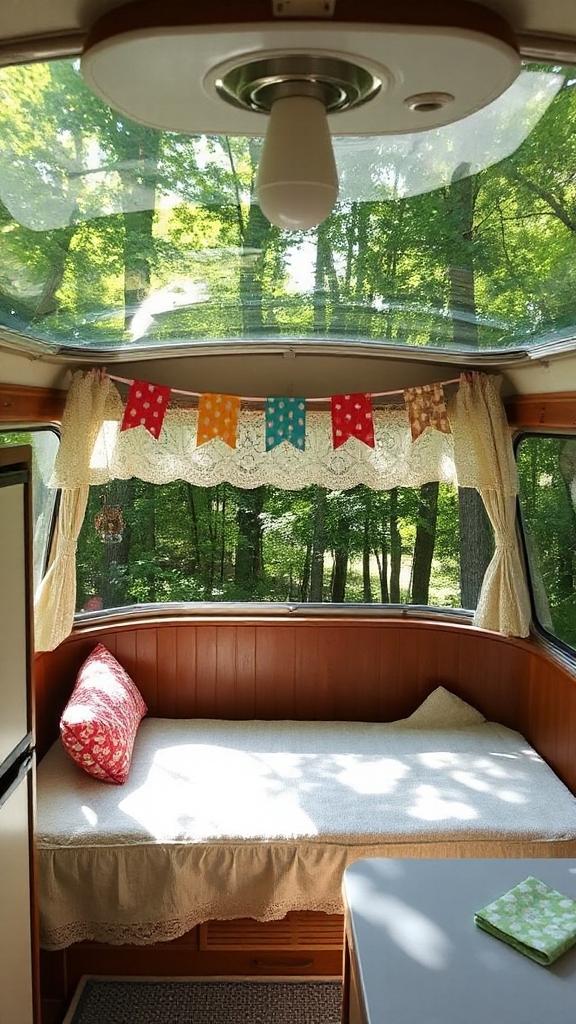
You don’t need to shell out big bucks or hire a pro just to make your window treatments look decent.
A great money-saving trick is to use your existing curtains and just sew or attach a cool new fabric over the top. If sewing machines scare you (I get it!), grab some Steam-A-Seam tape.
It’s basically a magic fabric glue that helps you create professional-looking curtains and valances without a single stitch.
For totally no-fuss options, try adhesive hooks, Velcro strips, or magnets. They’re super easy to install and remove. Which one sounds easier to use? Here’s a crucial tip: take a reference photo of your original curtains before you take them down. Trust me, it makes re-installing the new ones so much less stressful!.
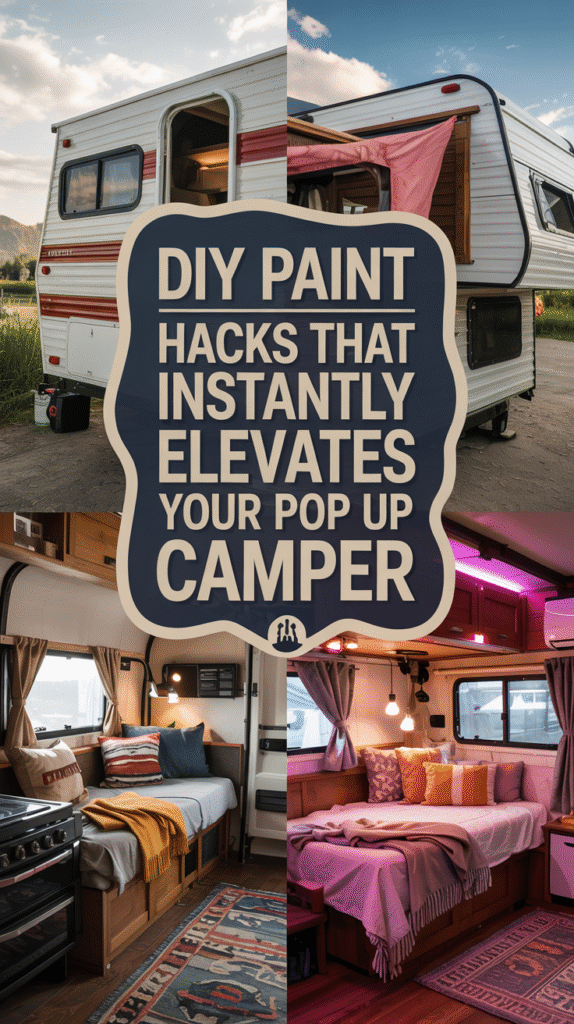
Introduce Colorful Paint
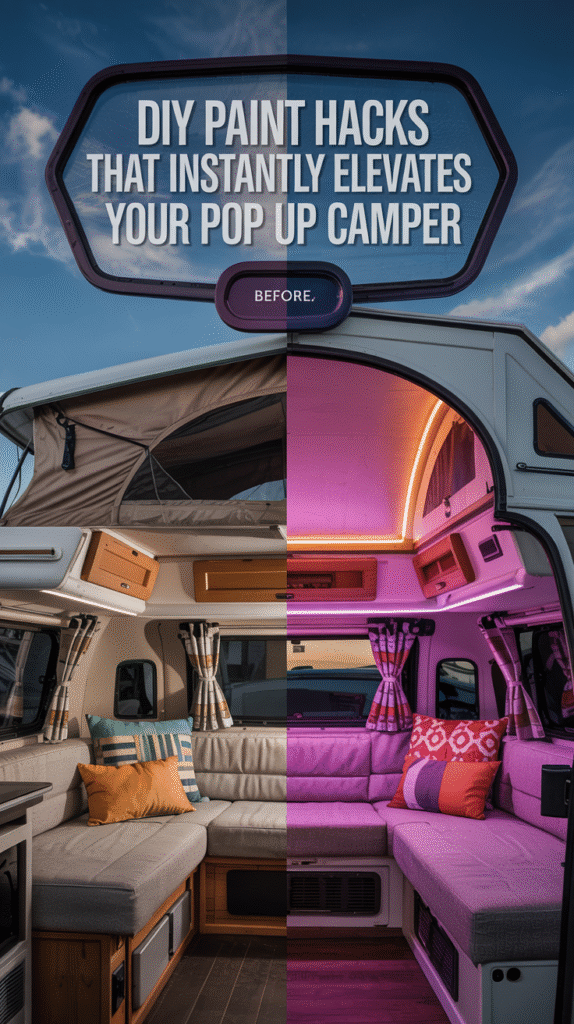
Updating your space with pop up camper interior paint is one of the most affordable and effective ways to transform your camper. A fresh coat of paint instantly revives dated cabinetry, dingy walls, and tired furniture.
Bright whites and soft neutrals help your camper feel open and spacious, while bolder shades like navy, hunter green, or terracotta can be used as striking accents.
For best results, start with thorough cleaning and a quality bonding primer before applying paint. Don’t forget details like ceilings, trim, or tables—small paint updates can make your camper look completely refreshed.
SEE THIS: 21 Pop Up Camper Interior Ideas for Road Trips Across Colorado!
Consider Painting With Cool Blue Accents
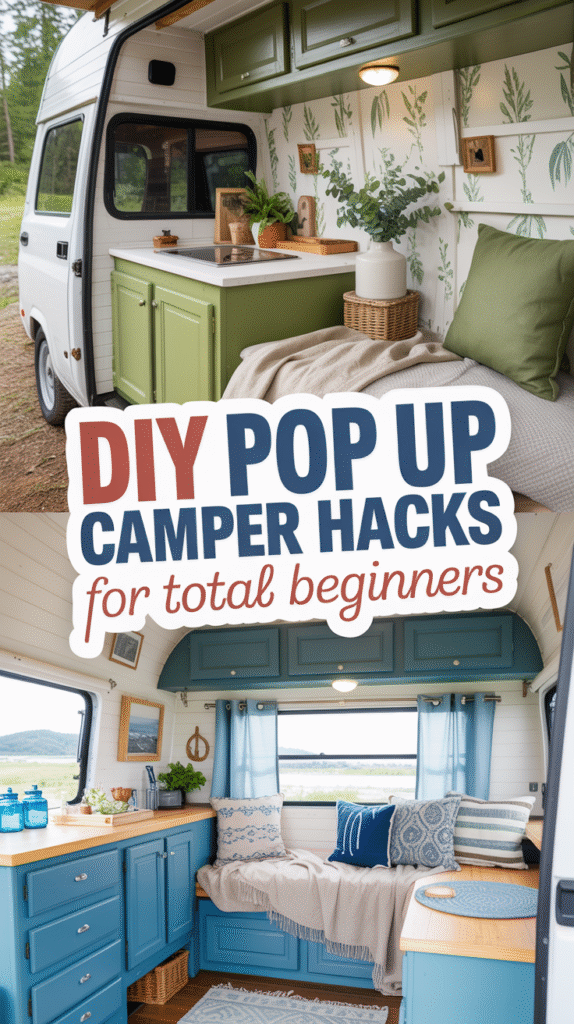
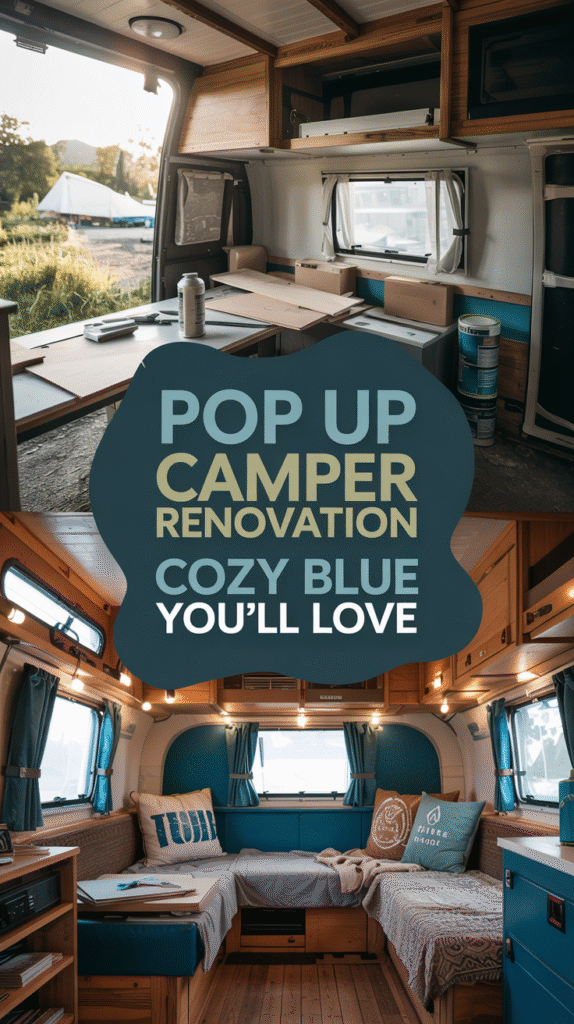
Adding blue color to your DIY pop up camper interior renovation brings a calm, coastal-inspired energy into your space.
If you use soft sky blue on the walls, it instantly makes a small camper feel larger and brighter, which is always the goal, right? Then you can add depth and a touch of sophistication by using darker navy accents on the cabinetry or trim.
You can easily bring this palette to life with throw pillows, some cute patterned curtains, or maybe a freshly painted dinette table in a pale blue.
For a cohesive design, layer different blue tones, powder, denim, and indigo, to create a space that feels both soothing and stylish, perfect for your next camping adventure.
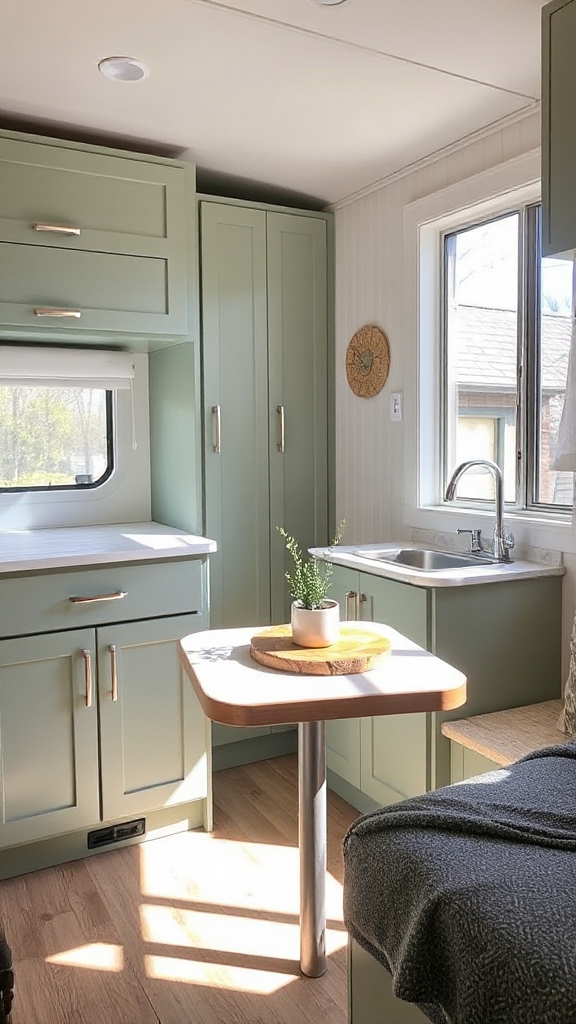
And, You Never Go Wrong With Green
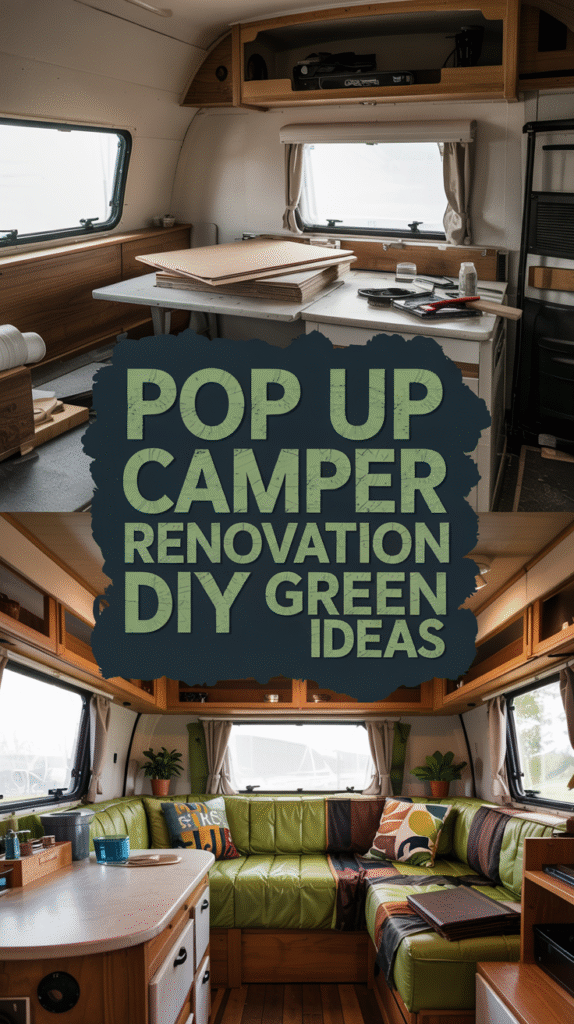
You can never Go Wrong With Green. But hey, if you’re more about the forest than the coast, exploring green paint inside is an amazing way to infuse your camper with a natural, outdoorsy vibe.
Sage or olive tones pair so beautifully with wood finishes, instantly giving your interior a cozy and organic look. You could also try peel-and-stick wallpaper in leafy patterns, or grab some muted green seat cushions or bedding with botanical prints to really tie the design together.
Adding small potted plants or earthy green textiles will enhance the connection to nature. Whether you choose subtle sage or bold emerald accents, green interiors bring warmth, balance, and freshness to your camper.
Budget-Friendly Cabinet and Surface Updates
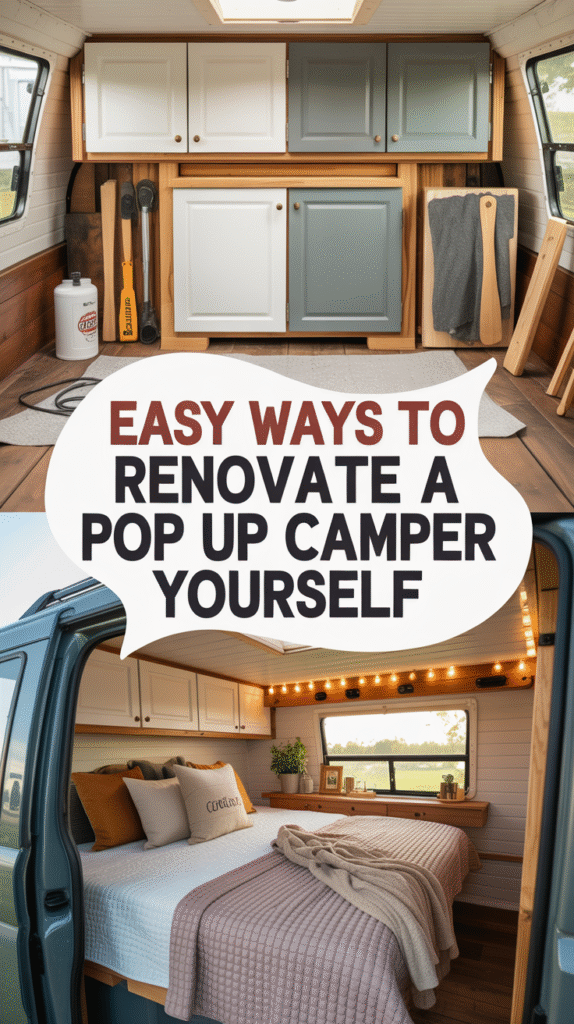
A well-planned cabinet and surface renovation can revolutionize your pop-up camper’s interior without breaking the bank.
One of my favorite tricks is mixing cabinet colors, something like light uppers and moodier lowers, to make the whole space feel intentional and stylish.
Before you dive in, pull everything out and give the surfaces a really good scrub with abrasive pads. It makes such a difference once you start painting. For the doors and little support pieces, premium pine lumber works beautifully: it’s sturdy but still nice and light, which is exactly what campers need.
Apply a chalk paint primer followed by two coats of eggshell finish paint, then protect with water-based polyurethane. Update your look with budget-friendly brushed gold hardware from home improvement stores.
Cozy Bedding Solutions for Better Camping
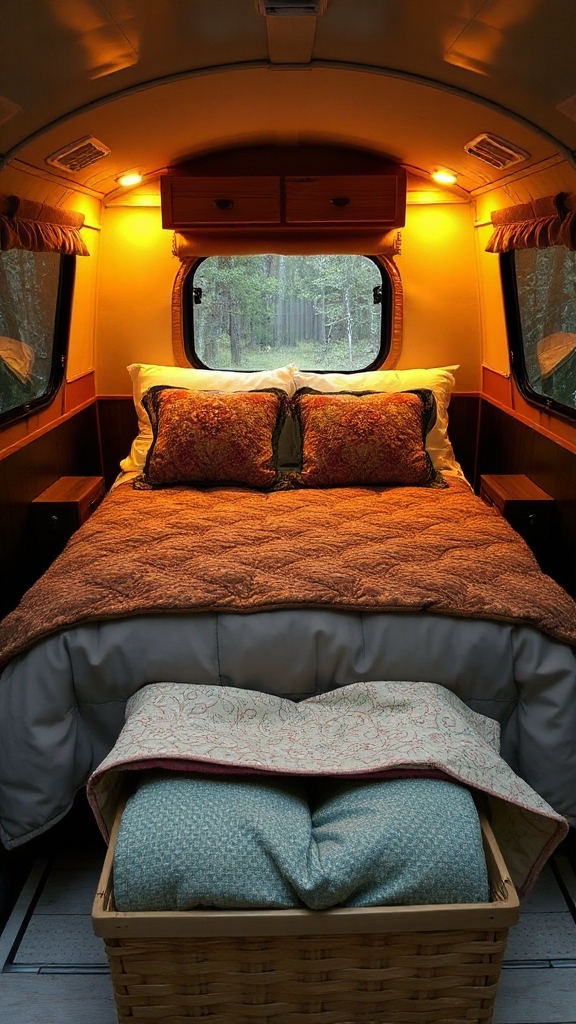
Every camper desires a cozy sleeping environment. Not achieving that coziness can make or break your camping experience.
A simple way to boost comfort is to add a memory foam topper or stack a pair of air mattresses. Jersey sheets with those grippy corners are lifesavers. And if you really hate making beds in tight spaces, zippered bedding like Beddy’s is a total dream.
For extra coziness, layer plush blankets and breathable fabrics that regulate temperature. Consider using waterproof mattress covers to protect your bedding investments from moisture and condensation issues.
Time-Saving Tools and Materials Guide
The right tools and materials can slash your pop-up camper renovation time in half while delivering professional-quality results.
You should definitely stock up on a few essentials! Get a pressure washer for efficient exterior cleaning, foam rollers for smooth paint application, and vinyl plank flooring for quick installation.
LED strip lights are perfect for creating ambiance while conserving energy during your camping adventures.
A thorough cleaning with Mr. Clean Magic Eraser will effectively restore dingy ceiling surfaces to a bright white finish. Don’t forget organizational helpers like Command hooks and magnetic strips to maximize your storage potential.