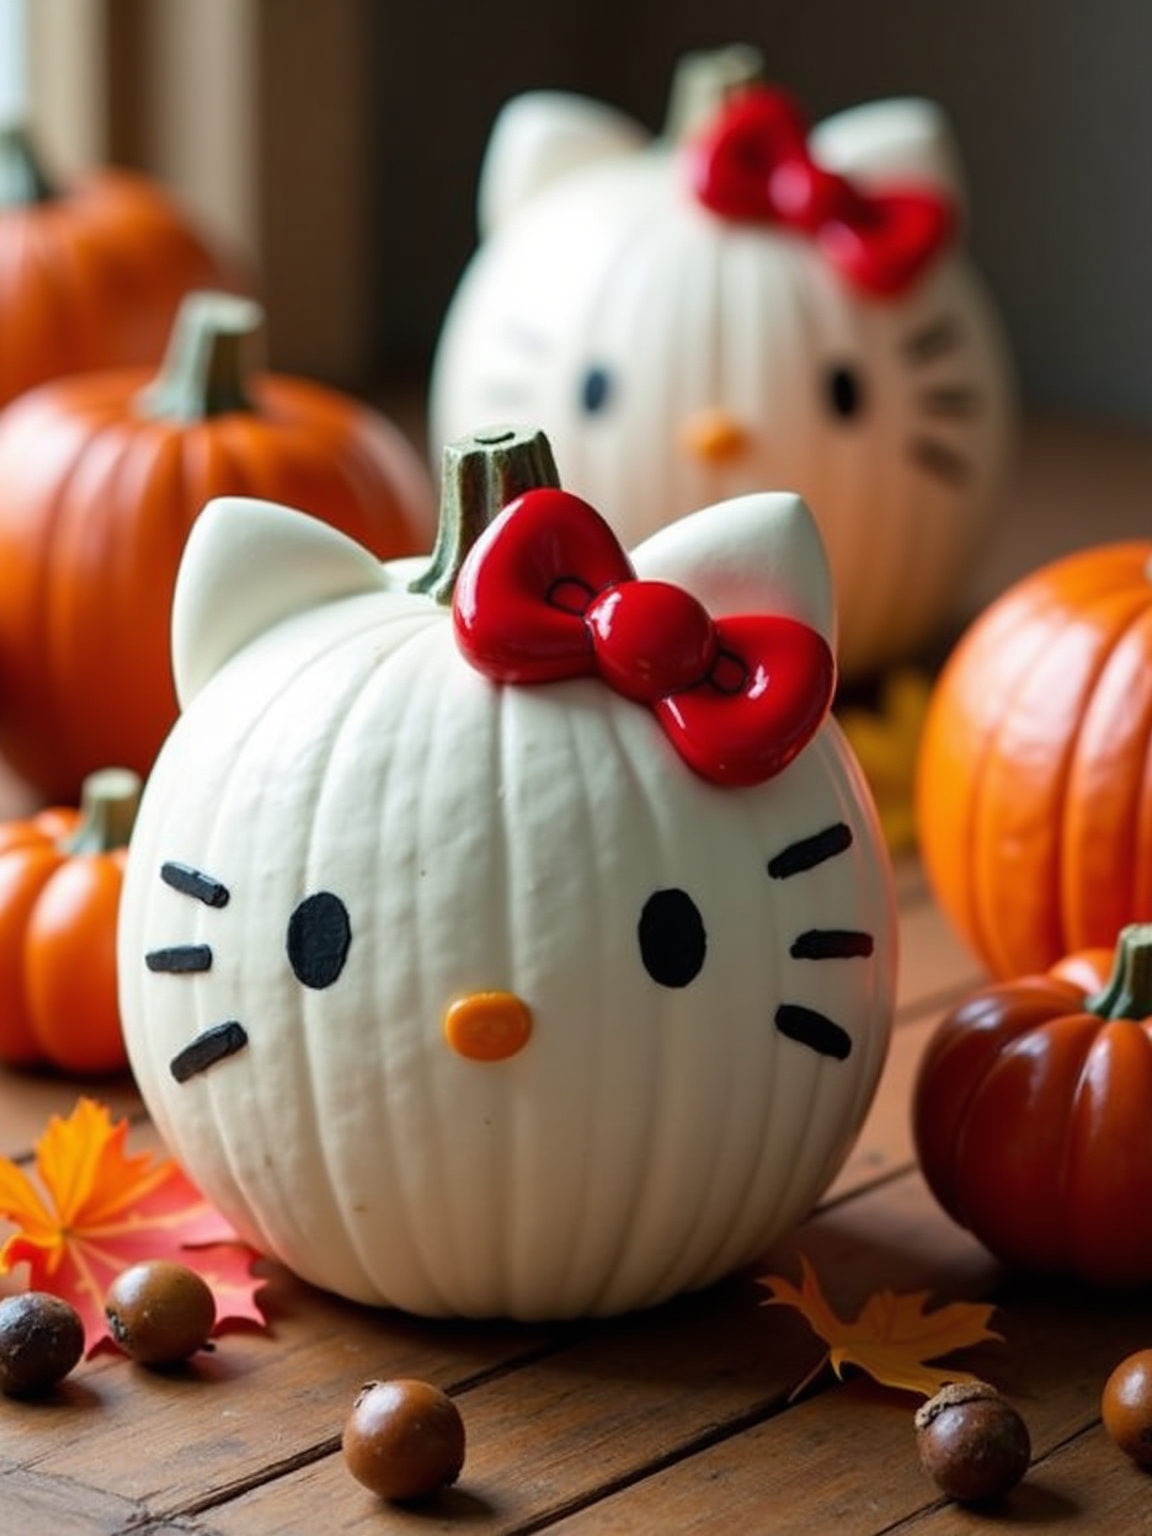
Envision this: a family gathers around their dining table, giggling as they transform foam pumpkins into adorable Hello Kitty masterpieces without the hassle of carving.
This delightful activity not only sparks creativity but also guarantees safety for little hands. With just a few materials like paint, craft foam, and glue, you can create charming autumn decor that showcases your family’s artistic flair.
Ready to explore these Hello Kitty Pumpkin Carving ideas? Now go ahead to discover these easy DIY ways to make your own unique Hello Kitty pumpkins!
Materials Needed for Hello Kitty Pumpkin Crafts

First things first: gathering your supplies. Making a Hello Kitty pumpkin without a knife is a super fun and safe way to enjoy the season, but you definitely want everything laid out before you start.
Start with a pumpkin, of course! You can use a real pumpkin or a foam/fake one (which I love because then you can use them again next year!). Either way works perfectly for this no-carve project. Grab some acrylic paint, it dries nicely and gives a smooth finish, and make sure you have a variety of brushes for the detailed bits.
To cut out her iconic features like those cute ears and her little nose, you will need craft foam or cardstock. A hot glue gun is always my go-to for speedy crafting, but a good, strong craft glue works great too.
I always try to set out everything before we start; it saves you from yelling “Has anyone seen the pink paint?” 100 times!
For the details, you’ll need pink paint or foam for that signature bow, and black paint or a good marker/paint pen will outline her eyes, whiskers, and maybe her nose. A little pop of yellow paint or a tiny foam piece finishes her nose.
Step-by-Step Guide to Decorating Your Pumpkin
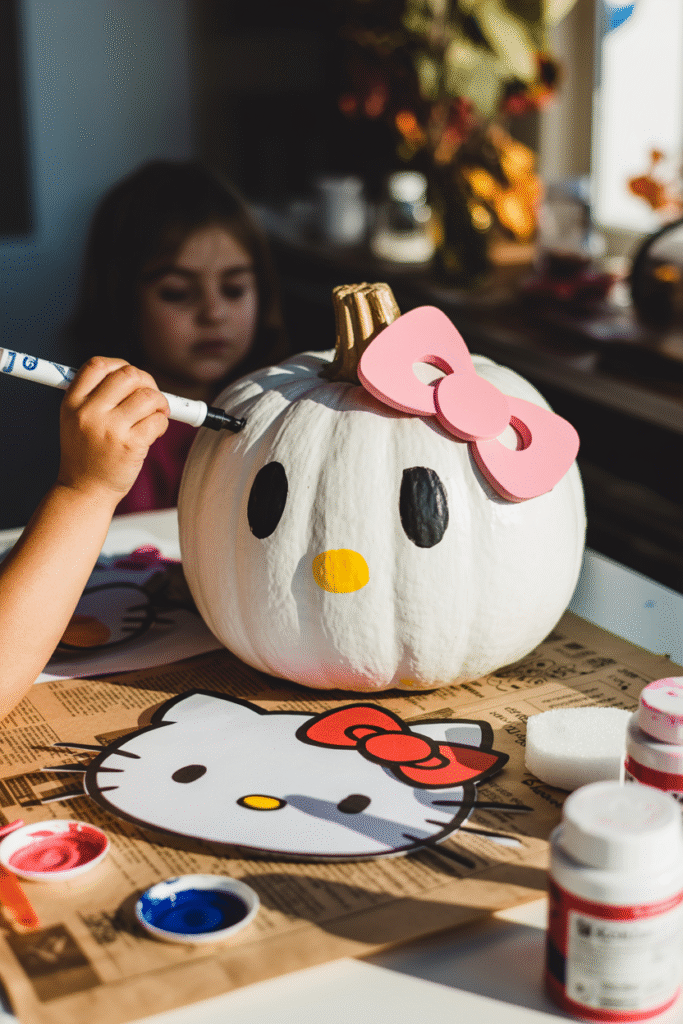
With all your materials gathered, let’s start transforming your pumpkin into the charming face of Hello Kitty. First, pick a smooth, flat pumpkin and clean it thoroughly. Lay down newspapers to catch any paint spills.
Once your pumpkin is dry, apply a base coat of white or green paint using a large sponge or brush. Confirm even coverage by using acrylic or craft paint, which may require multiple coats for full opacity. Let it dry completely before proceeding.
Next, use a black paint pen to draw Hello Kitty’s eyes as ovals, and paint a yellow oval nose outlined in black. Add three black whiskers on each side.
For the bow, use pink paint to create precise shapes. Cut ear shapes from colored cardstock, then attach them with tape or toothpicks.
Ensure your pumpkin is sturdy enough for carving to prevent it from collapsing when attaching accessories. Secure additional accessories with hot glue if needed.
Creative Variations for Unique Designs
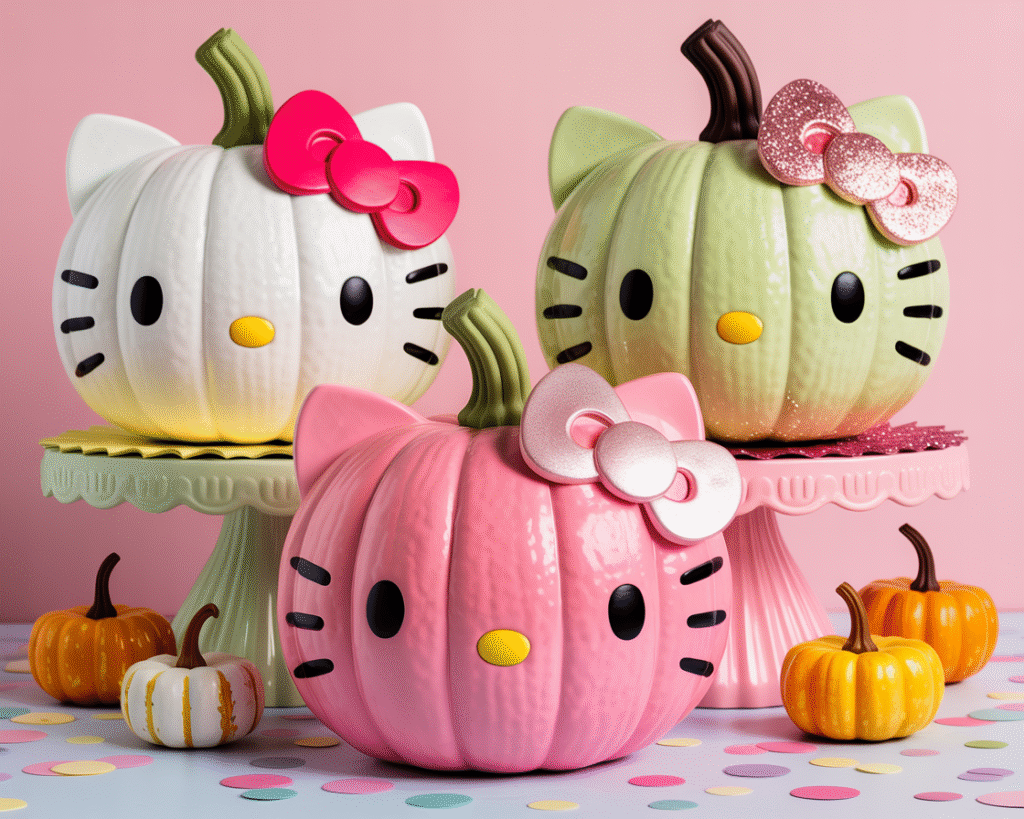
There’s no fun in copying designs online: the fun part is making it your own. Exploring creative variations for Hello Kitty pumpkin designs lets you really personalize your decorations and give them a unique flair..
I usually lean toward foam pumpkins because they’re lightweight, last forever, and you can paint them over and over! You can stick with the traditional white or mix it up with a pale light pink base.
For a spooky twist, try a green spray-painted base. Use paint pens in pink, black, and yellow to add precision to small details like whiskers and bows.
Hello Kitty Pumpkin Carving ideas: Enhance your design with cardstock cut into Hello Kitty’s ears, attached with toothpicks for dimension. Hot glue or tape can securely affix embellishments like bows and recycled items, such as painted spools of thread, to your pumpkin.
Safety Tips for a Fun Crafting Experience
Before you pull out the glue and paint, let’s just make sure the area is prepped so we can avoid any little disasters, okay? You know how quickly things can go sideways.
Start by creating a clean, dry, and well-lit workspace. That way, nobody is slipping on paint spills or bumping into things. You need a sturdy table that won’t wobble, and it’s smart to keep your hands and the pumpkin dry so tools don’t slip. Good light is also huge. It helps you see clearly and avoids those clumsy mistakes.
Adults should handle carving, leaving children to draw designs or clean out the pumpkin. Older children can carve under close adult supervision using age-appropriate tools.
Always supervise children with carving tools, and make sure they don’t place hands inside the pumpkin. Select specialized pumpkin carving kits with serrated saws instead of sharp kitchen knives. Use gentle, controlled cutting motions, carving away from your body.
Don’t rush the process; take your time to guarantee precision. Always stay aware of hand positions to avoid injuries.
Tips for a Perfect Finish and Long-Lasting Decor
The zone is now secure; let’s get to the real mission: crafting a Hello Kitty pumpkin to make sure it stands out and lasts throughout the season.
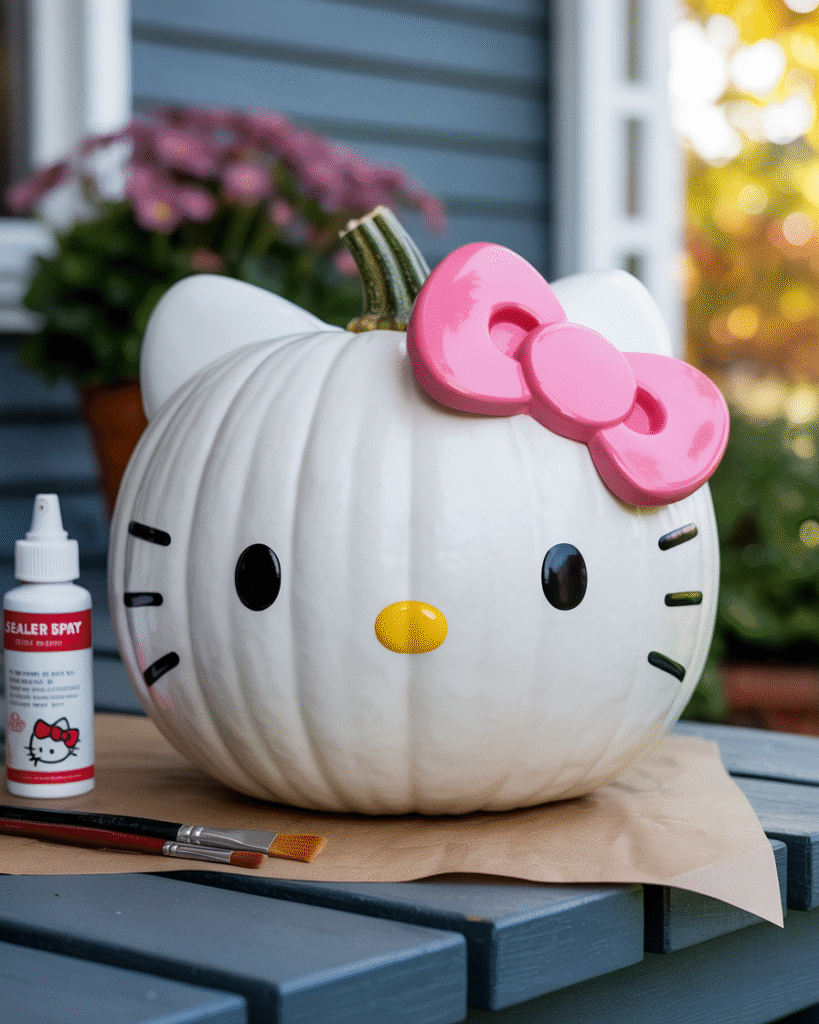
Dirt and paint don’t go well, so we need to give the pumpkin a fresh start. Start by selecting a pumpkin with a smooth, flat surface and wash it thoroughly. I always recommend using a white acrylic paint base coat. Keep the layers thin to avoid gross drips, and let each coat dry completely.
Outline Hello Kitty’s features with black paint for crisp definition, using a variety of brush sizes for precision.
When you attach the accessories, like the iconic bow or a cute little hat, make sure they are super secure with strong glue or double-sided tape. We don’t want anything flying off when the wind blows.
After everything is totally dry, give the whole thing a generous coat of a clear acrylic sealer spray. This is your pumpkin’s raincoat; it protects it from moisture and keeps that paint from fading out in the sun.
Finally, show off your beautiful creation in a cool, shaded area. To keep it looking fresh, especially if you used a real pumpkin, you can mist it with a little water or a pumpkin preservation spray now and then..
Inspiring Ideas for Themed Hello Kitty Creations
Why not infuse a bit of creativity into your Halloween decorations with themed Hello Kitty pumpkin designs?
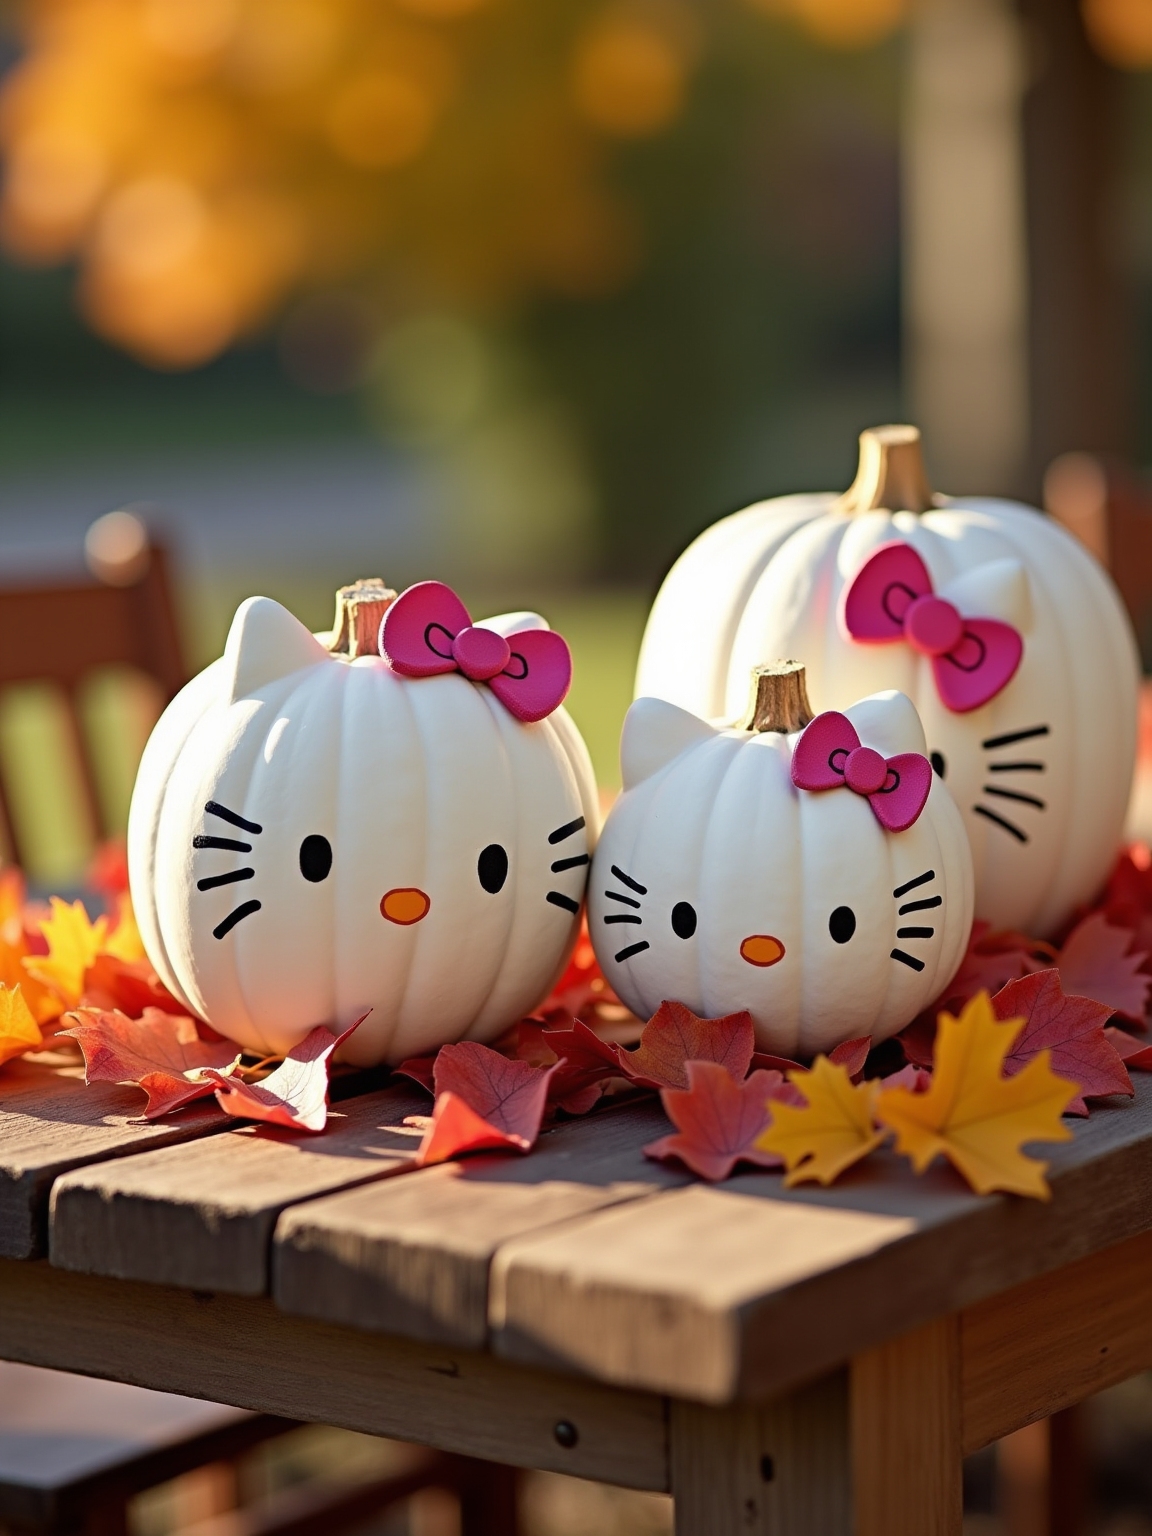
Start with the iconic Hello Kitty face by painting your foam pumpkin white, ensuring full opacity. Use paint pens or brushes to add the large black eyes, small yellow nose, and three whiskers on each side. A pink or red bow, crafted with rounded shapes, completes the classic look.
Want something a little spookier? Try adding some Halloween flair! You could paint on stitches, or even incorporate her friends, like the goth-cute Kuromi, for a fun thematic twist. Again, cut those ears and bows from cardstock or foam and use toothpicks for a cool, pop-out 3D effect.
Don’t feel locked into white! Play around with different background colors like light pink or green to match your personal style or your existing decor.
You know what else is fun? Hosting a themed decorating party! It’s such a great way to encourage creativity. Share your creations online, using hashtags like #hellokittypumpkin, to engage with a community of Hello Kitty enthusiasts.