| What this is: 15 genuinely doable DIY fall decor projects — most under $5 each, all Dollar Tree friendly, and every single one designed to make your room feel like autumn from the inside out. Who it’s for: Anyone who wants a cozy, decorated fall home without spending real money — renters, crafters, dorm dwellers, first-time DIYers, and every person who has ever walked out of Dollar Tree with a cart full of autumn vibes and no actual plan. Why read it: You’ll get a clear supply list, a step-by-step how-to, and a real explanation of why each project works — so you’re not just saving ideas, you’re actually making things and putting them up this weekend. |
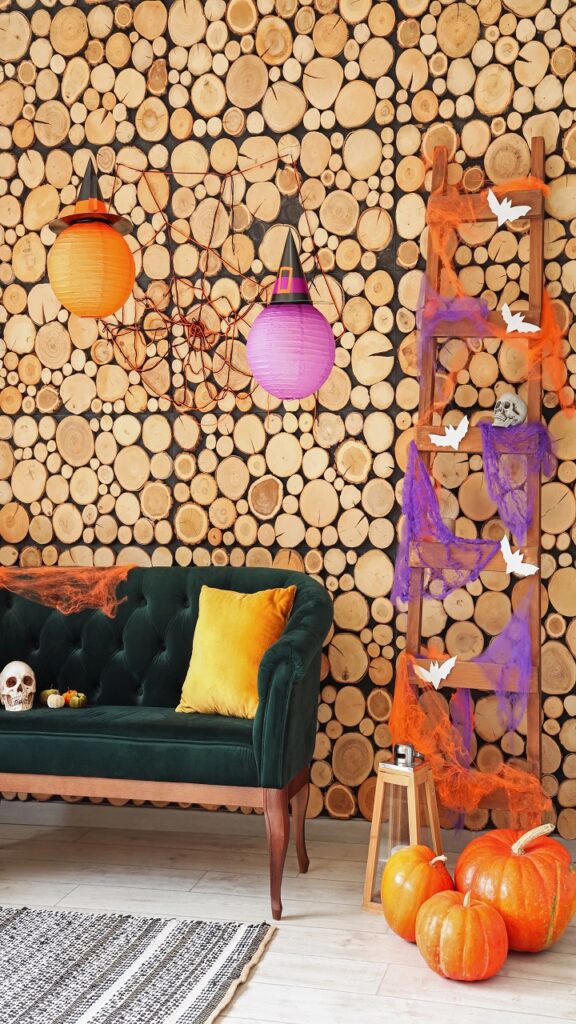
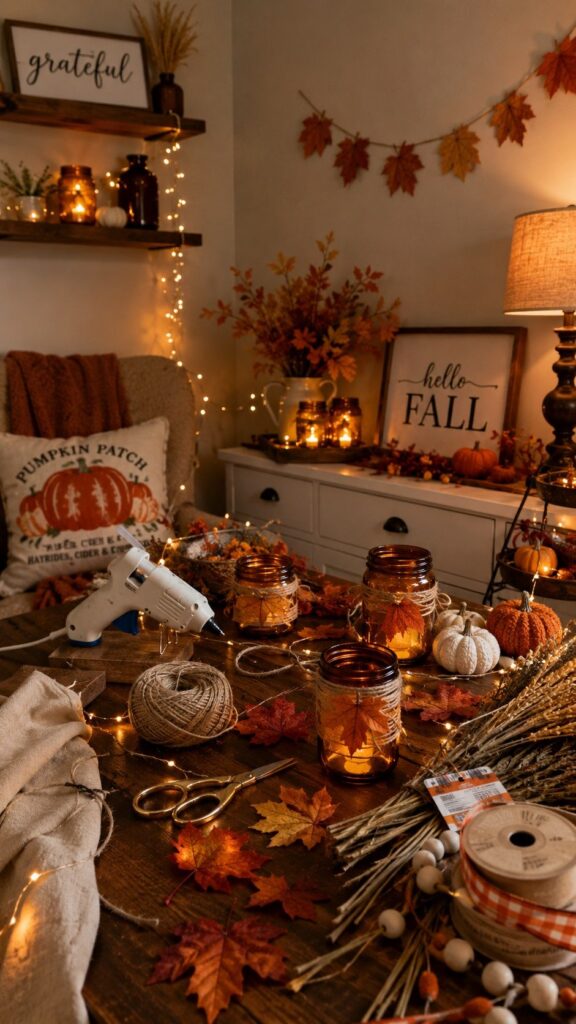
Let me tell you something about fall decorating that the glossy home magazines never will: some of the coziest, most Pinterest-worthy autumn rooms in existence were built almost entirely from dollar store finds, a hot glue gun, and a Saturday afternoon with good music playing.
I’ve seen it. I’ve lived it. I have personally gone “absolutely feral” (my roommate’s words) in the Dollar Tree fall aisle, and I am not even slightly ashamed.
The truth is, DIY fall decor is the move that separates a room that *looks* decorated from one that actually *feels* like autumn. When you make the thing yourself — when you baked those amber jars and strung those lights and bundled those stems — the room carries a warmth that no store-bought arrangement can replicate, because it carries a little bit of you in it. And when the whole project cost you $4? Even better.
These 15 projects are grouped into categories so you can do one efficient Dollar Tree run and come home ready to tackle a whole room. Supplies overlap intentionally — grab the essentials once and knock out multiple projects in the same session. Most take under an hour. All of them are genuinely easy, even if you’ve never picked up a glue gun in your life. Let’s go!
Dollar Tree Essentials to Grab Before You Start
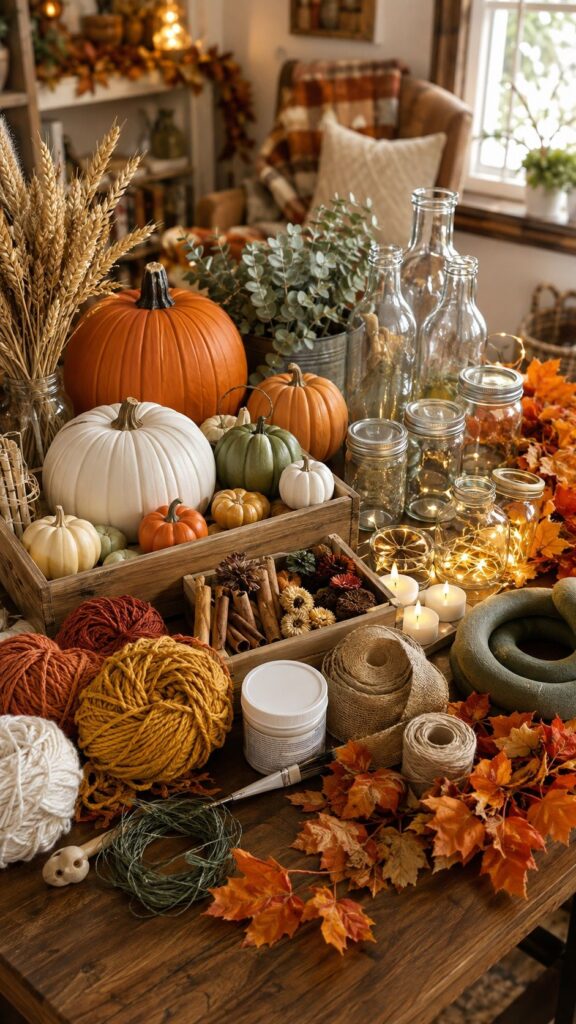
Before the projects, here’s your core shopping list — the supplies that show up across almost everything in this guide. One good haul covers most of the 15:
- Faux foam or plastic pumpkins (small, medium, large)
- Faux fall leaves and maple leaf garland
- Clear mason jars or glass bottles
- Battery-operated fairy lights and LED tea lights (flameless)
- Wooden trays or crates
- Jute twine or burlap ribbon
- Mod Podge and small paintbrushes
- Chunky yarn in rust, mustard, or cream
- Dried wheat stems or eucalyptus bundles
- Small foam wreath forms
- Cinnamon sticks and assorted dried botanicals
Now — let’s build your fall room.
Section 1: Glow Projects — Lighting That Makes the Whole Room Feel Like Autumn
Here’s something most people get wrong about fall decor: they put all their energy into surfaces and forget about light.
The right light at the right height is what makes a room actually feel like a cozy October evening rather than just look like one. These four projects fix that, and they’re all achievable for a few dollars each.
### Project 1: DIY Amber Mason Jar Votives
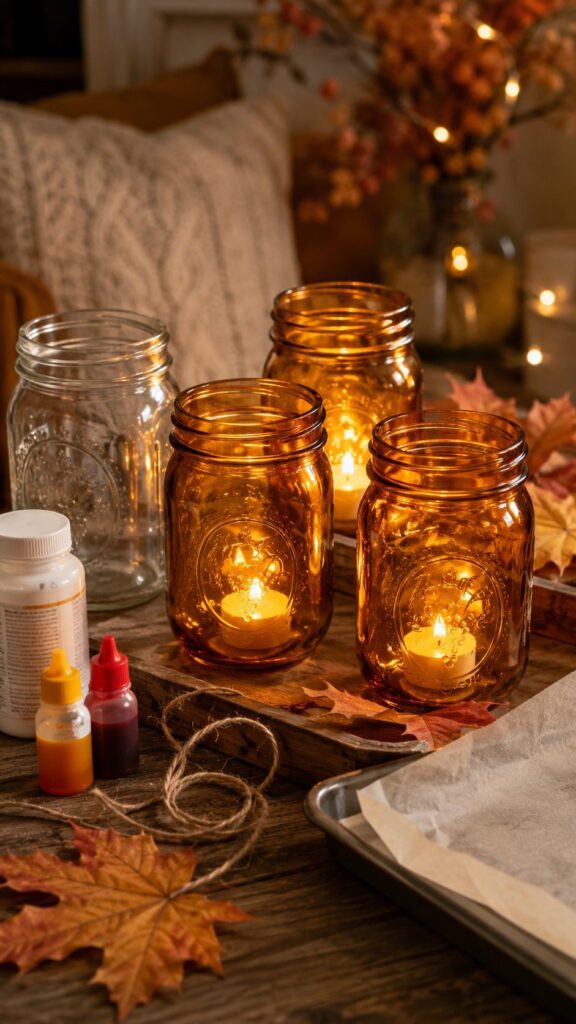
This is the one that started everything for me, and it remains the single most impactful Dollar Tree fall decor DIY you can do. The effect — warm, glowing amber light bouncing off a glass jar — looks like something from an expensive home boutique. The process is embarrassingly simple.
Supplies: Clear mason jars, Mod Podge, orange and yellow food coloring, parchment paper.
How to: Mix two tablespoons of Mod Podge with two or three drops of orange food coloring (add a tiny drop of yellow to warm the tone). Pour the mixture into a clean, dry mason jar, swirl to coat every surface, then tip out the excess over a bowl.
Set the jar upside down on a parchment-lined baking sheet and bake at 200°F for two hours. The heat sets the color into the glass and gives it that gorgeous glowing amber finish that behaves exactly like real tinted glass in candlelight. Once cool, drop a battery-operated LED tea light inside and watch the room change.
Why it works: The amber tint warms every light source near it, casting that golden, honeyed glow that our brains associate with fire, harvest, and shelter. It’s visceral and immediate — and the whole project costs about $2. Absolute genius!
### Project 2: Rope-Wrapped Bottle Lights
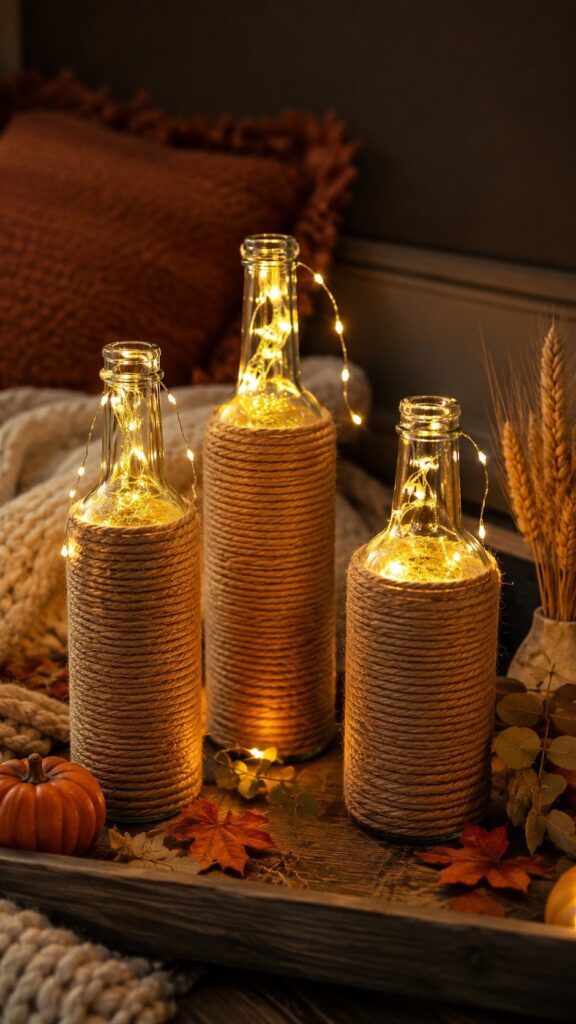
Supplies: Dollar Tree glass bottles (clear or green), jute twine, hot glue gun, battery micro LED strand.
How to: Starting at the base of a clean glass bottle, apply a small dot of hot glue and press the end of your jute twine in place. Wrap the twine tightly around the bottle, applying a new dot of glue every four or five rows to hold it in place.
Continue until you’ve covered as much of the bottle as you want — covering the bottom two-thirds and leaving the neck exposed is a great look. Tuck a strand of micro fairy lights inside and let them cascade out of the opening. The rope diffuses and softens the light beautifully, creating a warm, rustic lantern effect that looks completely hand-crafted — because it is.
Why it works: Texture and light together are a cozy room’s secret weapon. The rough jute against the glow of the lights creates exactly the kind of tactile-visual warmth that makes a corner feel like somewhere you want to sit and stay. Total vibe!
### Project 3: Lantern Cluster Centerpiece
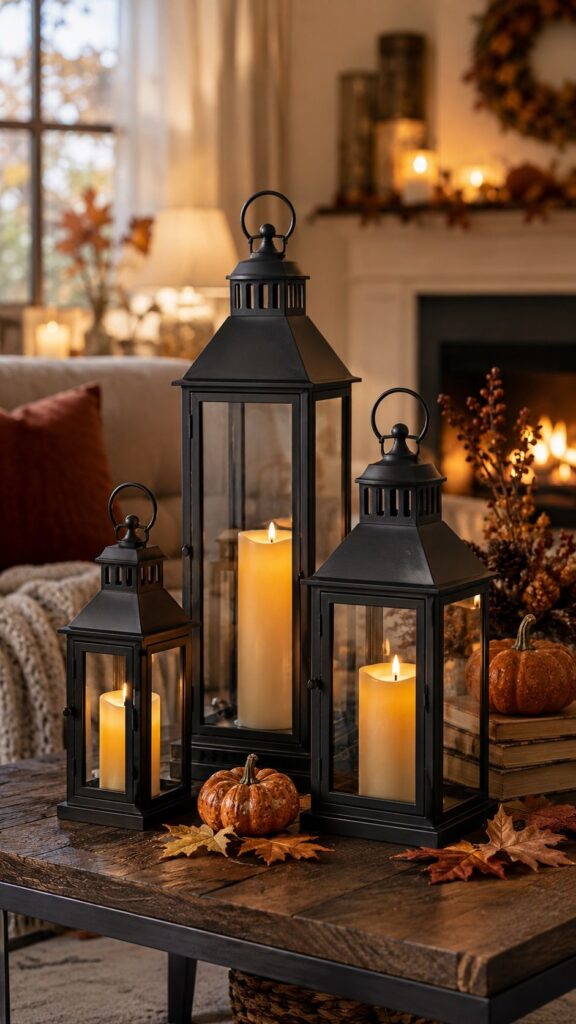
Supplies: Two or three Dollar Tree lanterns in different sizes, matte black or dark bronze spray paint ($4 a can from any hardware or dollar store), flameless pillar candles.
How to: Lay your lanterns on newspaper outside and spray them with matte black or dark bronze paint. Two thin coats, letting each dry fully, give a far better finish than one thick coat. Once dry, arrange them in a cluster at varying heights on your coffee table, mantel, or console — a large one in the center, a small one to the left, a medium one set slightly forward.
Place a flameless candle inside each one. The height variation and the dark metal finish make this look like a curated, expensive set. Nobody will guess it came from Dollar Tree.
Why it works: Grouped items at varying heights read as deliberate design rather than accumulation. The dark metal grounds the warm candlelight beautifully, and the cluster creates one strong visual moment rather than three scattered ones. This is the cheap DIY fall decor move that punches the furthest above its price. Pure magic!
### Project 4: Fairy Light Canopy Over the Bed
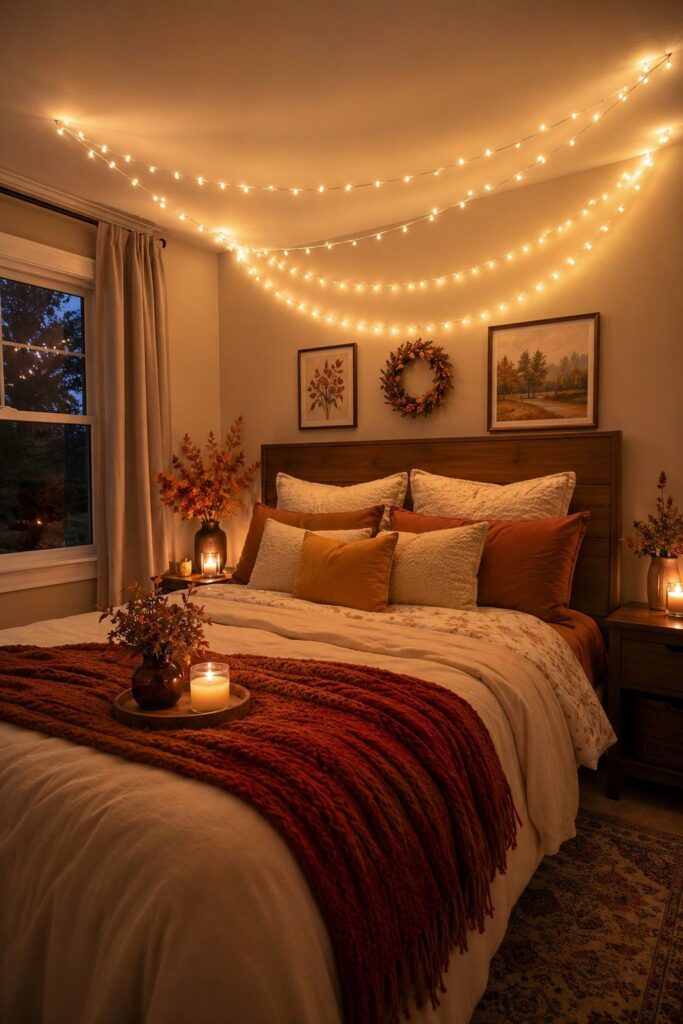
Supplies: Two or three packs of warm white battery-operated fairy light strands (Dollar Tree carries these in fall), Command adhesive hooks.
How to: Use Command hooks to attach the strands along the ceiling above your bed frame, draping them in gentle swoops from the headboard wall outward. The key is *warm white* — not cool white, not blue-tinted white.
Warm white sits in the 2700K color temperature range, and the difference between that and cool white is the difference between a cozy autumn evening and a fluorescent office. Battery-operated strands mean you’re not tied to an outlet and can arrange freely.
Why it works: Layering light sources at different heights is the single most effective atmospheric move in a room. Overhead fairy lights create a canopy effect that makes the bed feel like its own little retreat — exactly the lived-in, cozy fall room energy we’re building toward. Turn off the overhead light, turn these on, and the transformation is immediate and dramatic. So dreamy!
Section 2: Surface Projects — Vignettes, Shelves, and Tabletops That Look Intentional
Once your lighting is sorted, surfaces are where the fall detail lives. These projects are fast, cheap, and designed to work as a cohesive room rather than individual random pieces.
### Project 5: Stacked Pumpkin Topiary
Supplies: Three foam pumpkins in small, medium, and large; a wooden skewer or dowel; hot glue; a terracotta pot; dried moss.
How to: Stack the pumpkins from largest to smallest, pushing the dowel through the center of each one to keep them aligned. Hot glue between each pumpkin for extra stability.
Fill the terracotta pot with crumpled newspaper or floral foam, push the base of the dowel in, and cover the top with a layer of dried moss. The whole thing takes fifteen minutes and looks wildly impressive for its effort level. Paint the pumpkins white or cream for a modern, neutral topiary that works in any room aesthetic — or leave them orange for classic fall energy.
Why it works: Vertical elements create visual interest and break up the horizontal plane of a shelf or tabletop. A topiary reads as a decor focal point, not just a decoration, which is exactly what makes it look store-bought at $20 when it cost you $4.
### Project 6: Wooden Tray Fall Vignette
Supplies: Dollar Tree wooden tray, mini pumpkins, a small candle holder, acorns or pinecones, a folded square of plaid fabric.
How to: Lay the plaid fabric flat inside the tray as a base layer. Arrange your mini pumpkins in a cluster of three (odd numbers always look more natural than even), tuck the candle holder in beside them, and scatter a few acorns or pinecones in the gaps.
The contained tray makes a loose grouping look deliberate and styled. A warm-toned color palette in the fabric — rust plaid, mustard, or warm brown — ties the whole thing together. Done in five minutes, looks like it took thirty.
Why it works: A tray is the cheat code of surface styling. It creates a visual boundary that makes whatever’s inside look curated. Without the tray, three pumpkins on a table look random. Inside the tray, they look designed. This is the secret every stylist knows and almost nobody talks about.
### Project 7: Dried Botanical Arrangement
Supplies: Dollar Tree dried wheat stems, eucalyptus sprigs, faux berry branches, a dark bottle or vase, jute twine.
How to: Take your stems and arrange them in a loose bundle — tallest at the back, shorter elements layered in front — before placing them in the vase. The bundle should be slightly wider at the top than the base for that relaxed, gathered look. Tie a loose bow of jute twine around the neck of the vase to finish. This works in any room and any aesthetic; swap the vessel from terracotta to dark glass to brass and the whole feel shifts.
Why it works: Natural elements bring organic texture into a space that no synthetic decor can replicate. The irregular shapes and muted tones of dried botanicals read as both seasonal and sophisticated — which is exactly why this single move appears in virtually every cozy fall room that actually looks good. Effortlessly beautiful!
### Project 8: Nature Bowl Centerpiece
Supplies: A Dollar Tree decorative bowl or shallow basket, real pinecones (free, from outside!), mini gourds, a cinnamon stick bundle, dried leaves.
How to: Fill the bowl loosely with pinecones as a base layer, then tuck mini gourds in at different heights so they sit above the pinecone level. Add the cinnamon stick bundle leaning against one side and scatter a few dried leaves across the top.
This is the project that costs the least and earns the most compliments — partly because it smells incredible. The natural mix of textures (smooth gourds, rough pinecones, papery leaves, fragrant cinnamon) makes it look both artistic and organic.
Why it works: Fall is a sensory season. A bowl of natural elements engages smell and touch as much as sight, which is what separates a genuinely atmospheric fall room from one that just has orange things in it.
Section 3: Wall Projects — Damage-Free Ways to Dress Your Walls for Autumn
### Project 9: Pressed Leaf Gallery
Supplies: Real fallen leaves, Dollar Tree frames, white card stock, Command strips.
How to: Collect a handful of fallen leaves in different shapes and sizes — maple, oak, and ginkgo all press beautifully. Place them between two sheets of paper inside a heavy book and stack a few more books on top. Leave for five to seven days until fully flat and dry. Arrange one or two leaves on white card stock, place in your Dollar Tree frames, and hang using Command strips.
A grouping of three mismatched frames at different heights makes an elegant gallery that costs nothing — the leaves were free, the frames were $1.25 each, and the result looks genuinely beautiful.
Why it works: Real natural elements carry an authenticity that faux alternatives can’t quite match, and the simplicity of a pressed leaf on white background is clean, seasonal, and artistic in the best understated way. Genuinely clutch!
### Project 10: Chunky Yarn Wreath
Supplies: Dollar Tree foam wreath form, chunky yarn in rust or cream, a few faux fall leaves, hot glue.
How to: Tie the yarn end to the wreath form with a knot, then wrap tightly and continuously, keeping the rows close together so no foam shows through. When you reach the end, secure with hot glue.
Hot glue a small cluster of faux leaves at the top or bottom — three leaves at slightly different angles looks more natural than a perfect fan. Add a jute bow if you like, then hang with a Command hook.
The whole project takes about thirty minutes and produces a soft, textural wreath that works indoors on a wall or door just as well as outside.
Why it works: Chunky yarn reads as warmth — it’s the textile equivalent of a cozy sweater, and that association is immediate when someone sees it hanging on a wall. It’s also incredibly cost-effective: one skein of Dollar Tree yarn covers a standard wreath form completely, meaning this project costs about $3 total. Absolutely love it!
### Project 11: Leaf Garland Wall Drape
Supplies: Dollar Tree faux maple leaf garland, Command hooks, jute twine.
How to: Use Command hooks to create anchor points across the wall — above a headboard, along a shelf line, or framing a window. Drape the leaf garland in gentle swoops between the hooks, letting it hang naturally rather than pulling it taut.
Layer two garlands in slightly different tones (bright orange and a deeper burgundy-rust look gorgeous together) for depth. This is a ten-minute project with a genuinely transformative effect — a wall that was blank becomes an autumn focal point, and it all comes down without a mark when the season changes.
Why it works: A garland gives a wall movement and softness that a framed picture can’t. The slight droop of the swag catches the eye and creates a sense of abundance — exactly the harvest energy we want in a fall room. It’s the oldest decorating trick in the book and it works every single time!
Section 4: Scent Projects — Because a Fall Room Should Smell Like It Too
### Project 12: DIY Cinnamon Bundle
Supplies: Dollar Tree cinnamon sticks (usually sold in bundles), jute twine, dried orange slices (optional — available at Dollar Tree in fall).
How to: Take eight to ten cinnamon sticks, align them in a neat bundle, and tie tightly with jute twine in two or three places along the length. Finish with a simple bow at the top. If you have dried orange slices, tuck one flat against the side of the bundle before tying. Hang from a drawer pull, rest in a vase, or lean against your shelf vignette. The warmth from a nearby lamp will gently release the scent throughout the room.
Why it works: Scent is the most direct route to an emotional response of any sensory input — faster than color, faster than texture. A cinnamon bundle near a warm lamp turns a room into a memory before you’ve even looked around. The cost is essentially zero, and the effect is completely disproportionate to the effort. Total win!
### Project 13: Wax Melt Discs
Supplies: Dollar Tree unscented tea light candles, a silicone ice cube mold, cinnamon and clove essential oils (Dollar Tree stocks these in fall), a wax warmer (or use an existing one).
How to: Carefully remove the wax from six or eight tea light candles and melt it in a microwave-safe bowl in 30-second intervals, stirring between each. Once fully liquid, add eight to ten drops of cinnamon oil and four drops of clove oil and stir well.
Pour into the silicone mold and let cool fully before popping out. Each disc goes in a wax warmer exactly like a store-bought melt. You’ve made a batch of custom homemade fall decor scent for about $1, versus $5–8 for a single pack of branded melts. Insanely satisfying!
### Project 14: Simmer Pot
Supplies: A small saucepan, water, orange slices, cinnamon sticks, whole cloves, a vanilla pod or a teaspoon of vanilla extract.
How to: Fill a small saucepan with water, add two or three orange slices, two cinnamon sticks, a teaspoon of whole cloves, and either a split vanilla pod or a teaspoon of extract. Set on the lowest heat your stove allows and let it barely simmer — you want fragrant steam, not a boil.
Top up the water as needed. The whole house smells like fall within minutes, and the warm, spiced scent works on your nervous system in the same way that coming in from the cold and smelling something baking does — it signals safety, warmth, and home.
Why it works: This is the one project on the list that requires zero purchases if you have a reasonably stocked kitchen, and it’s arguably the single most impactful thing you can do for the atmosphere of your home this fall. The scent carries further and lasts longer than any candle, and it’s completely free. Honestly, it hits different every time — a true fall classic!
Project 15: The Full Room Edit — Putting It All Together
Here’s the thing nobody tells you about easy fall DIY decor: the individual projects matter less than how they work as a system. Your amber jars, your rope-wrapped bottles, and your lantern cluster all belong in the same room — they’re all warm, golden, glowing, and they reinforce each other.
Your pressed leaf gallery, your yarn wreath, and your leaf garland are all natural, textural, and organic. Your dried botanical arrangement and your nature bowl both speak the same material language.
When you build from a consistent visual vocabulary — warm light, natural materials, earthy tones, layered textures — everything you make fits, and the room feels designed rather than decorated.
So Project 15 is the edit. Once your projects are made and placed, walk around the room and remove one thing from every surface. Not because the projects aren’t good — they are — but because breathing room between objects is what makes each one land. The amber jars need space to glow. The topiary needs a clear sightline. The garland needs wall behind it.
Less is always more on surfaces. More is always better in layers. That’s the whole secret — and you just made it all yourself for under $40 total. Obsessed!
Your Fall Room Is One Hot Glue Gun Away
Pick three projects from this list for tonight. Not fifteen — three. Set up your supplies, put on a playlist, make something warm to drink, and spend a couple of hours crafting in the space you’re about to transform.
By the time you’re done with your first evening, your room will already feel different. By the time you’ve worked through the full list over the season, you’ll have a cozy autumn home that is entirely, genuinely, irreplaceably yours.
Dollar Tree got you there. A hot glue gun and an afternoon finished it. Go make your room gorgeous!