You know that feeling when October hits and suddenly your neighbor’s yard has a full graveyard, ghost lights swinging from the trees, and a fog machine creeping along the ground at 7 p.m.?
Yeah. That is the house everyone slows down for. That is the house the kids make a whole plan to visit on October 31st. And honestly? Getting there is so much more doable than it looks.
Outdoor Halloween decorating is its own thing. It’s not just “put your indoor stuff outside.”
The scale is different. The weather is a factor. Visibility at night changes everything. Getting it right means understanding a few fundamentals that most articles skip straight over. And once you know them, the whole process gets so much easier!
This guide covers everything: how to zone your space, which materials actually survive rain and wind. The props that show up most on everyone’s must-have lists, step-by-step setups for every space type, and honest budget breakdowns for every tier.
Let’s get into it.
|
Quick Summary
This is the only outdoor Halloween decorating guide you need. It covers every space type. Front yards, porches, balconies, and driveways, plus the props, lighting tricks, materials, and DIY builds that actually hold up in October weather. First-timer or seasoned decorator, this guide meets you where you are. Read it start to finish or jump straight to your section. |
Before You Spend a Single Dollar, Know Your Space
Most people skip this part. They buy a bunch of outdoor Halloween decorations, scatter them around the yard, and then stand back wondering why it looks random. The fix is simpler than you’d think — it’s all about zones.
Think of your outdoor space in four distinct areas.
The entry zone – your front door and immediate steps.
The path zone – the walkway or driveway leading up.
The lawn zone – the open yard space.
The wow zone – one focal feature that stops people in their tracks.
Not every yard has all four — and that’s totally fine! A small porch renter might only have an entry zone, and that can still look incredible with the right approach.
See our full guide on halloween decorations for haunted gardens if that’s your situation.
Large yards need scale
Props that look dramatic in a store look tiny against an open lawn. Go bigger than you think. A lone skeleton in a sprawling front yard reads as lonely, not spooky.
Group things, create scenes, fill the space with intention. Small porches, on the other hand, work best with one clear focal piece, one lighting layer, and restraint on the clutter — a packed tiny porch just looks messy.
What Actually Survives October Weather (And What Doesn’t)
Honest truth: a lot of the Halloween decorations people buy are not built for actual outdoor use.
Cardboard, untreated paper, and thin fabric blowing around unanchored will be destroyed after one rain and one wind storm. So before you set anything up, know your materials.
| Material | Weather resistance | Wind resistance | Notes |
|---|---|---|---|
| Foam / EVA foam | Good (seal it) | Medium | Seal with exterior spray paint or Mod Podge; bare foam absorbs water |
| Plastic (molded) | Excellent | Good if staked | Most store-bought props — just stake them properly |
| Treated wood / plywood | Excellent | Excellent | Best for DIY builds like tombstones and yard silhouettes |
| Metal | Excellent | Excellent | Shadow casters, stakes — zero worries |
| Fabric / polyester | Medium | Poor | Use only on covered porches or tether every corner |
| Cardboard | Poor | Very poor | Covered porches only, expect one use maximum |
| Latex / rubber | Good | Medium | Stake or weight the base |
Wind is the enemy no one talks about enough
Anything over 12 inches tall needs a stake, a weighted base, or a tether. Ghost stakes are actually designed for this, their stakes drive into the ground and hold.
Anything hanging from a tree or porch needs zip ties or S-hooks, not just string. String snaps.
not just string.
SIMPLE-tip: Pick up two-inch insulation foam sheets at Amazon for tombstone builds, and seal everything with outdoor Mod Podge before painting. That combo survives a full October outdoors without warping.
Lighting Is the Highest-ROI Investment You Can Make
Strip out all your props and leave just the lighting. That yard will still feel like Halloween.
Now flip it: put out every prop you own with zero lighting. At 7 p.m. in October, no one can see any of it. Lighting is what makes outdoor Halloween decorations work at night. And at night is exactly when it matters most.
The 3 types of outdoor halloween lighting.
There are three types of outdoor halloween lighting. And using all three together is what separates a flat setup from one that genuinely looks haunted.
Ambient lighting sets the overall mood. Orange string lights, purple rope lights along a fence line, or a warm glow from battery-powered lanterns. This is the “atmosphere” layer.
Accent lighting highlights your hero props, a solar spotlight angled at a skeleton rising from the ground, a colored floodlight pointed at a fog machine output.
Backlit props always read better than front-lit ones — front lighting flattens; back lighting creates drama and depth.
Dramatic lighting is the wow factor: a green or red wash on a tree, strobe lights on a motion-activated prop, a shadow caster throwing a witch silhouette across your garage door.
| Light type | Power source | Best use |
|---|---|---|
| String lights | Plug-in or battery | Ambient — fence lines, porch canopy, trees |
| Solar spotlights | Solar | Accent — prop highlighting, zero wiring |
| Battery LED stakes | Battery | Path lighting, prop backlighting |
| Color floodlights | Plug-in | Dramatic — washing walls and trees |
| Motion sensor lights | Plug-in or battery | Jump scare placement, animated props |
A quick note on color temperature. Warm white (2700K) reads cozy and vintage, cool white (5000K) reads clinical and creepy, and colored bulbs are purely atmospheric.
Mixing warm white ambient with one accent color is the move for a cohesive outdoor halloween aesthetic. So good, it’s not even fair!
The Starter Kit: Your First Outdoor Halloween in Five Pieces
This section is for you if this is your first time decorating outside, or if you’re starting fresh with a new space.
Five pieces.
That’s all you need for a setup that actually looks intentional.
- Ghost lawn stakes (set of 6–8): Drive them into the lawn in a loose cluster near your path, not in a perfect straight line. Find affordable sets at Amazon. At night, backlit with a small solar spotlight, a group of white ghost stakes genuinely looks like something is moving out there.
- Outdoor string lights in orange or warm white: Run them along your porch railing, wrap them around a tree, or drape across your front door frame. Buy lights rated for outdoor use — indoor string lights are not weatherproof and can be a safety issue in rain.
- One carved or lit pumpkin on the steps: Real pumpkins last about a week once carved — coat the carved edges with petroleum jelly to slow rotting. Alternatively, a high-quality faux lit pumpkin is a better long-term investment.
- Creepy cloth / cheesecloth: One bag of black or grey creepy cloth draped over your porch railing, stretched across bushes, or wrapped around a potted plant transforms a space for about three dollars. Stretch it thin and pull it apart for the most realistic cobweb effect.
- One focal prop: A large skeleton. A witch silhouette. A hanging ghost from a tree branch. Pick one thing that stops people and let everything else support it. One hero prop, executed well, beats a scattered dozen every single time. Total win!
| Tier | Budget | What you get |
|---|---|---|
| Dollar store setup | Under $30 | Ghost stakes, creepy cloth, 1 string light set, small pumpkin |
| Mid-range | $50–$100 | Quality ghost stakes, focal prop, outdoor lighting set, 2–3 yard fillers |
| All in | $150–$300 | Full graveyard kit, premium focal prop, multi-zone lighting rig |
| Enthusiast | $300+ | Animatronics, fog machine, custom DIY builds, full lighting design |
Honestly, the mid-range tier is where the most satisfying setups live.
The best outdoor halloween setups are usually built over multiple seasons, not bought all at once. Pure genius strategy right there!
Ghost Decorations Outdoor: The Prop That Owns This Keyword
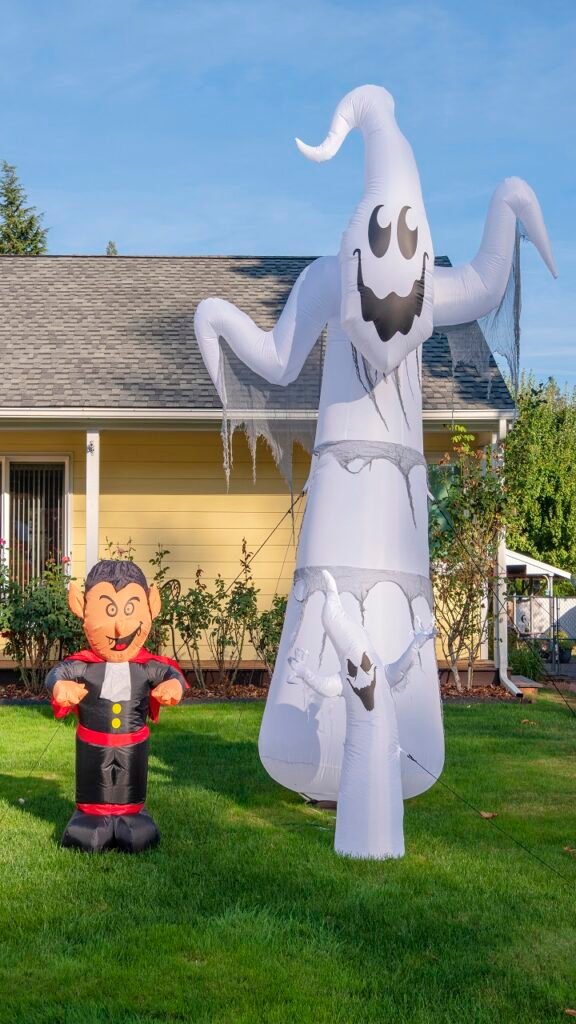
There is a reason ghosts show up everywhere in the best-performing outdoor halloween yard displays!
They are lightweight, easy to hang, easy to DIY, and they move. That last part matters more than people realize. A static prop in a yard is furniture.
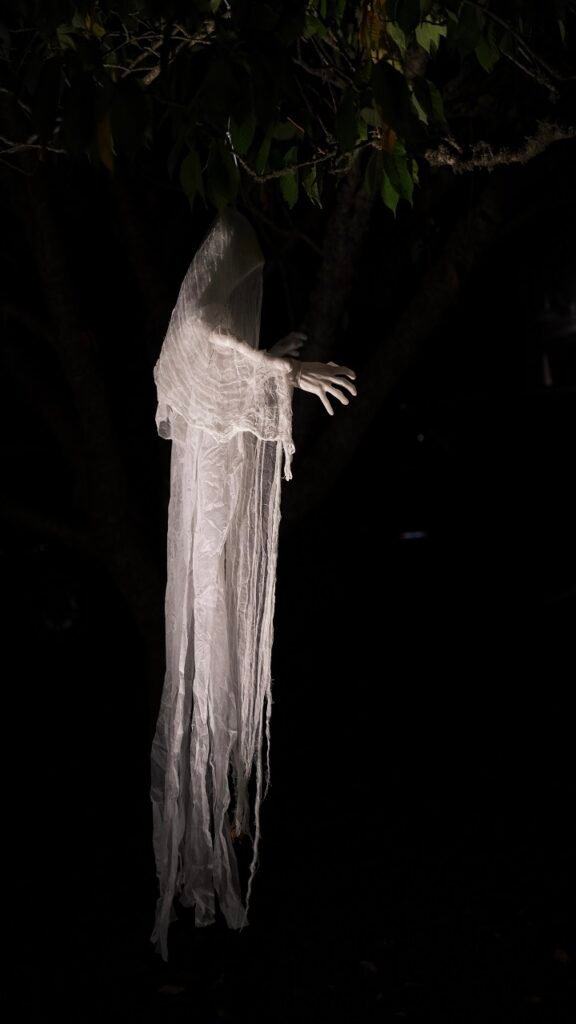
A ghost swaying gently in an October breeze at night, backlit white against a dark tree? That is genuinely unsettling in the best possible way.
The swinging ghost
The viral swinging ghost is easier to recreate than the videos make it look.
Grab a large white fabric panel or cheap white curtain, bunch and tie the top section into a round head shape with fishing line, then hang it from a tree branch on a swivel hook so it rotates freely.
The swivel is the key.
Without it, the ghost just hangs limp. With it, every little breeze sends it spinning slowly and it catches light from every angle. Add battery-powered LED fairy lights tucked inside the fabric head and it glows from within at night. So dreamy and spooky at the same time!
Ghost stake clusters
Ghost stake clusters work best in odd numbers. Three, five, or seven staked into the lawn in an uneven scatter.
Avoid straight lines or symmetrical groupings; those read as intentional yard art, not haunted. For porch ghosts, hanging ghosts at varying heights is the move.
One at ceiling height, one at mid-height, one lower near the railing. Layer them so they overlap slightly in the sightline from the street.
Ghost porch light covers — fabric panels draped over your existing porch light fixture — are a three-minute install that completely transforms the entry zone. Truly clutch!
Skeleton Decorations Outdoor: Stop Posing One Skeleton, Build a Scene
A lone skeleton standing in the middle of a lawn is the outdoor halloween equivalent of one sad balloon.
The skeletons that stop cars are always doing something. They tell a story. They are in a scene. Building a scene takes exactly the same number of props — you just arrange them with more intention.
The buried rising skeleton
The buried rising skeleton is the undisputed crowd favorite right now. Two or three skeleton hands and forearms pushed into the soil at an angle, as if something is clawing its way up from underground, with a full skeleton torso partially emerged beside them.
Add a ring of disturbed soil or dead leaves around the “burial site” and angle a green or red ground-level spotlight at it. At night, with fog rolling across it, this setup makes people stop their cars.
Skeleton scene ideas that actually land:
- Skeleton mowing the lawn — poseable skeleton, push mower, work gloves. Instantly funny and shareable
- Skeleton sitting on your porch chair — add a sweater, a mug, a newspaper. The domestic horror angle hits every time
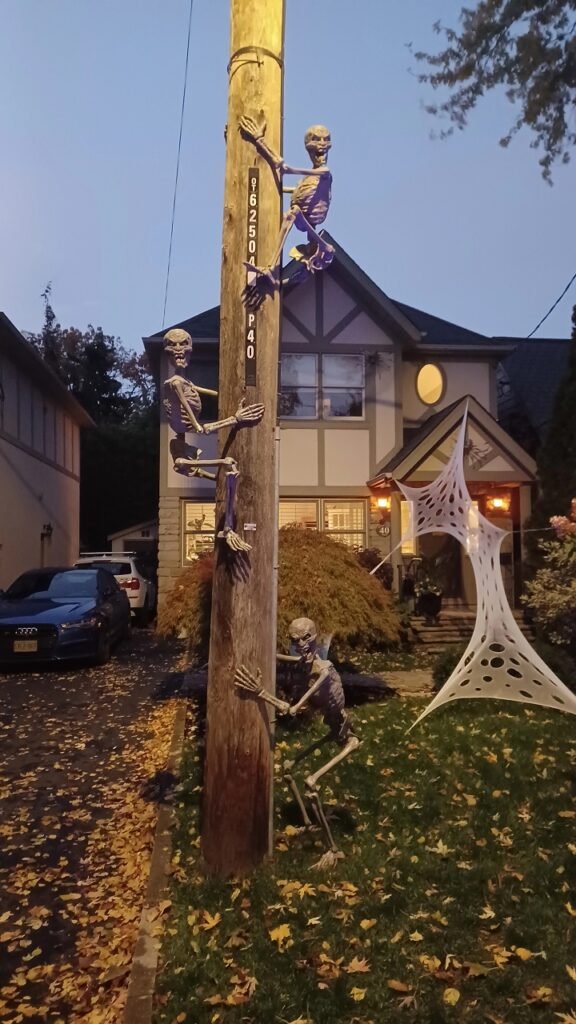
- Skeleton climbing the gutter or wall — most poseable skeletons have joints that hold a climbing position; tether to the gutter with zip ties for stability
- Skeleton dog on a leash — a small animal skeleton prop held by a full-size skeleton creates a whole story with zero extra effort
- Skeleton driving the car — visible through the windshield, one of the most low-effort, high-reaction setups going
Poseable skeletons are worth the extra cost over fixed-pose ones.
A 5-foot poseable skeleton runs about $35–$55 at most big-box stores in September and can be repositioned every year for a completely different scene. Fixed skeletons give you one look forever. Total win!
Halloween Yard Graveyard: How to Build One That Actually Looks Real
A yard graveyard is the halloween yard decoration with the highest ceiling of any outdoor setup.
Done badly, it looks like a stack of plastic signs pushed into the dirt.
Done well, it is the setup that earns your house a neighborhood reputation. The difference is in the details, and none of the details are hard.
Foam tombstones
Foam tombstones are the DIY gold standard. Lightweight, carvable, paintable, and cheap.
Pick up sheets of two-inch thick insulation foam from a hardware store, cut your shapes with a serrated knife, and carve surface details with a ballpoint pen pressed firmly.
Paint with exterior latex paint, dry-brush a lighter grey over the surface for an aged stone effect, and seal with exterior spray. A set of six foam tombstones costs about $15 to make and looks better than most $40 plastic sets at retail.
Cluster tombstones in groups of two or three rather than spreading them evenly. Real cemeteries are not evenly spaced, and even spacing reads as fake immediately.
Mix heights within each cluster. Tilt some slightly, as if they have settled over decades.
Fog machines
Fog machines used at ground level pool fog between the tombstones beautifully. Place the output nozzle pointing toward the center of the graveyard, not along the edges, so fog collects and builds rather than immediately dispersing.
A good outdoor fog machine on Amazon runs on a timer so it cycles automatically without burning through fluid.
Finishing details that sell the whole scene:
- Wilted silk flowers laid across a “grave”
- A hand-lettered wooden sign reading “Rest In Pieces” at the graveyard entrance
- Black caution tape strung between two stakes at the perimeter
- Dead branches or bare twigs pushed into the soil around the tombstones
- A lantern with a flickering LED candle placed at the foot of the tallest stone
Witch Decorations Outdoor: Three Setups That Actually Work
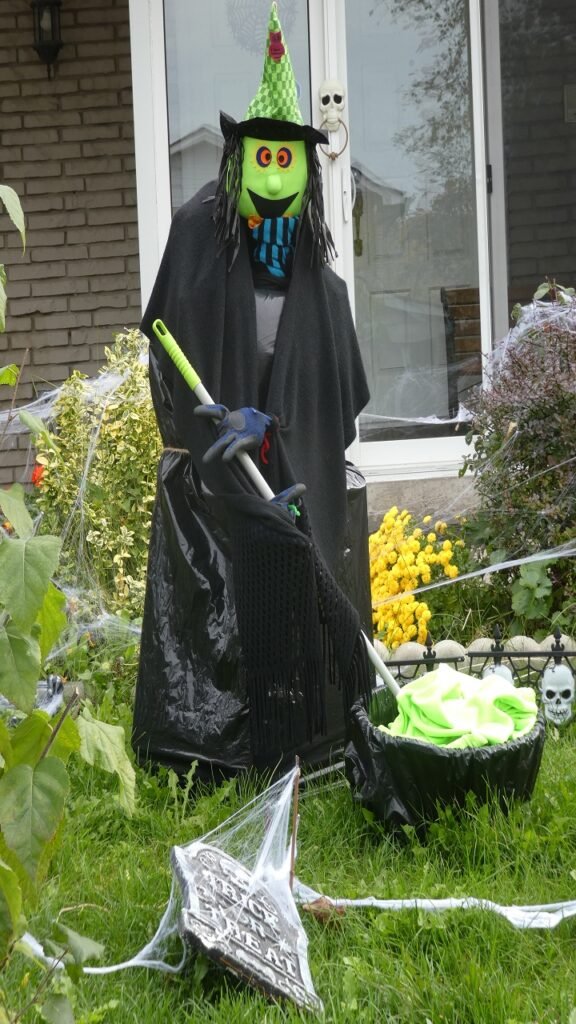
Witch outdoor setups are having a serious moment.
The best-performing witch prop right now is a shadow caster! A metal silhouette on a stake designed to cast a life-size witch shadow on your garage door or exterior wall when a spotlight is aimed at it from the ground.
The shadow throws itself eight to ten feet tall on a flat surface behind it. At night, from the street, it looks like something enormous is standing on your lawn. Total game-changer, and the setup takes ten minutes.
| Setup | DIY cost | Setup time | Impact |
|---|---|---|---|
| Shadow caster + spotlight | $25–$45 | 10 min | Very high — massive visual |
| Crashed witch in tree | $15–$30 | 20 min | High — narrative, shareable |
| Witch feet under fence | $8–$15 | 15 min | High — instantly readable |
| Lighted witch silhouette | $20–$50 | 15 min | High — great at night |
| Cauldron with LED lighting | $20–$40 | 10 min | Medium — great supporting prop |
Witch feet
Witch feet sticking out from under a fence, porch railing, or beneath a bush is the third setup worth knowing.
Striped stocking legs, pointy shoes, and a bit of fabric for a skirt poking out from underneath something — as if a house landed on her.
Make your own with pool noodles as the legs, striped fabric wrapped around them, and dollar store pointed shoe covers slipped over the ends.
Combining the shadow caster with the witch feet is a complete witch-themed front yard in under an hour for about $50-$75. Share the love because this setup is going to make everyone jealous!
Front Porch Halloween Decorations: The Frame Matters More Than the Props
Your porch is the frame. Everything you put on it should direct attention toward one thing: your front door.
Most halloween porch decorations fail because they ignore this entirely; props get scattered randomly, nothing guides the eye, and the whole setup reads as a pile rather than a scene.
The archway
The archway is the single highest-impact porch addition you can make.
A DIY arch frame over the door, built from half-inch PVC pipe into an arch shape and draped with creepy cloth, artificial black roses, and orange string lights.
It transforms a plain doorway into an entrance.
Guests and trick-or-treaters feel like they are stepping into something.
Porch column wrapping
Porch column wrapping is the second underused technique: wrap columns with gauze from top to bottom, wind orange string lights around in a loose spiral before applying the gauze, and the lights glow through the fabric beautifully.
Four wrapped columns on a porch creates a haunted mansion effect that makes the whole exterior look intentional.
For small porches — anything under six feet wide — the three-prop rule applies. One focal prop, one lighting layer, and one textile element.
That is a complete, intentional porch setup that does not feel cramped or chaotic. Resist the urge to add more. Less genuinely is more on a small porch, and it reads so well from the street!
Outdoor Halloween for Renters and Apartment Balconies
Let’s be real — renting should not mean giving up on outdoor halloween decorations. Balconies, doorsteps, and apartment entryways can look genuinely festive and spooky with zero permanent damage to your space.
Heavy-duty outdoor command hooks and removable adhesive hooks are your best friends here. The larger heavy-duty versions hold up to seven pounds — enough for ghost lanterns, string lights, lightweight fabric draping, and small hanging skeletons.
Balcony rail setups are incredibly underrated: weave orange and black garland through your railing balusters, hang ghost luminaries from the top rail on clear fishing line, and zip-tie battery string lights along the top.
The fishing line makes the lanterns appear to float. From the street level below, a balcony decorated this way looks absolutely magical. Total vibe!
| Setup | Method | Damage risk | Cost |
|---|---|---|---|
| Balcony string lights | Zip ties on rail, command hooks on ceiling | None | $10–$20 |
| Ghost luminaries hanging | Fishing line + command hooks | None | $8–$15 |
| Window cling silhouettes | Press-on, removes cleanly | None | $5–$12 |
| Pumpkin doorstep cluster | Freestanding, no attachment | None | $15–$30 |
| Over-door wreath | Over-door hook, no drilling | None | $15–$35 |
| Potted plant styling | Spray paint + googly eyes on existing pots | None | $5–$10 |
Potted plant halloween styling deserves its own mention.
Take any existing outdoor potted plant, give the pot a coat of matte black spray paint, hot-glue a pair of googly eyes to the front, and press a few plastic skeleton hands into the soil as if they are reaching up through the dirt.
Every single person who sees it does a double-take. Pure genius!
Scary vs. Cute: Picking Your Style and Owning It
Scary and cute are not the same audience, and trying to do both at once usually results in neither.
Decide which lane you are in before you buy a single prop, and your whole setup will feel more cohesive because of it.
Scary lane
The scary lane is for the theatrical decorator — the one who wants cars to slow down and adults to feel genuinely unsettled.
Darkness is your tool here. Motion-activated props placed at path level trigger when someone is already halfway up the walkway, which is exactly where the scare hits hardest.
Cool white and green lighting, fog, and deep shadows do more work than any individual prop.
Cute lane
The cute lane is just as valid: friendly ghost clusters with smile faces, pumpkins painted rather than carved in white or blush, hay bale vignettes with mums and corn stalks.
Cute outdoor halloween decorations are especially powerful for families with young kids — or neighborhoods full of them.
The easiest way to signal your lane before you shop is color palette. Scary setups lean into black, deep purple, blood red, sickly green, and cool white.
Cute setups reach for warm orange, soft white, blush, sage, and yellow. Walk into any halloween store with your palette already decided and you will stop picking up random things that do not go together. So much easier, and the result looks so intentional!
DIY Outdoor Halloween Decorations by Skill Level
Not every DIY halloween yard decoration requires a weekend and power tools.
Here is exactly what is achievable at each skill level.
Under 30 minutes — no skills required:
- Stuffed bag ghost: Fill a white kitchen trash bag loosely with crumpled newspaper, tie the top into a head shape with twine, draw a face with a black marker, and hang from a tree branch on fishing line.
- Hay bale vignette: One square hay bale from a garden center, two or three pumpkins on top, a bundle of dried corn stalks zip-tied to a stake behind it. Done in ten minutes, looks like a lifestyle shoot.
- Spider web spread: Stretch one bag of black poly webbing across a bush, fence section, or porch railing. Pull it apart aggressively — thin webs read more realistically than bunched ones
Weekend projects — basic tools, big results:
- Foam tombstone set: Two-inch insulation foam sheets, serrated knife, ballpoint pen for lettering, exterior latex paint, finishing spray. Six tombstones for about $15-$25 in materials that last five to seven seasons.
- Plywood yard silhouettes: A jigsaw, a sheet of half-inch plywood, exterior paint. Silhouettes read dramatically from the street especially at night when backlit.
- PVC arch frame: Two ten-foot lengths of half-inch PVC pipe bent into arch shape using ground stakes, connected at the top. Drape with creepy cloth, artificial roses, and string lights. Reusable every year.
Multi-weekend enthusiast builds:
- Full graveyard with lighting rig: Foam tombstone set plus ground stake uplights, a fog machine on a timer, skeleton hands emerging from the soil, dead branch accents. Plan the layout on paper before driving a single stake.
- Shadow caster panel: Cut a silhouette from thin sheet metal or thick weatherproof cardboard, mount on a conduit stake at ground level, position a bright LED spotlight behind and below it. The shadow throws huge on any flat exterior surface.
- Fog machine integration: Position the output nozzle at ground level inside a hollowed foam rock or cauldron prop so the source is hidden. Run it on a smart plug timer so it cycles every few minutes automatically. Pure genius and pure atmosphere!
Your Week-by-Week Setup Timeline
Outdoor halloween decorating done last-minute looks last-minute. Doing it in stages means less stress, better results, and nothing forgotten until October 30th at 9 p.m.
- Four weeks out: Finalize your zone plan and style lane. Order anything custom or from Etsy — shipping takes longer in October than any other month. Buy your fog machine if you want one; they sell out fast.
- Three weeks out: Purchase anchor pieces — your focal prop, lighting sets, main structural elements. Start any multi-weekend DIY builds now.
- Two weeks out: Buy filler props — ghost stakes, skeleton hands, creepy cloth, pumpkins (real ones wait until the week of). Do a dry layout of major props in daylight so you can adjust before committing to staking.
- One week out: Set up everything except real pumpkins. Walk your setup at night and look at it from the street — nighttime is when the truth comes out about what is working and what needs adjusting.
- Two days out: Carve real pumpkins. Coat carved edges with petroleum jelly. Fill fog machine fluid, check all battery-powered props have fresh batteries.
- Night-of checklist: All lights on by dusk, fog machine running on timer cycle, motion-activated props tested, all stakes and anchor points checked — wind picks up in the evening
Start Small, Go Big Next Year
Here is the honest truth about outdoor halloween decorating: the best setups in your neighborhood were not built in one season.
They started with five ghost stakes and a string of lights. They grew by three or four pieces every year until suddenly they were the yard everyone talks about.
One intentional, well-lit setup beats thirty random props every single time.
Start with your five-piece starter kit. Get the lighting right first. Pick your style lane and stick to it. And next October, add the one piece that excited you most this year.
That is how the neighborhood legends get built — one season at a time, one good decision at a time. And honestly? It is so much fun getting there!