Let’s be real. Nobody hands you a manual the first time you move somewhere with a real front porch, a balcony, or an actual yard. You just… figure it out.
And then October rolls around and suddenly you’re standing in a halloween store holding a cardboard skeleton, wondering if it will survive rain. Spoiler: it won’t. But that’s exactly why this guide exists!
Your first outdoor halloween setup does not have to be complicated. It does not have to be expensive. What it does have to be is intentional — because three props that work together always beat fifteen props that don’t.
Our complete halloween decorations outdoor guide covers every prop type and space in full detail once you’re ready to level things up. This article is the thing you read first. So exciting!
|
Quick Summary
First time decorating outside for Halloween? This guide covers everything the other articles skip, what materials actually survive October weather, how to make a small setup look intentional, the five things to buy first, and a week-by-week plan so nothing gets forgotten. Read this before you buy a single thing. |
Why Outdoor Decorating Is Different From Indoor (And Why It Matters)
Moving a pumpkin from your living room to your front steps seems simple.
Outdoor spaces have completely different rules though, and most first-timers find this out the hard way. The weather shows up. The wind shows up.
At 7 p.m. in October, visibility drops in a way that changes everything about how your front yard halloween display reads from the street.
Scale is the biggest adjustment
Decorations that look statement-making indoors disappear against an open lawn or a wide porch.
Props need to be bigger than you think, grouped rather than scattered, and lit so they actually register after dark.
The same principle applies when setting up any outdoor yard display; spacing, grouping, and a focal anchor point always matter more than the number of items you put out.
Outdoor spaces also have zones
Think of your space in four areas:
The entry zone (door and immediate steps),
The path zone (walkway leading up),
The lawn zone (open yard),
The wow zone (one big focal piece that stops people).
Picking just two zones and executing them well is so much better than spreading six props thinly across your entire property every single time. Total win!
RELATED: How to Set Up a Halloween Yard Graveyard From Scratch (The Full Tutorial)!
What Actually Survives October Weather (The Honest Material Guide)
Here is the part stores conveniently leave out: most halloween decorations are not rated for real outdoor conditions.
Cardboard disintegrates. Untreated paper molds. Thin polyester fabric turns into a sad, tangled mess after one gusty night.
Knowing your materials upfront saves money and a whole lot of frustration. This Old House’s outdoor decorating guide is worth bookmarking for a full breakdown on weatherproofing seasonal props.
| Material | Holds up outdoors? | Notes |
|---|---|---|
| Molded plastic | Yes | Most store-bought props — stake them so they don’t blow over |
| Metal | Yes | Shadow casters, stakes — completely weatherproof |
| Treated wood / plywood | Yes | Great for DIY builds; seal with exterior paint |
| EVA / insulation foam | Yes, if sealed | Coat with exterior clear sealer before putting outside |
| Polyester fabric | Covered porch only | Tether every corner or wind destroys it |
| Cardboard | No | One use maximum, covered areas only |
| Latex / rubber | Usually | Weight or stake the base |
Wind is honestly the number one first-timer problem
Anything taller than 12 inches needs a stake driven into the ground, a weighted base, or a tether.
Hanging decorations need zip ties or S-hooks — not string, which snaps. The lesson applies beyond Halloween too.
Our elegant outdoor Christmas decorations guide covers how outdoor-rated hardware like UV-resistant clips and eye bolts make any seasonal display survive real weather, season after season.
The Five Things to Buy First (Your Starter Kit)
You do not need a full cart on your first outdoor halloween.
Five things, chosen well, give you a complete and intentional outdoor halloween setup that looks finished. Everything else can be added over future seasons as your collection grows.
Our full halloween decorations outdoor guide has the prop-by-prop breakdowns for when you’re ready to go deeper.
Starter kit · $30 to $150
RELATED: 14 DIY Witch Decorations for Your Yard That Are Actually Impressive!
Ghost lawn stakes (set of 6–8)
Drive them into the lawn in an uneven cluster near your path, never in a perfect straight line. Odd-numbered ghost groupings look more natural and more eerie.
Find affordable sets at Amazon before they sell out in October. At night with a solar spotlight aimed at them from behind, they genuinely look like something is moving in your yard. Truly clutch!
Outdoor-rated string lights
Orange or warm white string lights draped along your porch railing or wrapped around a tree shift the entire color temperature of your space instantly.
Always buy lights labeled for outdoor use — indoor string lights are not weatherproof and are a genuine safety risk in rain. The way string lights transform an outdoor space at night is genuinely magic. Just like a well-lit backyard setup changes the whole energy of a space after dark.
One carved or lit pumpkin
Real pumpkins last about five days once carved. Coat the cut edges with petroleum jelly to slow down rotting.
A battery-powered faux pumpkin is a smarter long-term investment if you want something reusable year after year. The amber glass fall decor ideas on the site show how a single glowing object becomes the anchor of an entire seasonal vignette.
Creepy cloth or cheesecloth
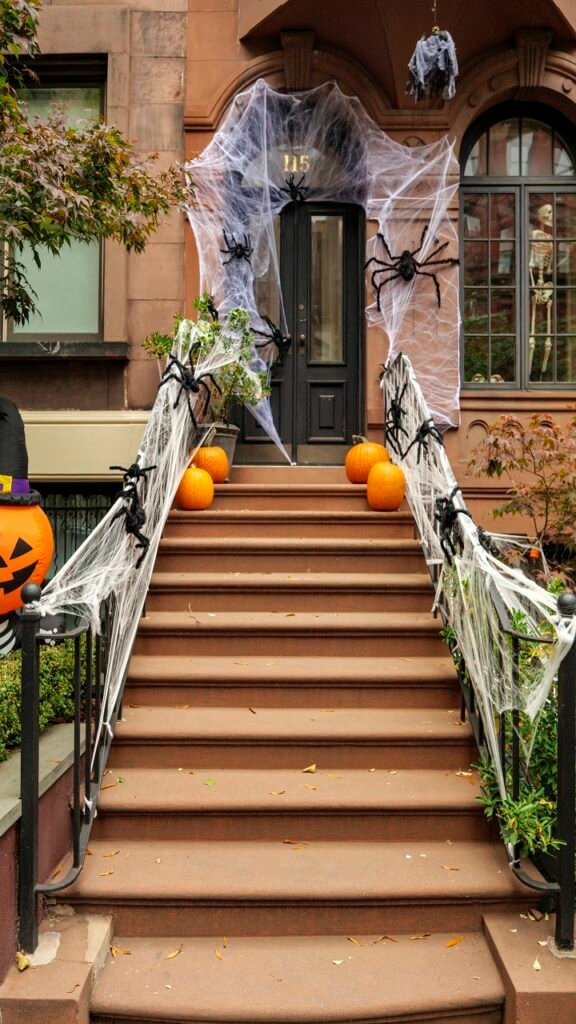
One bag runs about three dollars at any craft store. Draped over a porch railing, stretched across bushes, or wrapped around a potted plant, it transforms a plain space in minutes.
Pull it apart aggressively so it looks like actual cobwebbing rather than a folded pile of grey fabric. Thin and wispy beats bunched every single time.
One focal prop
A large skeleton doing something interesting, a hanging ghost from a tree branch, or a witch shadow caster from Amazon that throws a massive silhouette across your garage wall.
Pick one thing that stops people and build everything else around it. Our halloween decorations outdoor guide breaks down every major focal prop with honest notes on which ones have the highest street-level impact. Pure genius strategy!
| Budget | What to expect |
|---|---|
| Under $30 | Ghost stakes, one string light set, creepy cloth, small pumpkin |
| $50–$100 | All of the above plus a quality focal prop and a solar spotlight |
| $100–$150 | Full starter kit plus a second lighting layer and a few yard fillers |
How to Make Even Three Props Look Like a Complete Setup
This is the thing nobody teaches and everyone needs to know on their first outdoor halloween.
Three props arranged with intention look like a styled, finished display. Those same three props scattered randomly look like you gave up halfway. The difference is not money — it is just a few principles.
Group, do not scatter
Place your props close enough that they relate to each other visually.
A ghost stake cluster near your path, a lit pumpkin on the step, and a creepy cloth drape on the railing creates a cohesive halloween entry zone display that reads as intentional from the street.
The same grouping principle that makes a fall outdoor decor vignette feel curated. Varying heights, a glowing anchor, layered texture — works exactly the same way outdoors for halloween.
Always add a lighting layer
Any prop looks twice as good at night when something is illuminating it. A solar spotlight behind ghost stakes, a battery LED tea light inside a pumpkin, or orange string lights draped near your focal prop makes everything feel finished.
According to Better Homes and Gardens, lighting is the single most impactful upgrade for outdoor seasonal decor and the one most first-timers skip entirely.
Genuinely so good!
Use height variation
Put something at ground level, something at mid height, and something higher up.
A pumpkin on the ground, ghost stakes at lawn height, and a hanging ghost from a porch ceiling creates visual interest that a flat, same-height arrangement just cannot match. Your eye travels through the scene and the whole thing reads as more intentional and complete. Total vibe!
The Biggest Beginner Mistakes (And How to Skip All of Them)
Honestly, these are so common and so easy to avoid once someone just tells you.
Most first-year outdoor halloween displays go wrong in the same four ways. Knowing them upfront saves you a wasted Saturday and a cart full of things you’ll return the following week.
Mistake 01
Walking into a halloween store in October feels like a fever dream. Everything looks amazing and suddenly you’re holding a six-foot inflatable and three sets of tombstones.
Stick to your zone plan. Props that don’t belong to a zone just become clutter with extension cords. Our halloween decorations outdoor guide has a zone-by-zone system that keeps the cart focused.
Mistake 02
Setting up in daylight and never looking at your display after dark is the number one way to end up with a setup that looks great at noon and invisible at 7 p.m.
Always walk your setup at night before Halloween arrives. What looks too close together in daylight often looks perfect after dark. So important and so easy to miss!
Mistake 03
Indoor string lights and plug-in props are not sealed against moisture. Rain gets in. Connections corrode. According to the U.S. Consumer Product Safety Commission, electrical fires from misused seasonal lighting spike significantly in October
Buy outdoor-rated everything — it costs the same and actually works. Cheers to not having to explain that one to your landlord!
Mistake 04
A setup that looks gorgeous on October 28th can be completely destroyed by an overnight wind event on the 29th. Anything not staked, weighted, or tethered will move.
Drive every stake fully into the ground, zip-tie every hanging piece to its anchor point, and put a weighted rock inside the base of any freestanding prop. Easy win!
Your Week-by-Week Setup Timeline (So Nothing Gets Left to the Last Minute)
This is the section every first-timer deserves upfront. Outdoor halloween decorating done last-minute looks last-minute.
Doing it in stages means better results, less stress, and no frantic trip to the store on October 30th when everything good is already gone.
4 weeks out
3 weeks out
2 weeks out
1 week out
2 days out
NIGHT-OF CHECKLIST
- All outdoor lights switched on by dusk
- Fog machine running on a timer cycle
- Motion-activated props tested and repositioned if needed
- Every stake and anchor point checked — wind picks up in the evening
- Porch light on so trick-or-treaters know you are open for business.
Your First Halloween Is Just the Beginning
Here is the most encouraging thing about outdoor halloween decorating: the first year is always the hardest because you are making all your decisions from scratch.
Next year, the zones are already mapped. The lighting positions are figured out. The focal prop is sitting in storage waiting. All you do is add one new piece and let the whole setup level up again.
Starting with five intentional pieces and a clear zone plan beats a chaotic cart of thirty random items every single time. Get the lighting right first. Choose your style lane early.
And give yourself the gift of setting it up a week early so you actually get to enjoy it — rather than collapsing on the couch on November 1st wondering what just happened. So exciting, and honestly? So worth it!