You’ve got limited square footage in your mini camper, but that doesn’t mean you’re stuck with cramped quarters. I’ve spent years living out of small trailers, and I can tell you that smart remodeling makes all the difference between feeling like you’re camping in a closet and actually enjoying your mobile home.
The secret is choosing modifications that pull double duty while keeping your space feeling open enough to breathe. These fourteen ideas come straight from real campers who’ve figured out how to reclaim every inch without losing the comforts that make travel worth doing.

Install Sliding Benchtops to Maximize Kitchen Prep Space
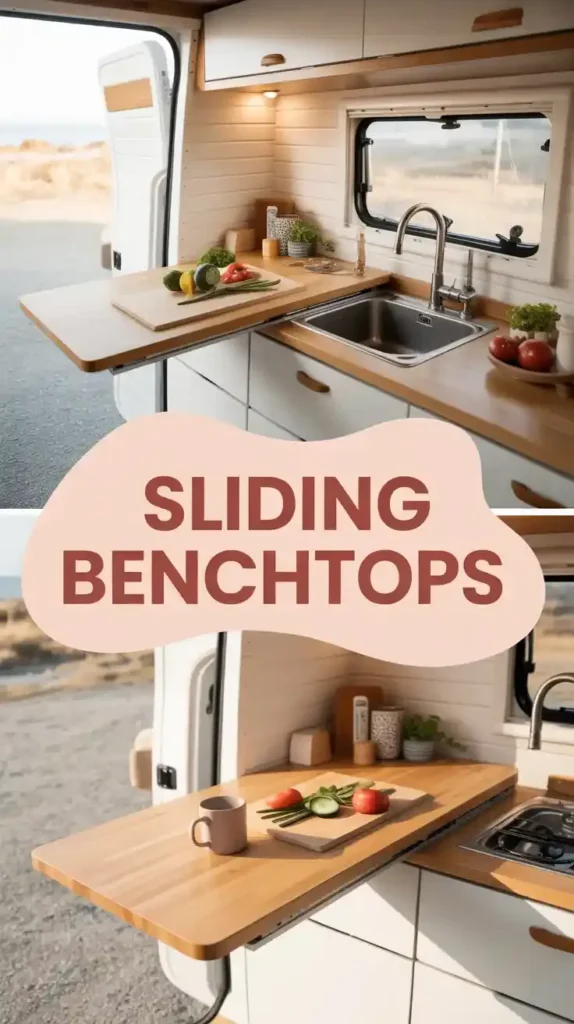

A sliding benchtop gives you workspace exactly when you need it, then disappears to keep your walkways clear. I recommend full-extension runners rated for at least 35 kilograms, secured with both wood glue and screws so they don’t rattle loose on bumpy roads.
The integrated brake is worth the extra twenty bucks because it locks everything in place while you’re driving. Make sure you’ve got at least a meter of clearance in front of your kitchen unit when the benchtop’s extended, or you’ll be doing an awkward dance every time you cook.
Upgrade to Multi-Functional Compact Kitchen Appliances

Every appliance in your camper kitchen needs to earn its spot by doing more than one job. An Instant Pot handles pressure cooking, slow cooking, and rice all in the same footprint that a basic rice cooker would take up.
Those compact smart ovens can bake, roast, and reheat without hogging counter space like a full-size appliance. Induction burners are safer than gas, more energy-efficient than resistance coils, and you can stash them in a drawer when they’re not in use.
Transform Your Dinette Into a Convertible Bed
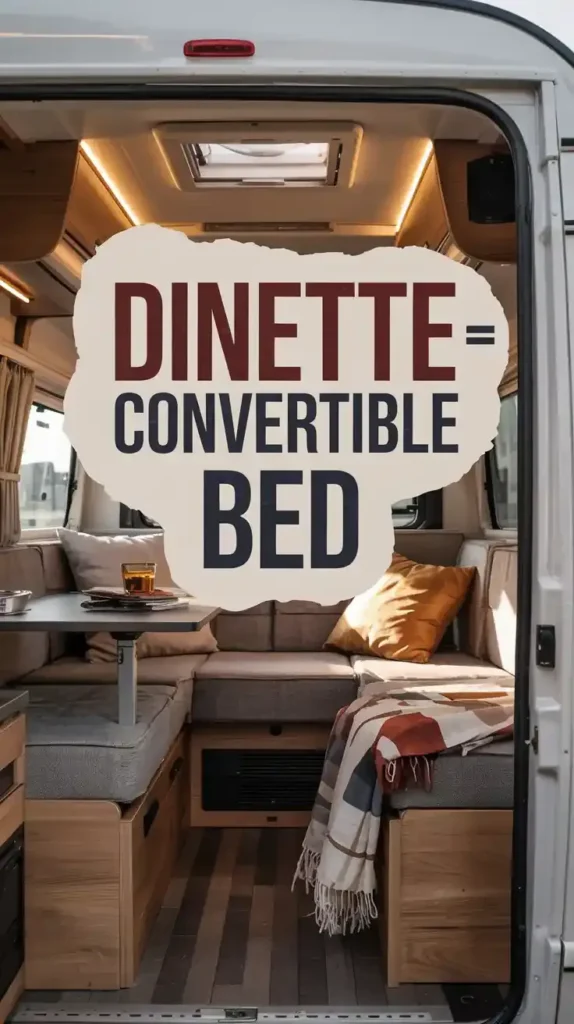
Your dinette shouldn’t just be a place to eat breakfast. Lower the table down to create your bed base, slide those bench cushions together, and you’ve got a sleeping surface that costs you zero floor space during the day.
Quality foam cushions make this setup comfortable enough for full-time sleeping, not just emergency crash space. The bench bases underneath become storage for everything from clothes to canned goods, which means you’re using that cubic footage three different ways.
Add a Loft Bed to Free Up Floor Space Below
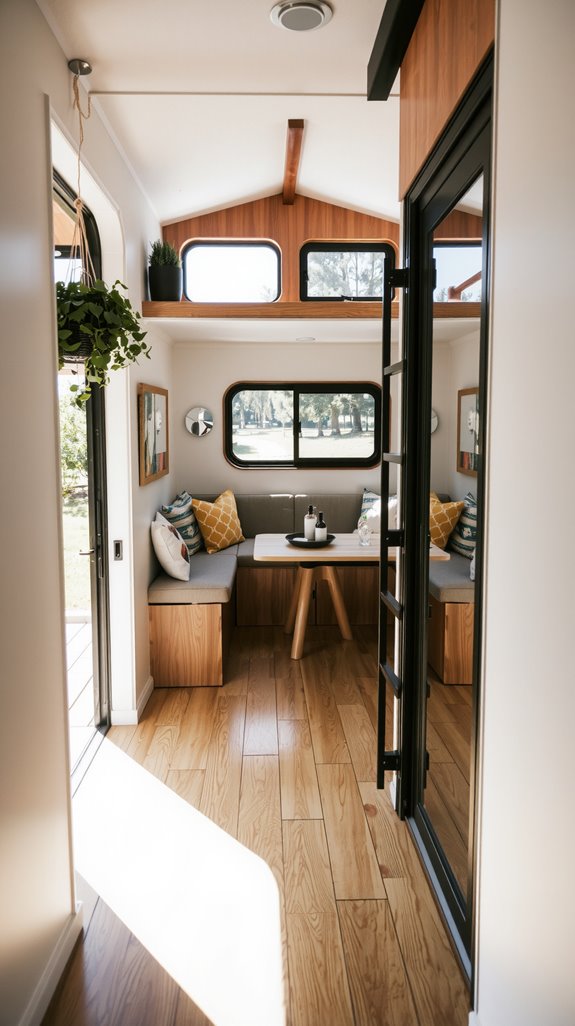
Building a loft bed opens up your entire floor plan by moving your sleeping area overhead where you weren’t using the space anyway. The area underneath becomes perfect for a workspace, seating area, or gear storage depending on what you actually need.
Plan on two hours and a second pair of hands for assembly, and hand-tighten everything so you don’t crack the wood or strip the hardware. Double-check your mattress dimensions before you start building, because fixing a size mismatch after everything’s assembled is a nightmare.
Use Light Colors and Neutrals to Brighten Your Interior
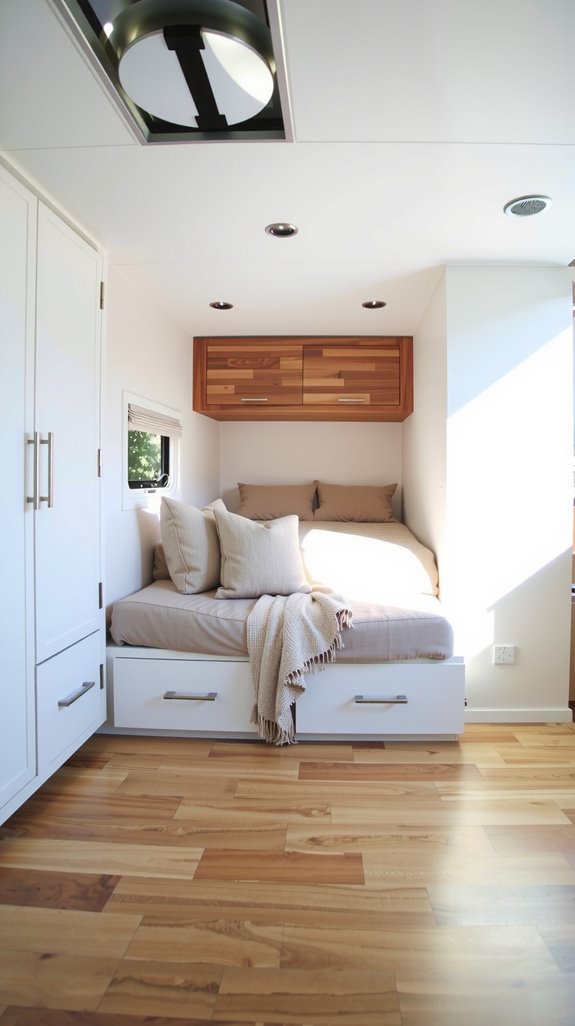
Light colors bounce more photons around your space, which tricks your brain into thinking the camper’s bigger than it actually is. Whites, creams, and soft grays create a clean backdrop that doesn’t compete for your attention or make the walls feel like they’re closing in.
These lighter shades work with both natural daylight and your electrical lighting to maximize brightness without adding more fixtures. Higher color temperatures around 6500 Kelvin can even make your space feel more energizing, though you’ll want warmer tones for evening relaxation.
Create a Removable Sliding Sink for Flexible Counter Space
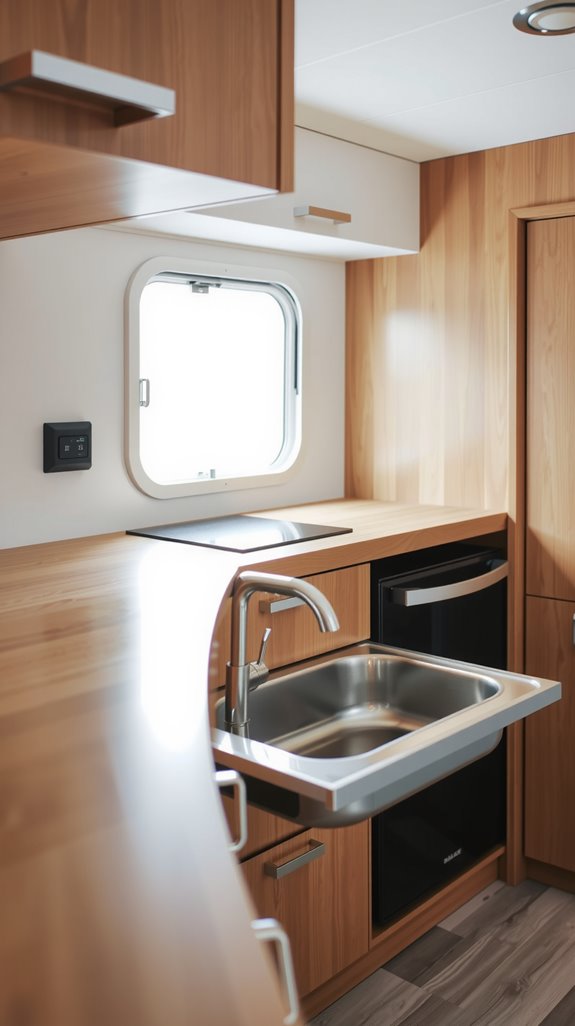
A sliding sink that tucks into a drawer gives you counter space back when you’re not washing dishes. Mount a stainless steel basin on smooth drawer rails, connect your water lines with barbed fittings and hose clamps, and add a retractable faucet that folds down flush.
The low-profile drain assembly keeps everything compact while silicone caulk around the edges prevents water from seeping into your cabinetry. Position your greywater tank directly beneath for proper drainage, and you’ve got a system that actually works instead of just looking clever.
Build Custom Furniture Tailored to Your Camper’s Dimensions
Off-the-shelf furniture never quite fits right in campers because manufacturers design for averages, not your specific floor plan. Measuring multiple times before making any cuts saves you from expensive mistakes, and remember that nominal lumber dimensions differ from actual dimensions by about half an inch.
Lightweight plywood in the 10 to 15 millimeter range gives you the best strength without adding unnecessary weight to your trailer. Secure everything with screws or dowels rather than just glue, because road vibrations will shake weaker joints apart over time.
Add Peel-and-Stick Wallpaper for a Quick Style Refresh
Peel-and-stick wallpaper transforms your interior in an afternoon without the commitment or mess of traditional wallpaper. The adhesive lets you reposition sections during installation, and it peels off clean when you want to change things up or sell the camper.
Modern versions resist water and heat better than you’d expect, plus they add a layer of soundproofing that helps with road noise. Patterns range from realistic brick to marble to geometric designs, so you can personalize your space for less money than paint and way less effort than a full renovation.
Install Layered Lighting to Open Up Confined Areas
Combining three types of lighting makes your camper feel twice as large by eliminating the shadows that emphasize tight quarters. Surface-mount downlights provide your general illumination, LED strips under cabinets light up your work zones, and small puck lights can accent features or create mood lighting.
Wire everything in parallel using 12-volt LEDs so one bulb burning out doesn’t kill your whole system. Dimmable options let you adjust brightness based on battery levels and whether you’re cooking dinner or winding down for the night.
Incorporate Reclaimed Wood Accents for Warmth and Character
Reclaimed wood brings instant personality to generic camper interiors while actually performing better than fresh lumber in some ways. The weathered patina and natural grain patterns create visual warmth that makes small spaces feel cozy instead of cramped.
Old wood has already done most of its warping and shrinking, so it stays dimensionally stable through temperature swings and constant movement. Use it for accent walls, floating shelves, or exposed ceiling beams where the character really shows through.
Maximize Vertical Storage With Shelves, Hooks, and Racks
The space above your head is the most wasted real estate in any camper, and it’s the easiest to fix. Overhead cabinets and shelves hold books, dishes, and folded clothes without eating into your floor space or blocking your movement.
Magnetic strips mounted on walls keep knives and metal utensils organized and accessible. Ceiling nets are perfect for bulky lightweight items like sleeping bags and winter jackets that would otherwise consume an entire cabinet.
Hide Appliances on Sliding Drawers to Preserve Bench Space
Sliding drawers underneath your countertops can hide coffee makers, microwaves, and other appliances that would otherwise clutter your workspace. Heavy-duty ball-bearing slides handle the weight while withstanding constant road vibration better than cheaper alternatives.
Add drawer locks to prevent everything from flying open during travel. Mount power outlets inside or directly adjacent to these drawers so you can use appliances without dragging them out onto the counter every single time.
Add Mirrors and Reflective Surfaces to Expand Visual Space
Mirrors genuinely make confined spaces feel more open by bouncing light around and creating the illusion of depth. Position them across from windows to amplify whatever natural light you’re getting, or go with full-length mirrors to maximize the reflective surface area.
Glossy cabinet finishes, metallic hardware, and glass shelving extend this effect beyond traditional mirrors. Combine reflective surfaces with light paint colors and LED strips, and you’ll effectively double your perceived space without changing the actual square footage.
Optimize Under-Bed and Under-Seat Storage Areas
The space beneath your bed and seating is prime storage territory that most campers completely underutilize. Slide-out drawers or lift-up platforms make everything accessible instead of requiring you to empty half your stuff to reach what’s in back.
Modular bins with dividers keep smaller items organized and prevent the jumbled mess that happens when everything’s just tossed into one big cavity. Vacuum-seal bags compress bulky items like winter clothes or extra bedding, and custom wooden dividers stop everything from shifting into chaos while you’re driving.
Conclusion
Remodeling your mini camper comes down to using space intelligently rather than wishing you had more of it. Sliding benchtops, convertible furniture, and smart color choices transform cramped quarters into spaces you’ll actually want to spend time in.
Most camper owners tell me they wish they’d tackled storage and multi-function furniture years earlier than they did. Pick one upgrade from this list and start there, because you’ll be amazed how much difference these changes make once you’re back on the road.