Renting a caravan sometimes feels like decorating someone else’s prison cell with their permission.
You want upgrades, but the park rules and your lease agreement have opinions. The good news is that reversible changes, meaning ones you can undo completely before you leave, are fair game almost everywhere.
Eleven specific upgrades can transform your space without costing you a deposit, and the first one takes under ten minutes.
What Makes a Caravan Makeover Truly Reversible?
Before diving into specific products and techniques, it helps to understand what “reversible” actually means in a caravan context.
A reversible makeover is one you can fully undo using basic tools, leaving original surfaces, fixtures, and layouts structurally intact and functional. Think of it as borrowing the space rather than owning it.
The real test is simple. After you remove everything, the caravan should look fundamentally unchanged. No holes, no adhesive ghosts, no scratched panels.
Reversible upgrades also can’t void manufacturer warranties, break safety certifications, or violate park rules. Get that right, and you’ve kept your options open. Small additions like rugs, scatter cushions, or new lighting fixtures can meaningfully brighten the interior without leaving any permanent trace behind.
What Caravan Parks Actually Allow Renters to Change
Whether you’re in a holiday van or a long-term site, the rules about what you can change aren’t arbitrary; they come from actual legislation.
In NSW, the Residential (Land Lease) Communities Act 2013 governs long-term residents specifically. Short-stay occupants get fewer rights.
Most parks require written consent before any structural work touches the van or site. Disability-related modifications are different; owners generally can’t refuse if changes are necessary and reversible.
Low-impact items like adhesive hooks, plug-in induction cooktops, and folding furniture usually pass without drama.
Anything involving gas, electrical systems, or in-ground planting needs explicit permission first. Any new site rules must be communicated in writing before they can be enforced against tenants.
Highest-Impact Caravan Upgrades for the Least Effort
Most renters overlook how much a caravan’s liveability improves without touching a single screw.
Swap incandescent bulbs for warm-white 2700K LEDs and you’ll cut lighting power draw by up to 85% while making the space feel less like a hospital corridor.
Add a 5,8 cm memory foam topper and sleep actually becomes something you look forward to.
Clip-on reading lamps, magnetic puck lights, and adhesive LED strips handle the rest of the lighting gaps.
None of these require tools leases don’t prohibit them, and most pack flat when you leave. Portable fridges/freezers running on 12V keep fresh food accessible without any permanent installation required.
Flexible Furniture That Reclaims Lost Caravan Floor Space
Swapping out your bulbs and bedding gets you surprisingly far, but floor space is where a caravan either works or doesn’t.
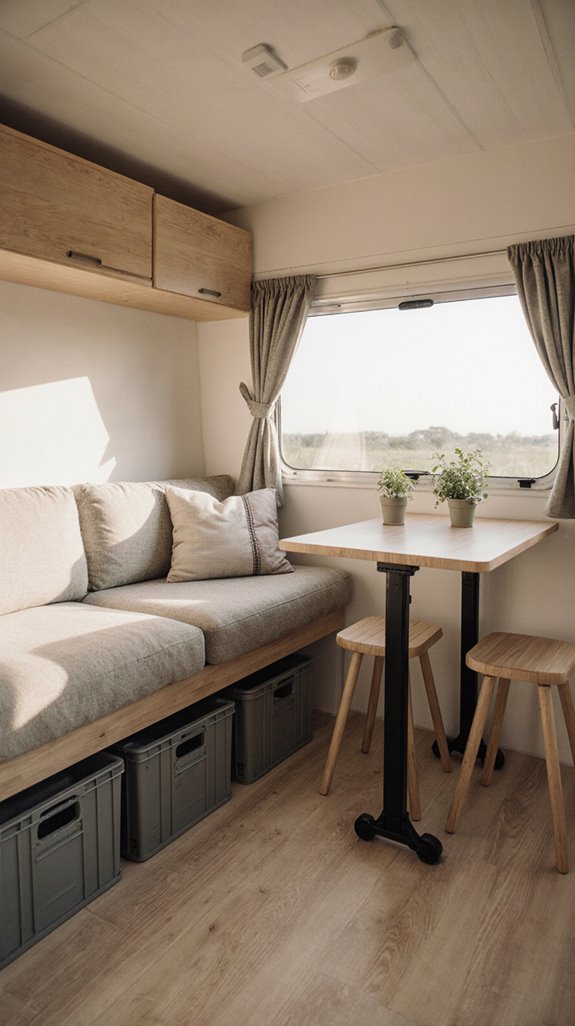
A jackknife sofa converts from seating to a bed, eliminating a separate guest mattress and recovering up to 30 sq ft overnight.
Wall-mounted drop-leaf tables fold to a 3,4″ profile during the day, giving you a corridor back.
Folding stools hang on hooks or stack to one chair’s footprint when guests leave. None of these require drilling into structure or repainting anything.
You’re just swapping fixed furniture for versions that disappear when you’re done with them. Modular furniture pieces can be reconfigured to suit different layouts, making them especially practical when your space needs shift from day to day.
Peel-and-Stick Surfaces for Dated Caravan Laminates
Once you’ve sorted the floor plan, the next thing that dates a caravan interior is the laminate, those flat, factory-printed cabinet doors and wall panels that looked fine in 1998.
Peel-and-stick vinyl decor film, sold as contact paper, covers them cleanly in wood, stone, or solid colors. First, degrease every surface with isopropyl alcohol and let it dry completely.
On gloss doors, a light sand with 320-grit paper helps the adhesive grip through vibration and heat.
For backsplashes use PVC subway tile sheets, water-resistant, lightweight, and thick enough to add actual texture without adding actual weight. Laminate peeling is especially common in caravans due to sunlight exposure and condensation, so ensuring the surface is fully dry before applying any film is critical.
Temporary Caravan Wall Treatments Worth Trying

Everything that dates a caravan’s walls can be covered without a single permanent fix.
Fabric-wrapped 1/8-inch Baltic birch panels attach with hook-and-loop strips, flex around curved walls, and pull off cleanly when you leave.
Thin vinyl cladding uses high-tack adhesive rated to 110°F, so it won’t peel in a hot parked van. For wet areas, 1/16-inch FRP sheet bonds over existing walls and wipes clean. Seal every edge with silicone.
Removable faux-brick plastic panels create an accent wall nobody asked for but everyone notices. Temporary adhesive mounts them. Swapping to a material like Azdel composite can cut wall weight down to just 0.25 lbs per square foot.
Caravan Storage Fixes That Won’t Upset Your Landlord
Renting a caravan doesn’t mean living with a storage disaster until you move out. Tension rods wedged inside wardrobes create instant shelving without touching a single screw.
Command-style adhesive hooks rated up to 3 kg stick cleanly to vinyl, laminate, or painted MDF, and remove without tearing the surface.
Shallow rolling drawers, around 15, 20 cm tall, slide under fixed beds on lockable casters. Vacuum compression bags shrink bulky bedding by up to 75%.
Expandable shelf risers inside kitchen cabinets add a second tier for plates. None of these solutions leave a mark your landlord will actually find.
Caravan Lighting Upgrades That Need Zero Wiring
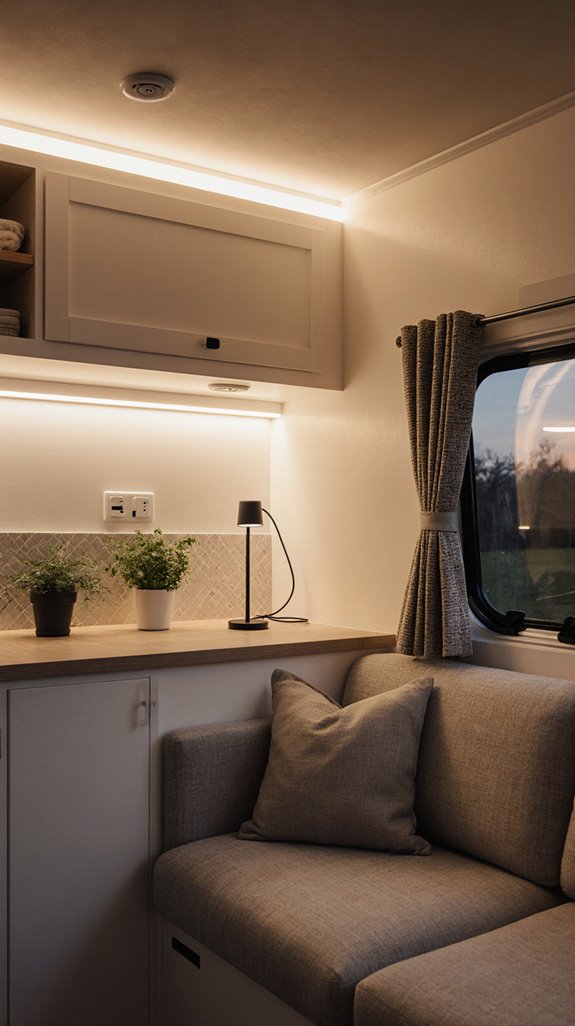
Sorting your storage is satisfying, but dim caravan lighting can make even a tidy space feel like a submarine at noon.
USB-rechargeable LED bars top up from a power bank and remove cleanly when you leave. Stick-on 12V LED strips cut every 3,5cm, so you can fit them under lockers or along pelmets without touching a single wire.
Warm white sits around 2,700,3,000K for cosy evenings, cool white hits 4,000,6,000K for chopping vegetables.
Add a PIR motion sensor puck in the washroom and it switches itself on, which is genuinely useful at 2am.
Soft Furnishings That Transform Fixed Caravan Seating Fast
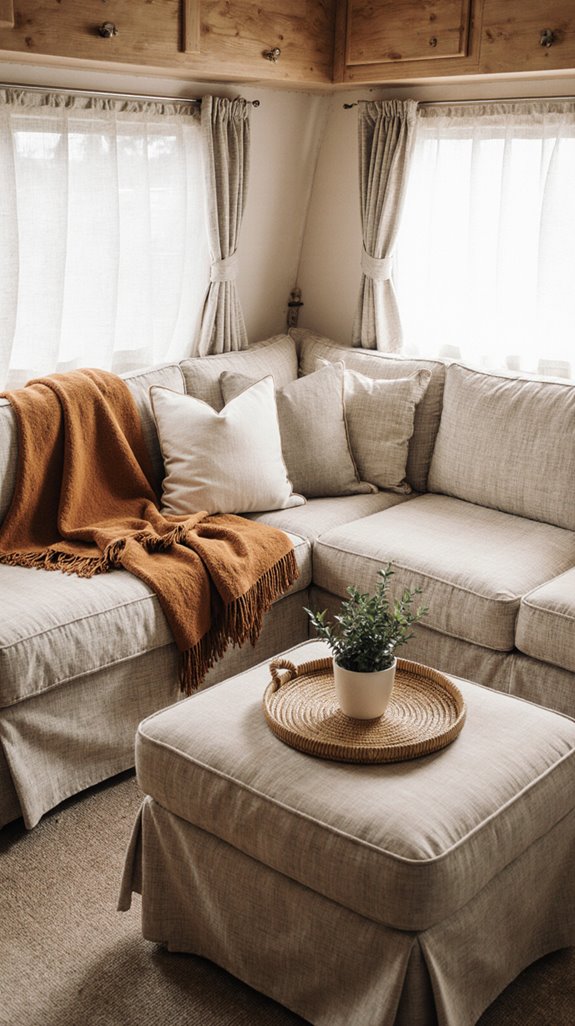
Fixed seating is the one thing you can’t move, so it’s the one thing worth making comfortable first.
Start with foam. A 3 cm memory foam topper cut to your bench dimensions sits under a fitted cover and immediately kills that plywood-with-fabric feeling.
For covers, tuck a dark patterned throw behind the cushion edges and use upholstery clips underneath, no sewing, no damage.
Add a 30×50 cm lumbar cushion at the lower back, and a dinette bench starts feeling like actual seating. Finish with a low-pile washable rug in front and the whole area reads intentional instead of accidental.
Easy Caravan Entry and Outdoor Patio Upgrades
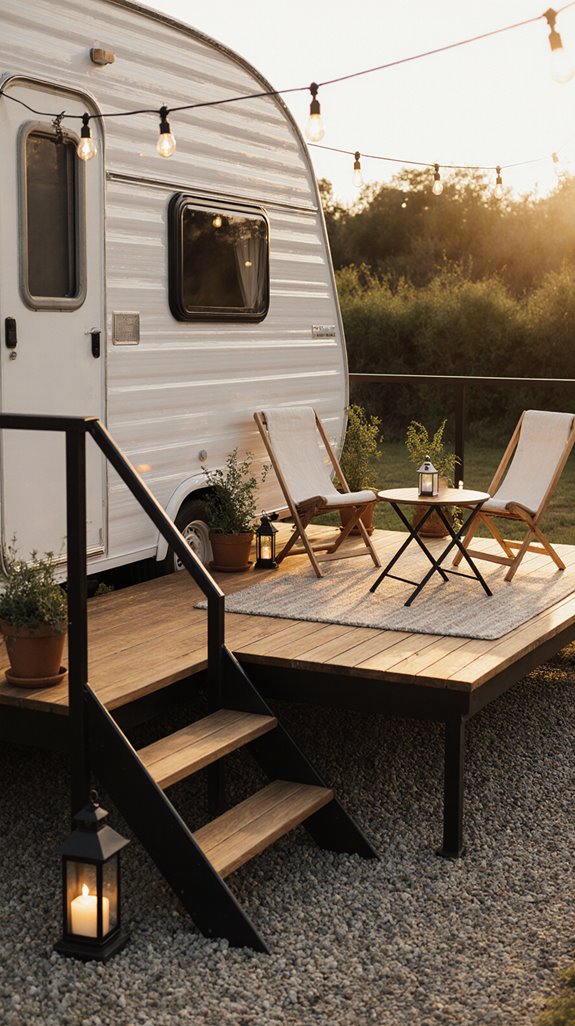
Once the inside seating feels sorted, the entry area earns attention next. A portable aluminium step platform sitting 200 to 300 mm high beats the single inbuilt step immediately.
Add adhesive grip tape to the tread and you’ve handled wet-morning slip risk without drilling anything.
Outside, lay interlocking polypropylene deck tiles rated at 250 to 300 kg/m² over gravel or grass for an instant level patio.
Drop a coir scraper mat at the base and a washable microfibre mat inside the door. That dual-mat combo cuts tracked-in dirt by around 80%. Clip-on rain deflectors along the awning edge handle puddles near the step.
A Room-by-Room Reversal Checklist for Moving Day
Moving day runs smoother when you work through each space in reverse order, undoing your upgrades the same methodical way you installed them.
Start in the entry and living area, pull Command strips slowly, dab leftover adhesive with Goo Gone, and spackle nail holes with DAP lightweight filler.
In the kitchen, use a hairdryer on 60 seconds to lift peel-and-stick contact paper without tearing cabinet surfaces.
Bedrooms come last, unclip tension blackout rods, refit original wardrobe shelves, and vacuum under-bed storage.
Photograph every restored space before handing back keys. Your future self will thank you during the bond inspection.